This article delves into quick and effective DIY room divider solutions for spontaneous events, offering practical tips and creative ideas to transform any space with minimal effort and cost.
What is a DIY Room Divider?
A DIY room divider is a versatile solution that allows individuals to create separate spaces within a larger area. These dividers can be used for various purposes, including enhancing privacy, defining different zones, or adding aesthetic appeal to an event. Common types of DIY dividers include:
- Fabric Panels: Easy to assemble and customizable.
- Furniture Arrangements: Utilizing existing furniture to create barriers.
- Artistic Screens: Adding creativity and style to your space.
Why Use a Room Divider for Events?
Room dividers serve multiple functions at events, such as:
- Creating Intimate Spaces: Ideal for smaller gatherings.
- Managing Crowd Flow: Helps direct guests efficiently.
- Enhancing Aesthetics: Adds visual interest to your setup.
What Materials Can You Use for a Quick Divider?
Choosing the right materials is essential for a fast and effective room divider. Here are some popular options:
| Material | Pros | Cons |
|---|---|---|
| Fabric | Lightweight, customizable | May require support |
| Wood | Sturdy, durable | Heavy, more expensive |
| Cardboard | Inexpensive, easy to cut | Not very durable |
How to Create a Fabric Room Divider?
Fabric dividers are versatile and easy to assemble. Here’s a simple guide:
1. Gather materials: fabric, rods, clips, or hooks.2. Measure the space to determine the size of your divider.3. Cut fabric to desired dimensions.4. Attach fabric to rods using clips or hooks.5. Secure the rods in place using brackets or stands.
How to Use Furniture as a Divider?
Utilizing existing furniture can be a quick fix for creating separation. Consider:
- Bookshelves: Offer both storage and separation.
- Couches: Create cozy nooks.
- Tables: Define areas for dining or activities.
What Are Some Creative DIY Ideas for Room Dividers?
For those looking for unique solutions, here are some innovative ideas:
- Hanging Plants: Use planters to create a natural barrier.
- Artistic Panels: Design custom panels to serve as dividers.
How to Ensure Stability in Your DIY Divider?
Stability is key to a functional room divider. Here are some tips:
- Weighting Your Divider: Add weights at the base for stability.
- Securing to the Floor: Use brackets or adhesive to keep it in place.
What Are Some Last-Minute Tips for Setting Up Your Divider?
Setting up your room divider quickly can be a challenge. Here are some last-minute hacks:
- Planning Your Layout: Sketch out your layout in advance to save time.
- Utilizing Help: Enlist friends or family to assist with assembly.

What is a DIY Room Divider?
Creating a personal space within a larger area has become increasingly important in today’s multifunctional environments. Understanding the concept of a DIY room divider is essential for anyone looking to foster privacy or separate spaces quickly and affordably. This guide will explore various types and purposes of DIY room dividers, providing you with practical insights and innovative ideas.
A DIY room divider is a versatile and customizable solution designed to partition a room for various purposes. Whether you want to create a cozy nook for reading, establish a dedicated workspace, or simply enhance the aesthetic appeal of your living area, a room divider can serve as an effective tool. Here are some common types of DIY room dividers:
- Fabric Dividers: Utilizing curtains or fabric panels can add a soft touch to any space while providing the necessary separation.
- Furniture Dividers: Using bookshelves, cabinets, or even sofas can create natural barriers without the need for additional materials.
- Artistic Panels: Custom-made panels or repurposed doors can serve as both functional dividers and decorative elements.
- Natural Elements: Incorporating plants or greenery can create a living wall that divides spaces while enhancing air quality.
Each type of divider serves a unique purpose, and the choice largely depends on your specific needs and the overall aesthetic of your space.
There are several reasons to opt for a DIY room divider. Firstly, they offer flexibility in design, allowing you to customize the size, style, and material according to your preferences. Secondly, they are often more cost-effective than purchasing pre-made dividers. Lastly, the DIY approach allows for a sense of personal achievement and creativity.
During events, a DIY room divider can be invaluable for managing space and enhancing guest experience. Here are some practical applications:
- Creating Intimate Spaces: Use dividers to form smaller areas for conversations or activities, making large spaces feel more inviting.
- Managing Crowd Flow: Strategically placed dividers can guide guests through different sections of an event, improving organization.
- Enhancing Aesthetics: A well-designed room divider can serve as a focal point, contributing to the overall decor and theme of the event.
Incorporating room dividers into your event setup not only enhances functionality but also elevates the ambiance.
Choosing the right materials is crucial for a successful DIY room divider. Here are some popular options:
- Fabric: Lightweight and easy to manipulate, fabric dividers can be hung or draped to create fluid spaces.
- Wood: Provides durability and a rustic charm, making it perfect for permanent installations or more structured designs.
- Cardboard: An inexpensive option for temporary setups, cardboard can be easily cut and decorated.
Each material has its pros and cons, so consider factors such as durability, cost, and ease of assembly when making your choice.
In summary, a DIY room divider is a practical and creative solution for anyone looking to enhance their living or event space. By understanding the various types, purposes, and materials available, you can craft a divider that meets your needs and reflects your personal style.

Why Use a Room Divider for Events?
When organizing events, the layout and atmosphere can significantly impact the experience of your guests. Incorporating room dividers into your setup can be a game-changer, offering both functionality and aesthetic appeal. In this section, we will explore the various reasons why using room dividers can enhance your event.
- Creating Intimate Spaces: Room dividers can help to create cozy, intimate areas within larger venues. This is especially beneficial for events like weddings or networking gatherings, where small group interactions are encouraged.
- Managing Crowd Flow: Effective crowd management is crucial for any event. Room dividers can guide guests through the space, ensuring that movement is organized and that areas do not become overcrowded.
- Enhancing Privacy: For events that require confidentiality, such as corporate meetings or sensitive discussions, room dividers provide a necessary barrier that enhances privacy and minimizes distractions.
- Adding Aesthetic Value: Beyond functionality, room dividers can serve as decorative elements that enhance the overall theme or ambiance of your event. Whether you opt for elegant fabric dividers or artistic panels, they can complement your design vision.
- Flexible Layout Options: Room dividers allow for greater flexibility in layout design. You can easily reconfigure spaces to accommodate different activities or guest numbers, making it easier to adapt to changing needs.
Utilizing room dividers can significantly improve the overall guest experience at your event. By creating separate areas for different activities, you can ensure that guests feel comfortable and engaged. For example, having a designated area for food and drinks, separate from seating or entertainment, can reduce congestion and enhance enjoyment.
Yes, room dividers can also play a critical role in noise reduction. By segmenting spaces, they can help to muffle sounds from different areas, allowing guests to converse without competing with background noise. This is particularly important in larger venues where sound can easily travel and disrupt conversations.
There are endless possibilities when it comes to using room dividers creatively. For instance, you can use hanging plants to create a natural divider that adds greenery while providing separation. Alternatively, artistic panels can be customized to reflect the theme of your event, serving both as a divider and a conversation starter.
In addition to their aesthetic and functional benefits, room dividers can also enhance safety at events. By clearly defining spaces, they can help prevent accidents or overcrowding in certain areas, ensuring that guests can move freely and safely throughout the venue.
In summary, incorporating room dividers into your event setup offers numerous advantages, from enhancing privacy to improving guest flow and safety. Their versatility, combined with the ability to add decorative flair, makes them an essential tool for any successful event planner.

What Materials Can You Use for a Quick Divider?
Choosing the right materials is crucial for a fast and effective room divider. This section covers common materials like fabric, wood, and cardboard, along with their pros and cons.
When it comes to creating a quick room divider, the choice of materials can significantly impact both functionality and aesthetics. Below, we explore some of the most popular options:
- Fabric
- Pros:
- Lightweight and easy to transport.
- Available in a wide variety of colors and patterns.
- Can be easily draped or hung for a soft, inviting look.
- Cons:
- May require additional support to stay upright.
- Can be less durable than other materials.
- Pros:
- Wood
- Pros:
- Sturdy and stable, providing excellent separation.
- Offers a natural, warm aesthetic.
- Can be painted or stained to match your decor.
- Cons:
- Heavier and more challenging to move.
- Can be more expensive than other materials.
- Pros:
- Cardboard
- Pros:
- Inexpensive and readily available.
- Lightweight and easy to cut into desired shapes.
- Can be easily decorated or painted for customization.
- Cons:
- Less durable and not suitable for long-term use.
- Can be easily damaged by moisture.
- Pros:
In addition to these materials, consider the purpose and setting of your event. For instance, if you need a temporary divider for an outdoor gathering, fabric or cardboard may be more suitable due to their lighter weight and ease of setup. Conversely, for a more formal event, wood might be the better choice for its stability and aesthetic appeal.
Ultimately, the right material for your room divider will depend on your specific needs, budget, and the overall look you want to achieve. By weighing the pros and cons of each option, you can make an informed decision that enhances your space while providing the necessary functionality.

How to Create a Fabric Room Divider?
Creating a fabric room divider is an excellent way to enhance the functionality of any space, whether for a last-minute event or for daily use. This guide will walk you through the process of making a fabric room divider, ensuring you have all the necessary tools and techniques at your disposal.
Fabric dividers are versatile and easy to assemble. Follow these steps to create your own:
- Gather Your Materials: You’ll need fabric of your choice, a sturdy frame (this could be PVC pipes, wood, or an existing furniture piece), scissors, a measuring tape, and a sewing machine or fabric glue.
- Measure Your Space: Determine the height and width of your divider. This will help you choose the right amount of fabric and frame size.
- Choose the Right Fabric: Select fabric that suits your aesthetic and functional needs. Consider factors like opacity, texture, and color to achieve the desired look.
- Cut the Fabric: Based on your measurements, cut the fabric to size. Remember to add a few extra inches for hems.
- Assemble the Frame: If using a DIY frame, assemble it according to your design. Ensure it is stable and can support the weight of the fabric.
- Attach the Fabric: Secure the fabric to the frame using your preferred method. You can sew it onto the frame or use fabric glue for a no-sew option. Make sure it is taut to avoid sagging.
- Finishing Touches: Add weights at the bottom of the fabric or frame to enhance stability. You can also incorporate decorative elements like lights or artwork to personalize your divider.
The fabric you select can significantly impact the overall look and functionality of your room divider. Here are some factors to consider:
- Opacity: If privacy is a concern, opt for thicker fabrics. Sheer fabrics can create a light and airy feel but may not provide the necessary seclusion.
- Texture: Different textures can add depth to your design. Consider using textured fabrics like burlap or velvet for a more sophisticated appearance.
- Color: Choose colors that complement your existing decor. Bright colors can energize a space, while neutral tones can create a calming atmosphere.
Proper assembly is crucial for the stability and functionality of your fabric room divider. Here are some essential tips:
- Secure Mounting: Ensure that the fabric is securely attached to the frame to prevent it from falling or shifting.
- Weight Distribution: If the divider is tall, consider adding weights at the bottom to prevent tipping.
- Test Stability: Before using the divider, test its stability by gently pushing on it to make sure it holds firm.
By following these steps, you can create a stylish and functional fabric room divider that meets your needs for any occasion. Whether it’s for a special event or simply to enhance your living space, a fabric divider is a practical solution that adds both style and functionality.
Choosing the Right Fabric
When it comes to creating a stunning and functional room divider, is crucial. The fabric you select can significantly impact not only the overall aesthetic but also the practicality of your divider. This section will delve into key factors to consider, including opacity, texture, and color.
Opacity refers to how much light passes through the fabric. A more opaque fabric can provide increased privacy, making it ideal for areas where you want to block visibility. Conversely, a sheer fabric can create a light, airy feel, allowing natural light to filter through while still offering some separation. Consider the purpose of your divider:
- If privacy is a priority, opt for thicker, darker fabrics like velvet or canvas.
- For a more open feel, choose lightweight, sheer materials such as chiffon or organza.
The texture of the fabric can add depth and interest to your room divider. Different textures can evoke various moods and styles:
- Smooth fabrics like silk create an elegant look, perfect for formal events.
- Textured fabrics, such as burlap or linen, lend a rustic charm that works well in casual settings.
- Consider mixing textures to create a unique visual effect.
Color plays a vital role in the overall aesthetic of your divider. The color you choose should complement the existing decor while also aligning with the mood you wish to create:
- For a calming atmosphere, opt for soft, neutral tones like beige or pastel shades.
- To make a bold statement, choose vibrant colors or patterns that draw attention.
- Remember to consider the lighting in the space, as colors can appear differently under various lighting conditions.
Ultimately, the best fabric for your room divider will depend on a combination of opacity, texture, and color. By carefully evaluating these factors, you can create a divider that not only serves its functional purpose but also enhances the aesthetic appeal of your space. Here are a few tips:
- Experiment with swatches to see how different fabrics work together.
- Consider layering fabrics to achieve a unique look.
- Don’t hesitate to incorporate patterns, as they can add character and interest.
By focusing on these key elements, you can select a fabric that elevates your room divider from a simple partition to a statement piece that reflects your style and enhances your event.
Assembly Tips for Fabric Dividers
When it comes to creating a functional and aesthetically pleasing space, proper assembly of your fabric room divider is crucial. A well-constructed divider not only enhances the visual appeal of your environment but also ensures stability and functionality. Below, we provide a comprehensive guide with practical tips to securely mount your fabric room divider, making it both effective and safe for any setting.
Proper assembly is essential for several reasons. First, it prevents accidents that could occur if the divider collapses or tips over. Second, a well-assembled divider can withstand movement and environmental changes, ensuring it serves its purpose throughout the event. Lastly, it contributes to the overall aesthetic, making the space more inviting.
- Fabric: Choose a fabric that complements your decor and is durable enough for repeated use.
- Support Structure: Use a sturdy frame or tension rods that can hold the fabric securely.
- Fasteners: Velcro strips, clips, or hooks can help attach the fabric to the structure.
- Weights: Adding weights at the base can enhance stability.
- Measure Your Space: Before assembling, measure the area where the divider will be placed. This will help you determine the appropriate size for your fabric and support structure.
- Prepare the Frame: Assemble your support structure according to the manufacturer’s instructions. Ensure all joints are tight and secure.
- Attach the Fabric: Use your chosen fasteners to attach the fabric to the frame. Make sure it is taut to avoid sagging.
- Secure the Base: If using weights, attach them to the base of the divider to prevent tipping. This is especially important in high-traffic areas.
- Final Adjustments: Stand back and assess the divider. Make any necessary adjustments to ensure it is straight and secure.
To further enhance the stability of your fabric room divider, consider the following:
- Use Heavy-Duty Materials: Opt for a sturdy frame made from metal or thick wood to provide better support.
- Secure to the Floor: If possible, anchor the divider to the floor using brackets or adhesive strips to prevent movement.
- Balance Weight Distribution: Ensure that any weights added are evenly distributed to maintain balance.
- Neglecting Measurements: Failing to measure properly can lead to an ill-fitting divider.
- Using Inadequate Materials: Lightweight fabrics or flimsy frames may not provide the necessary support.
- Overlooking Safety: Always prioritize safety by ensuring the divider is stable and secure.
By following these assembly tips, you can create a fabric room divider that is not only visually appealing but also safe and functional. Remember, the key to a successful assembly lies in attention to detail and using the right materials. With a little effort, your fabric divider can transform any space effectively.

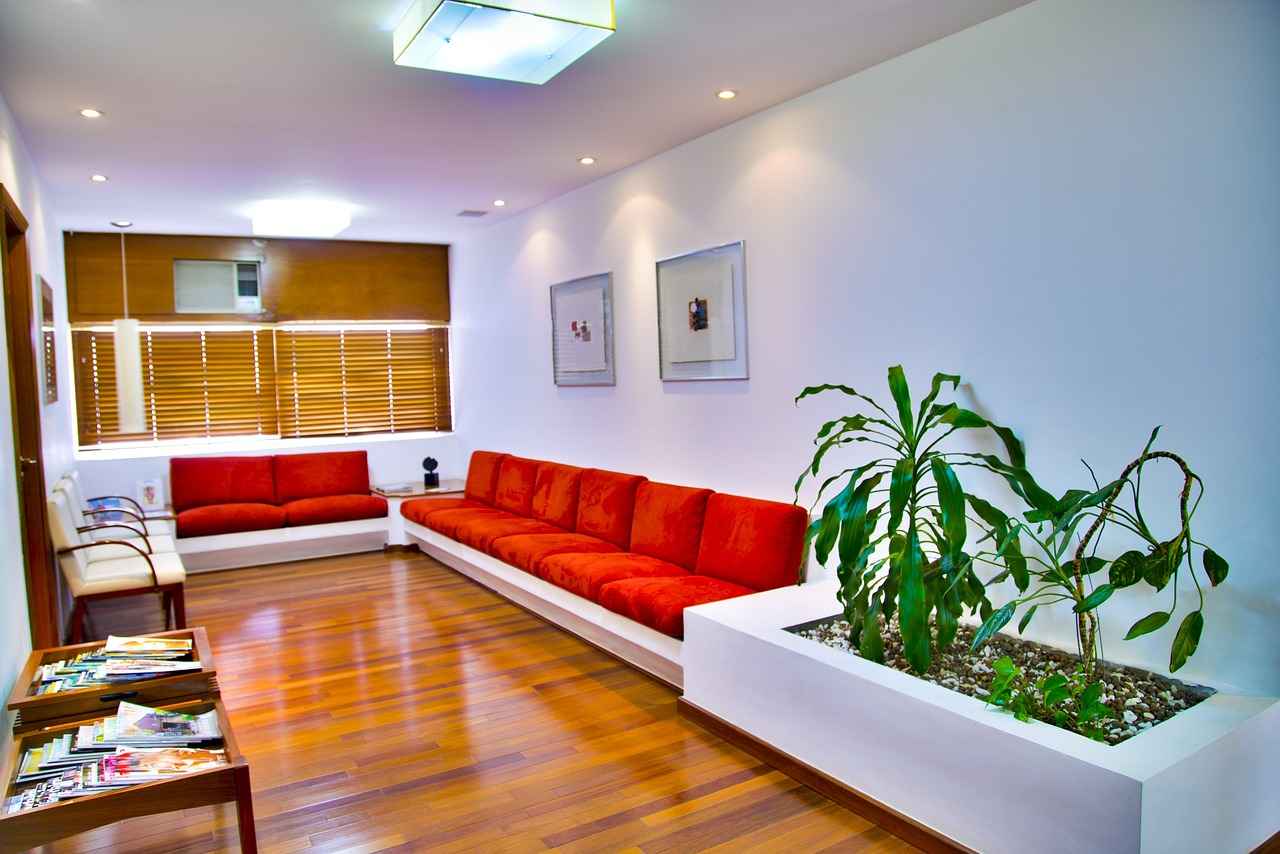
How to Use Furniture as a Divider?
Creating distinct areas within a space can be a challenge, especially during events or gatherings. One of the most effective and affordable solutions is utilizing existing furniture as room dividers. This approach not only saves money but also adds a personal touch to your decor. Here are some creative ideas for using furniture like bookshelves, couches, and tables as makeshift dividers.
Bookshelves are versatile pieces of furniture that can serve as functional dividers. They provide a visual separation while also offering storage space. Here are some tips:
- Positioning: Place the bookshelf in a way that it stands perpendicular to the main flow of traffic. This creates a natural barrier.
- Decorate: Fill the shelves with books, plants, or decorative items to enhance their appearance and make them more inviting.
- Open vs. Closed: Consider using open bookshelves for a lighter feel, or closed ones for more privacy.
Couches can easily be repurposed as room dividers, especially in larger spaces. Here’s how:
- Sectional Sofas: Use a sectional sofa to create a cozy corner that separates different areas without the need for additional furniture.
- Back-to-Back Arrangement: Position two couches back-to-back to form a division while providing seating on both sides.
- Accent Pillows: Enhance the divider effect by adding accent pillows that match the overall decor of your space.
Tables can also serve as effective dividers. Here are some ideas:
- Console Tables: Place a console table against a wall or in the center of a room to create a defined space.
- Dining Tables: For larger gatherings, a dining table can act as a divider while also providing a functional area for food and drinks.
- Decorative Touches: Use table runners, centerpieces, or decorative trays to enhance the visual appeal of the table divider.
The arrangement of your furniture plays a crucial role in the effectiveness of your makeshift dividers. Here are some strategies:
- Flow of Movement: Ensure that the layout allows for easy movement between different areas. Avoid overcrowding and maintain clear pathways.
- Layering: Layer different types of furniture to create depth. For example, pair a bookshelf with a couch to form a more substantial barrier.
- Height Variation: Combine low and high furniture pieces to create visual interest and effective separation.
Incorporating decorative elements can elevate the look of your furniture dividers. Here are some suggestions:
- Artwork: Hang artwork or photos on the side of the bookshelf or above the couch to personalize the space.
- Plants: Use potted plants or hanging greenery to soften the edges of your furniture divider and add a touch of nature.
- Lighting: Consider adding lamps or fairy lights to create a warm and inviting atmosphere around your divider.
By creatively using existing furniture, you can effectively create separation in any space. This approach not only enhances the functionality of your area but also showcases your personal style. Whether you opt for bookshelves, couches, or tables, the key is to arrange them thoughtfully and complement them with decor to achieve an attractive and practical room divider.
Arranging Furniture for Maximum Impact
Strategic arrangement of furniture can significantly enhance the effectiveness of furniture dividers in any space. By carefully considering the layout and configuration of your furniture, you can create distinct areas that serve various purposes, whether for privacy, aesthetics, or functionality. This section delves into various layouts and configurations that can maximize the impact of your furniture dividers.
- Understanding Space Flow: Before arranging furniture, it is essential to assess the flow of movement within the space. Identify natural pathways and ensure that your furniture arrangement does not obstruct these routes. This will help maintain an open and inviting atmosphere.
- Creating Zones: Utilize furniture dividers to define specific zones within a larger area. For example, a bookshelf can separate a reading nook from a social gathering space. By placing furniture strategically, you can create a sense of intimacy and purpose in each zone.
- Using Angles: Instead of aligning furniture in straight lines, consider angling pieces to create visual interest and dynamism. This approach can make the space feel more inviting and less rigid, allowing for a more relaxed atmosphere.
- Layering Heights: Incorporating furniture of varying heights can add depth to your arrangement. For instance, combining tall bookshelves with lower seating can create a visually appealing contrast that draws the eye and enhances the overall design.
Moreover, combining different types of furniture can further enhance the effectiveness of your dividers. For instance, pairing a sofa with a decorative screen can create a cohesive look while providing separation. Here are some additional tips:
- Incorporate Multi-Functional Pieces: Choose furniture that serves multiple purposes, such as ottomans that can double as storage or side tables that can be moved easily. This flexibility allows for quick adjustments based on the event’s needs.
- Consider Color Schemes: The colors of your furniture can affect how the space feels. Opt for complementary colors that enhance the mood you want to create. For example, warm colors can create a cozy atmosphere, while cool colors can promote calmness.
- Utilize Accessories: Enhance your furniture dividers with accessories such as plants, artwork, or lighting. These elements can add personality and flair to your arrangement while maintaining the functionality of the divider.
Finally, remember that the arrangement of furniture should be adaptable. As events progress, the needs of the space may change, and being able to quickly reconfigure your furniture can be invaluable. By keeping these principles in mind, you can create an engaging and effective layout that maximizes the impact of your furniture dividers.
Combining Furniture with Decor
When it comes to creating a functional yet aesthetically pleasing space, is an essential strategy. This approach not only enhances the overall appearance of your room divider but also ensures that it serves its intended purpose effectively. Here, we explore various methods to achieve this balance, focusing on practical tips and creative ideas.
Integrating decorative elements into your furniture divider can significantly improve the visual appeal of your space. Decorative touches can transform a simple bookshelf or table into a stunning focal point, creating an inviting atmosphere. Additionally, this combination allows for better functionality, as the decor can complement the furniture’s purpose while enhancing its aesthetic value.
When selecting decor to pair with your furniture divider, consider the following:
- Color Coordination: Choose decor items that match or complement the color scheme of your furniture. This creates a cohesive look.
- Texture Variety: Incorporate different textures, such as soft fabrics, smooth ceramics, or rough wood, to add depth to your space.
- Size and Scale: Ensure that the decor items are proportionate to the furniture. Oversized decor can overwhelm, while tiny items may get lost.
Here are some innovative ways to enhance your furniture divider:
Incorporating plants into your furniture divider not only adds a touch of nature but also improves air quality. Place potted plants on shelves or use hanging planters to create a green barrier. This approach provides both privacy and a vibrant aesthetic.
Artwork can serve as a stunning backdrop for your furniture divider. Hang framed pieces on the wall behind a bookshelf or use small easels to display art on tables. This not only beautifies the space but also allows you to express your personality through your decor choices.
Lighting can dramatically change the atmosphere of a space. Consider placing string lights or small lamps on or around your furniture divider. Soft lighting can create an inviting ambiance, making your space feel cozy and warm.
Incorporate decorative storage solutions like baskets or boxes into your furniture divider. These items can help keep your space organized while adding texture and interest. Choose materials that match your decor style, whether it’s rustic wicker or sleek metal.
Layering textiles is an excellent way to enhance the visual appeal of your divider. Drape a colorful throw or place decorative cushions on a sofa or chair used as a divider. This technique adds warmth and comfort, making your space feel more inviting.
While it’s important to focus on aesthetics, remember that functionality should never be compromised. Ensure that your decor choices do not obstruct movement or create clutter. Keep pathways clear and opt for decor that serves a dual purpose, such as decorative storage solutions.
By thoughtfully combining furniture with decor, you can create a stunning room divider that enhances both the beauty and functionality of your space. Whether you’re preparing for a last-minute event or simply looking to refresh your home, these tips will help you achieve an elegant and practical solution.

What Are Some Creative DIY Ideas for Room Dividers?
When it comes to hosting an event, creating distinct spaces can enhance the overall experience. DIY room dividers offer a unique solution to this challenge, allowing you to customize your environment while adding a personal touch. In this section, we will explore some creative DIY ideas for room dividers that not only serve their purpose but also add visual interest to your event.
- Using Hanging Plants as Dividers
Incorporating hanging plants into your space can create a stunning natural barrier. By suspending plants from the ceiling or wall, you can form a lively divider that brings the outdoors in. Choose a variety of plants with different heights and textures to create depth and interest. Ensure that the plants are well-maintained and positioned to allow for adequate light, making them a vibrant addition to your event.
- Artistic Panels as Dividers
Custom art panels can serve as both decoration and separation. You can create panels using lightweight materials such as canvas or plywood, then paint or decorate them according to your theme. Consider using stencils or decals for unique designs. These artistic panels can be easily moved and rearranged, allowing you to adapt the space as needed.
- Fabric Drapes for a Soft Touch
Fabric drapes can transform any space into a cozy atmosphere. Use curtain rods or tension wires to hang flowing fabrics that can be easily drawn open or closed. Choose fabrics that match your event’s color scheme, and consider layering different textures for added visual appeal. This method not only divides the room but also creates a warm, inviting environment.
- Upcycled Pallet Walls
For a rustic look, consider using upcycled wooden pallets to create a sturdy room divider. These pallets can be painted or stained to match your decor. They are easy to assemble and can be positioned in various configurations. This option is not only cost-effective but also environmentally friendly.
- Photo Collage Screens
Create a personalized photo collage screen that showcases memories while serving as a divider. Use a large frame or multiple smaller frames to display your favorite pictures. This not only adds a personal touch to your event but also sparks conversation among guests.
Each of these DIY ideas not only provides a functional separation of space but also contributes to the overall aesthetic of your event. By incorporating creativity and personal touches, you can ensure that your room dividers are as unique as the occasion itself. Whether you opt for a natural look with plants or a more artistic approach with panels, the key is to choose elements that resonate with your theme and enhance the atmosphere.
Using Hanging Plants as Dividers
Incorporating hanging plants into your space not only enhances the aesthetic appeal but also serves as an effective way to create a natural barrier. This method allows you to introduce greenery into your environment, promoting a calming atmosphere while providing necessary separation between areas.
When considering hanging plants as dividers, it’s essential to understand how to effectively integrate them into your design. Here are some tips:
- Choose the Right Plants: Select plants that thrive in the light conditions of your space. Ferns, pothos, and spider plants are excellent choices due to their resilience and ability to cascade beautifully.
- Determine Placement: Identify areas where you want to create separation. Hanging plants can be suspended from ceilings, hooks, or even shelves to form a natural barrier that doesn’t obstruct light.
- Utilize Varying Heights: For visual interest, hang plants at different heights. This creates a dynamic look while effectively dividing spaces. Consider using macramé hangers or decorative planters to enhance the overall design.
- Group Plants: Cluster multiple hanging plants together to create a fuller, more impactful divider. This not only enhances the look but also improves air quality and adds to the overall ambiance.
- Incorporate Lighting: Enhance your hanging plants with appropriate lighting. Using LED grow lights can support plant health, while also adding a warm glow that enhances the atmosphere.
Using hanging plants as dividers offers numerous benefits:
- Improved Air Quality: Plants naturally filter air pollutants, promoting a healthier environment.
- Noise Reduction: The foliage can help absorb sound, making your space feel more serene.
- Visual Appeal: Greenery adds color and life to any setting, making it more inviting.
Additionally, hanging plants can be a cost-effective solution for creating dividers. You can often find affordable plants and materials at local nurseries or craft stores. With a little creativity, you can transform your area into a lush, green oasis without the need for extensive renovations.
In summary, using hanging plants as dividers is a practical and stylish way to enhance your space. By selecting the right plants, determining optimal placement, and incorporating design elements like lighting and height variation, you can create a beautiful and functional barrier that promotes both privacy and tranquility. Embrace the natural beauty of plants and let them work their magic in your home or event space!
Artistic Panels as Dividers
Artistic panels can be a stunning addition to any space, serving not only as a visual focal point but also as effective dividers. This section delves into the various ways you can create or source these unique panels, enhancing both the aesthetics and functionality of your environment.
Artistic panels are decorative elements that can be used to partition spaces, providing both visual appeal and practicality. They come in various materials, including wood, metal, and canvas, and can be customized to fit your unique style. By using artistic panels, you can create a sense of separation while still maintaining an open and inviting atmosphere.
Creating your own artistic panels can be a rewarding DIY project. Here are some steps to guide you:
- Choose Your Material: Opt for materials that resonate with your aesthetic. Plywood, canvas, or even repurposed items can work well.
- Design Your Artwork: Use paint, fabric, or mixed media to create a design that reflects your personality. You can also use stencils for a more polished look.
- Assemble the Panels: If using multiple panels, ensure they are securely connected. Hinges or brackets can be effective for mobility.
If DIY isn’t your style, you can easily source artistic panels from various places:
- Local Artisans: Support local artists by purchasing custom panels that reflect their unique styles.
- Online Marketplaces: Websites like Etsy or Amazon offer a plethora of options, from handmade to mass-produced artistic panels.
- Home Decor Stores: Many stores feature artistic panels designed specifically for home decoration, often in trendy styles.
Incorporating artistic panels as dividers offers numerous advantages:
- Enhanced Aesthetics: Artistic panels can elevate the overall look of your space, providing a unique touch that standard dividers lack.
- Flexibility: Panels can be moved or repositioned easily, allowing you to adapt your space for different events or needs.
- Sound Absorption: Depending on the material used, artistic panels can help reduce noise, creating a more serene environment.
To ensure your artistic panels remain in pristine condition, consider the following maintenance tips:
- Regular Cleaning: Dust the panels regularly and clean any stains promptly to maintain their appearance.
- Protect from Direct Sunlight: If your panels are made of materials that can fade or warp, position them away from direct sunlight.
- Inspect for Damage: Periodically check for any signs of wear and tear, and address issues immediately to prolong their lifespan.
In conclusion, artistic panels serve as versatile and beautiful dividers that can enhance your space while providing the functionality of separation. Whether you choose to create your own or source them from artisans, these panels can transform any environment into a visually appealing and organized area.

How to Ensure Stability in Your DIY Divider?
When creating a DIY room divider, stability is crucial for safety and functionality. A well-built divider not only enhances the aesthetic of your space but also ensures that it serves its purpose without becoming a hazard. Below are some effective strategies to secure your DIY structures, preventing any risk of tipping or falling.
Stability in room dividers is essential for several reasons:
- Safety: An unstable divider can pose injury risks, especially in crowded environments.
- Functionality: A stable divider effectively separates spaces and maintains privacy.
- Aesthetics: A well-secured divider looks more polished and intentional.
One of the simplest ways to enhance the stability of your DIY divider is by adding weight. Here are some effective methods:
- Base Weights: Attach heavy objects such as sandbags or bricks to the base of your divider. This is especially useful for fabric or lightweight materials.
- Weighted Bottoms: If you’re constructing a wooden divider, consider incorporating a weighted bottom or using denser materials at the base.
- Fillable Bases: Create a hollow base that can be filled with sand or water, allowing for adjustable weight and stability.
For added safety, securing your divider to the floor is essential. Here are some techniques:
- Adhesive Strips: Use strong adhesive strips designed for flooring to keep your divider in place without causing damage.
- Floor Anchors: Install floor anchors that can be easily removed later. This method is particularly effective for heavier dividers.
- Velcro Strips: For a less permanent solution, heavy-duty Velcro can hold your divider securely while allowing for easy removal.
Incorporating additional support can significantly enhance the stability of your divider:
- Brackets and Supports: Use brackets to secure your divider against walls or other furniture. This method works well with bookcase dividers.
- Cross Bracing: For tall dividers, consider adding cross braces to prevent swaying. This technique is particularly beneficial for freestanding structures.
- Attach to Existing Furniture: If possible, anchor your divider to existing furniture like sofas or shelves for additional support.
The materials you choose for your DIY divider can greatly impact its stability:
- Heavy Fabrics: Opt for thicker fabrics that can withstand movement and resist tipping.
- Solid Woods: If using wood, select heavier types like oak or maple for better stability.
- Metal Frames: Consider using metal frames for a robust structure that can support additional weight.
Finally, regularly checking your divider for stability is crucial:
- Routine Inspections: Inspect your divider periodically for any signs of wear or instability.
- Adjustments: Make necessary adjustments to weights or supports as needed, especially after events.
- Feedback: Encourage users to provide feedback on the divider’s stability during events, allowing for real-time adjustments.
By following these tips, you can ensure that your DIY room divider is not only functional but also safe and aesthetically pleasing. Stability is key, and with the right approach, your divider will serve its purpose effectively.
Weighting Your Divider
When it comes to creating a functional and visually appealing room divider, stability is paramount. A well-weighted divider not only enhances its structural integrity but also ensures that it serves its purpose effectively without compromising on design. Below are some practical methods to add weight to your divider while maintaining its aesthetic appeal.
Adding weight to your room divider can significantly improve its stability. This is especially crucial in event settings where foot traffic and movement can easily cause lightweight dividers to topple over. A stable divider creates a sense of security and privacy, allowing guests to feel more comfortable in designated areas.
- Weighted Bases: Consider using weighted bases that can be easily attached to the bottom of your divider. These bases can be made from materials like sandbags or weighted plates, which can be hidden from view to maintain the design.
- Incorporating Heavy Materials: Choose materials that naturally have more weight, such as thick wood or metal frames. These materials not only provide stability but also add a touch of elegance to your divider.
- Using Decorative Elements: You can integrate decorative elements like stone planters or ceramic vases filled with sand or rocks at the base of your divider. This method allows you to combine functionality with aesthetics.
- Weighted Curtains: If you are using fabric as a divider, consider adding weights to the hem of your curtains. This will help them hang straight and resist movement caused by drafts or foot traffic.
- Floor Anchors: For a more permanent solution, consider using floor anchors. These can be installed discreetly and will secure your divider in place, preventing it from tipping over.
While stability is crucial, it should not come at the expense of design. Here are some tips to ensure that your weighted divider remains visually appealing:
- Color Coordination: Choose weights that match or complement the color scheme of your divider. This will help them blend in rather than stand out.
- Creative Concealment: Use fabric covers or decorative panels to hide weighted bases or anchors. This will maintain the overall look while providing the necessary support.
- Functional Decor: Incorporate elements that serve both as weights and decor, such as artistic sculptures or functional furniture that can be used for storage.
After implementing your chosen weighting method, it’s essential to test the stability of your divider. Gently push against it or simulate foot traffic to ensure it remains upright. If it wobbles or tips, consider adding more weight or adjusting your design.
In summary, weighting your room divider is a vital step in ensuring its functionality and stability. By choosing the right methods and materials, you can enhance the divider’s strength without sacrificing its visual appeal. With these practical tips, you can create a secure and stylish space for your next event.
Securing Your Divider to the Floor
When designing a room divider, ensuring its stability is crucial, especially in high-traffic areas or during lively events. not only enhances safety but also maintains the integrity of the space you are creating. This section delves into various effective techniques to keep your divider firmly in place.
Room dividers can easily tip over or shift if not properly secured, which can lead to accidents or disruptions during events. By securing your divider, you minimize the risk of it falling, thus providing a safer environment for guests. Additionally, a stable divider maintains the intended layout of your space, ensuring that privacy and functionality are preserved.
- Using Adhesive Strips: One of the simplest methods is to apply strong adhesive strips or double-sided tape to the base of your divider. This allows for easy removal post-event without damaging the floor.
- Weighted Bases: Adding weight to the bottom of your divider can significantly improve stability. You can use sandbags, bricks, or any heavy object that complements the design of your divider.
- Floor Anchors: For a more permanent solution, consider using floor anchors. These can be drilled into the floor and will securely hold your divider in place. This method is ideal for longer-term installations.
- Velcro Strips: Similar to adhesive strips, Velcro can be used to attach your divider to the floor. This allows for easy adjustments while ensuring it stays put during use.
To maximize the effectiveness of your securing methods, consider the following best practices:
- Choose the Right Location: Ensure that your divider is placed in an area where it is less likely to be bumped into. This reduces the chances of it needing additional support.
- Regular Checks: If your event spans several hours or days, make it a point to check the stability of your divider periodically. Adjust or re-secure it if necessary.
- Consider the Type of Floor: Different flooring materials may require different securing techniques. For example, carpet may hold adhesive strips better than tile.
For those looking to add a creative touch while ensuring stability, consider these innovative ideas:
- Decorative Weights: Use decorative items, such as large vases filled with stones or sand, to weigh down your divider while also enhancing its aesthetic appeal.
- Incorporate Plants: If using a fabric or lightweight divider, consider placing potted plants at the base to add weight and visual interest.
In conclusion, securing your divider to the floor is a crucial step in creating a safe and functional space for any event. By employing the techniques and best practices outlined above, you can ensure that your divider remains stable, allowing you to focus on enjoying your gathering without any worries.

What Are Some Last-Minute Tips for Setting Up Your Divider?
Setting up a room divider quickly can be a daunting task, especially when time is of the essence. Whether you are preparing for a last-minute event or simply need to create separate spaces in your home, having a few last-minute hacks at your disposal can make the process smoother and more efficient. This section provides practical tips to help you streamline your setup and achieve a professional look in no time.
- Plan Your Layout in Advance: Before you start setting up, take a moment to visualize the arrangement of your room divider. A pre-planned layout can save you precious minutes during the actual setup. Consider factors like traffic flow, the purpose of the divider, and how it fits into the overall design of the space.
- Utilize Help for Quick Assembly: Don’t hesitate to enlist the help of friends or family members. Having extra hands can significantly speed up the assembly process. Coordinate tasks so that one person can hold the divider while another secures it. This teamwork can make a noticeable difference in efficiency.
- Choose Lightweight Materials: Opt for materials that are easy to handle and transport. Lightweight options like fabric, cardboard, or even folding screens can be set up quickly without requiring heavy lifting. This choice not only saves time but also reduces the risk of injury.
- Use Pre-Made Components: If you’re in a hurry, consider using pre-made room dividers or panels that can be easily assembled. Many stores offer stylish options that can be set up in minutes. Look for those that come with simple instructions for a hassle-free experience.
- Keep Tools Handy: Having the right tools on hand can expedite your setup. Make sure you have scissors, tape, or any necessary hardware accessible. This preparation allows you to address any unexpected issues quickly without wasting time searching for tools.
- Incorporate Decorative Elements: If time permits, add some decorative touches to your room divider to enhance its visual appeal. Consider using fairy lights, plants, or decorative fabric clips. These small additions can transform a simple divider into a stunning focal point.
- Set Up in Sections: If your divider consists of multiple panels or sections, set them up individually before connecting them. This approach allows for easier handling and adjustment. Once each section is in place, you can join them together for a seamless look.
- Test Stability: After setting up your divider, ensure it is stable and secure. Give it a gentle push to test its sturdiness. If it wobbles, consider weighting the base or securing it to the floor for added safety.
Implementing these last-minute tips can significantly enhance your room divider setup experience. By planning ahead, utilizing help, and choosing the right materials, you can create an effective and aesthetically pleasing division in your space quickly. Remember, the key is to remain organized and flexible, adapting your approach as needed to achieve the best results.
Planning Your Layout in Advance
When it comes to organizing events, whether they are corporate meetings, weddings, or casual gatherings, is crucial. A well-thought-out layout can significantly streamline the setup process, allowing you to focus on other essential aspects of the event. By taking the time to sketch out your space and determine where each element will go, you can save valuable time during the actual setup.
One of the primary advantages of pre-planning is that it helps you visualize the flow of the event. Consider the traffic patterns and how guests will move through the space. This can help you avoid bottlenecks that can lead to frustration and discomfort. For instance, if you know that a food station will attract a lot of traffic, placing it in a corner or away from main pathways can keep the flow smooth.
Additionally, a planned layout allows you to identify the necessary equipment and materials needed for the event. By listing out all the items required, you can ensure that nothing is forgotten on the day of the event. This includes everything from tables and chairs to decorations and lighting. Having a checklist can also help in organizing these items efficiently, reducing the last-minute rush.
Furthermore, when you plan your layout in advance, you can experiment with different configurations. This might involve creating intimate spaces for conversations or open areas for mingling. By trying out various arrangements, you can find the best setup that meets the needs of your guests. A versatile layout can adapt to different activities, ensuring that everyone feels comfortable and engaged.
Incorporating flexible dividers can also enhance your layout. For example, using DIY room dividers can create temporary spaces without the need for permanent fixtures. This flexibility allows you to adjust the layout as needed throughout the event, accommodating changes in guest flow or activities.
Moreover, consider the aesthetic appeal of your layout. A visually pleasing arrangement can elevate the overall atmosphere of the event. Use colors, decorations, and lighting that complement each other, creating a cohesive look that resonates with your theme. A well-planned layout not only enhances functionality but also contributes to the overall ambiance.
Lastly, don’t underestimate the value of communication when planning your layout. Share your layout plans with your team or volunteers who will assist in the setup. Clear instructions and visual aids can ensure that everyone is on the same page, reducing confusion and errors during the actual setup. This collaborative effort can lead to a more efficient and successful event.
In conclusion, investing time in planning your layout in advance can lead to a more organized and enjoyable event. From enhancing flow and functionality to creating an inviting atmosphere, the benefits are substantial. So, before the big day arrives, take the time to plan and prepare your space effectively.
Utilizing Help for Quick Assembly
When it comes to setting up a room divider for an event, enlisting help can significantly speed up the assembly process. Collaborating with others not only makes the task easier but also adds a layer of creativity and efficiency to your setup. Below, we explore strategies for coordinating with others during the assembly phase, ensuring a smooth and quick installation.
Working together with friends, family, or colleagues can transform a daunting task into a fun group activity. Collaboration fosters creativity and allows for the sharing of ideas, which can lead to a more aesthetically pleasing and functional room divider. Additionally, having multiple hands on deck can help distribute the workload, making the assembly process faster and more efficient.
- Assign Specific Roles: To maximize efficiency, assign specific tasks to each person involved in the setup. For example, one person can handle the materials, while another focuses on assembly.
- Communicate Clearly: Establish a clear plan and communicate effectively. Use simple language and visual aids if necessary to ensure everyone understands their responsibilities.
- Set a Time Limit: Encourage a sense of urgency by setting a time limit for the assembly process. This can motivate everyone to work efficiently and stay focused on the task at hand.
- Use a Checklist: Create a checklist of all the materials and steps required to complete the room divider. This can help keep everyone organized and ensure that no important steps are overlooked.
To further enhance the assembly process, consider the following tips:
- Leverage Skills: Identify the strengths of your team members. If someone has experience in DIY projects, let them take the lead in complex tasks.
- Encourage Creativity: Allow team members to suggest ideas for the room divider design. This can lead to innovative solutions that you may not have considered.
- Keep it Fun: Play music or create a friendly atmosphere to make the assembly process enjoyable. A positive environment can boost morale and productivity.
Having the right tools at your disposal can streamline the assembly process. Make sure to gather all necessary tools beforehand, such as:
- Measuring Tape: To ensure accurate measurements for your divider.
- Scissors or Cutter: For cutting materials to size.
- Drill or Hammer: Depending on the materials used, these tools may be necessary for assembly.
- Clips or Fasteners: To secure elements together effectively.
In conclusion, enlisting help for your room divider assembly can make a significant difference in both the speed and quality of your setup. By implementing these strategies and fostering a collaborative environment, you can transform a simple assembly task into an engaging and efficient group activity.
Frequently Asked Questions
- What is a DIY room divider?
A DIY room divider is a creative solution to separate spaces using materials you can easily find or repurpose. It can be anything from fabric to furniture, allowing you to create privacy or distinct areas for different activities.
- Why should I use a room divider for events?
Using a room divider at events can enhance the atmosphere by creating intimate spaces, managing crowd flow, and providing a sense of organization. It’s like setting the stage for different performances, making your event more engaging!
- What materials are best for a quick divider?
Common materials include fabric, wood, and cardboard. Each has its pros and cons: fabric is lightweight and versatile, wood offers sturdiness, and cardboard is budget-friendly and easy to work with. Choose based on your needs and the vibe you want to create!
- How can I ensure my DIY divider is stable?
Stability is key! You can add weight at the bottom or secure it to the floor for extra support. Think of it like building a house; a solid foundation keeps everything standing tall and proud!
- What last-minute tips can help with setup?
Planning your layout in advance can save you time when setting up. Also, don’t hesitate to enlist a couple of friends to help out; teamwork makes the dream work, especially in a pinch!


