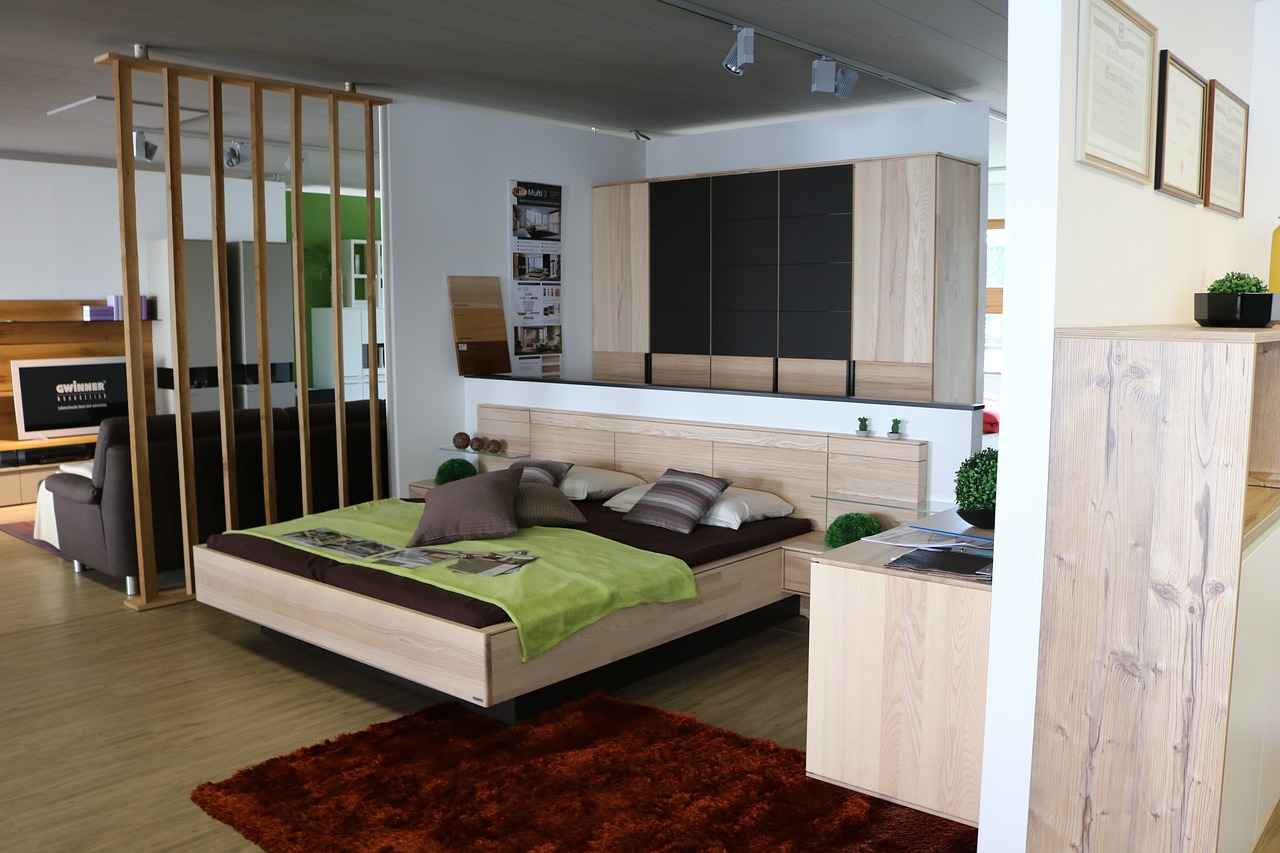
This article explores the essential steps, materials, and tips for constructing a freestanding wooden partition, suitable for both home and office environments, enhancing space utilization and aesthetics.
Freestanding wooden partitions offer versatility and style, allowing for easy reconfiguration of spaces while providing privacy and sound absorption. They are an excellent choice for both home and office settings, enabling you to create distinct areas without the need for permanent walls. This solution is ideal for those looking to optimize their space while maintaining an inviting atmosphere.
- Measuring Tape: For accurate measurements.
- Saw: A circular or miter saw for cutting wood.
- Drill: For making holes and driving screws.
- Screwdriver: Essential for assembly.
- Sander: To smooth the wood surfaces.
- Level: To ensure your partition is straight.
Selecting the appropriate type of wood is vital for durability and aesthetics. Common choices include:
- Pine: Affordable and easy to work with.
- Oak: Strong and durable, providing a classic look.
- Plywood: Cost-effective and versatile for various designs.
Accurate measurements are key to a well-fitting partition. Use a measuring tape to determine the height and width of the area where you plan to install the partition. Consider any furniture or fixtures that may impact the layout. Double-check your measurements to avoid common pitfalls during the planning phase.
A thoughtful design can enhance both functionality and visual appeal. Consider whether you want a solid partition for privacy or one with cutouts for light and openness. Sketching your design can help visualize the final product and ensure it meets your specific needs.
Follow this comprehensive step-by-step guide to construct your freestanding wooden partition:
- Prepare the Wood: Cut your wood to the desired dimensions, sand the edges, and treat it with a wood preservative.
- Assemble the Partition Frame: Use screws to join the pieces securely. Ensure all joints are tight and stable.
- Install the Partition: Position the partition in your desired location and adjust as necessary.
The finishing touches can elevate the overall look of your partition. Options include:
- Stains: Enhance the natural beauty of the wood.
- Paint: Add color to match your décor.
- Protective Coatings: Extend the life of your partition.
Maximize functionality by integrating storage solutions into your partition design. Consider adding shelves or cabinets to utilize the space effectively. This not only enhances utility but also contributes to a cleaner and more organized environment.
Proper maintenance is essential for preserving the integrity of your wooden partition. Regularly dust and clean the surface, and check for any signs of wear or damage. Reapply protective coatings as needed to keep the wood looking its best.
Avoiding common pitfalls can save time and resources. Here are a few frequent mistakes made during construction:
- Neglecting to measure twice before cutting.
- Using inadequate fasteners for assembly.
- Overlooking the need for a level surface.

Why Choose a Freestanding Wooden Partition?
When considering how to optimize your living or working space, freestanding wooden partitions emerge as an excellent choice. These versatile structures not only enhance the aesthetic appeal of any environment but also provide practical benefits that can significantly improve functionality. In this section, we will explore the reasons why opting for a freestanding wooden partition is a smart decision.
- Versatility in Space Configuration: One of the standout features of freestanding wooden partitions is their ability to be easily reconfigured. Whether you need to create a temporary workspace, divide a room for privacy, or simply change the layout of your space, these partitions can be moved and adjusted with minimal effort.
- Enhanced Privacy: In both home and office settings, privacy is paramount. Freestanding wooden partitions provide a physical barrier that helps to minimize distractions, allowing individuals to focus better on their tasks. This is especially beneficial in open-plan offices where noise levels can be high.
- Sound Absorption: Wood is known for its acoustic properties, which means that wooden partitions can help absorb sound, thereby reducing noise pollution. This feature is particularly advantageous in environments where concentration is key, such as libraries, study rooms, or shared workspaces.
- Stylish Aesthetics: Wooden partitions bring a touch of natural beauty to any space. Available in various designs, finishes, and wood types, they can complement your existing décor while adding warmth and character. This makes them a stylish choice for both modern and traditional interiors.
- Easy Installation: Unlike permanent walls, freestanding wooden partitions do not require extensive construction work. They can be set up quickly and without the need for professional installation, making them a cost-effective solution for immediate space needs.
The ability to adapt your space as needs change is crucial in today’s dynamic environments. Freestanding wooden partitions allow for this flexibility by enabling users to create different layouts without the commitment of permanent installations. This adaptability is particularly valuable in:
- Home Offices: As remote work becomes more common, having a designated workspace at home is essential. A freestanding partition can help define your work area, separating it from your living space.
- Event Spaces: For venues that host various events, these partitions can be utilized to create distinct areas, such as dining zones, lounges, or presentation areas, all tailored to the specific needs of each event.
- Retail Environments: In retail, the layout can be adjusted based on seasonal promotions or product displays. Wooden partitions can help in creating attractive displays while maintaining clarity in the shopping experience.
Many freestanding wooden partitions are made from sustainably sourced materials, making them an eco-friendly option. Choosing partitions made from reclaimed or certified wood not only supports environmental conservation but also adds a unique character to your space.
In conclusion, the decision to incorporate a freestanding wooden partition into your home or office can lead to numerous benefits, including enhanced privacy, improved acoustics, and stylish aesthetics. With their versatility and ease of use, these partitions are an ideal solution for anyone looking to optimize their space.
Essential Tools for Building a Wooden Partition
When embarking on the journey of constructing a freestanding wooden partition, having the right tools is paramount for a successful build. A well-equipped toolkit not only streamlines the construction process but also enhances the overall quality of the finished product. This section details the essential tools you’ll need, ensuring a smooth and efficient construction experience.
- Measuring Tape: Accurate measurements are the foundation of any construction project. A reliable measuring tape is essential for determining the dimensions of your space and ensuring that your partition fits perfectly.
- Square: A framing square helps in achieving precise right angles, which is crucial for the stability and aesthetic appeal of your partition.
- Level: To ensure your partition is perfectly vertical and horizontal, a level is indispensable. This tool helps avoid any unsightly tilts or slants.
- Saw: Depending on your preference and the complexity of your design, you may need a hand saw, circular saw, or miter saw for cutting the wood to the desired lengths.
- Drill: A power drill is essential for creating holes for screws and fasteners, making assembly quicker and more efficient.
- Screwdriver Set: Having a set of screwdrivers, both flathead and Phillips, will assist in securing the components of your partition together.
- Sandpaper: To achieve a smooth finish on your wood, sandpaper is vital. It helps eliminate rough edges and prepares the surface for staining or painting.
- Clamps: Clamps hold your pieces together securely while you work, ensuring that everything stays in place during assembly.
- Safety Gear: Last but not least, don’t forget to equip yourself with safety gear, including goggles and gloves, to protect yourself during the building process.
Each of these tools plays a critical role in the construction of your wooden partition. By ensuring you have them on hand, you can avoid unnecessary delays and complications during your project. Remember, investing in quality tools not only enhances your efficiency but also contributes to the overall durability and finish of your partition.
In summary, preparing adequately with the right tools sets the stage for a successful construction experience. With these essentials at your disposal, you are well on your way to creating a beautiful and functional wooden partition that meets your needs.

Choosing the Right Wood for Your Partition
When embarking on a project to build a freestanding wooden partition, one of the most crucial decisions you will face is choosing the right type of wood. The wood you select will significantly impact both the durability and aesthetics of your partition. This guide will walk you through various wood types, their unique characteristics, and how to make the best choice for your specific needs.
The selection of wood is not merely a matter of preference; it involves considerations that affect the longevity and appearance of your partition. Different woods possess varying levels of durability, resistance to warping, and aesthetic qualities. Understanding these factors can help you avoid costly mistakes and ensure that your partition complements your space.
- Pine: A popular choice due to its affordability and ease of use. It is lightweight and can be painted or stained easily, making it a versatile option.
- Oak: Known for its strength and durability, oak offers a beautiful grain that enhances aesthetic appeal. It’s ideal for partitions that require a robust structure.
- Maple: This hardwood is prized for its fine, consistent grain and light color. It is durable and often used in modern designs.
- Birch: Birch is another strong hardwood that provides a smooth surface, making it perfect for sleek, contemporary partitions.
- Plywood: Made from thin layers of wood veneer, plywood is strong and stable. It is often used for larger partitions due to its structural integrity.
When selecting wood for your partition, consider the following factors:
- Purpose: What will the partition be used for? If it needs to withstand heavy use or provide sound insulation, opt for a sturdier wood like oak or birch.
- Environment: Will the partition be in a humid area? Some woods are more resistant to moisture than others. For example, cedar is excellent in humid conditions.
- Aesthetic Appeal: Consider the overall design of your space. Choose a wood type that complements your existing decor and color scheme.
- Budget: High-quality hardwoods can be expensive. Determine your budget beforehand to narrow down your options.
Regardless of the wood type you choose, proper maintenance is essential for longevity. Regularly check for signs of wear and tear, and apply protective coatings as needed. This will not only preserve the beauty of your partition but also extend its life.
In conclusion, selecting the right wood for your partition is a decision that requires careful consideration of various factors. By understanding the characteristics of different wood types and aligning your choice with your project’s needs, you can create a beautiful and functional space that stands the test of time.

Measuring Your Space Accurately
When it comes to building a freestanding wooden partition, accurate measurements are essential for ensuring a perfect fit in your designated space. This section will guide you through effective techniques for measuring your area, helping you avoid common pitfalls during the planning phase. Proper measurements not only streamline the construction process but also enhance the overall aesthetics and functionality of your partition.
Accurate measurements are the foundation of any successful construction project. A well-measured partition will:
- Fit Perfectly: Ensures that the partition occupies the intended space without gaps or overlaps.
- Enhance Stability: A precisely measured partition is less likely to wobble or become unstable.
- Save Time and Resources: Reduces the likelihood of costly mistakes that require rework.
To measure your space accurately, gather the following tools:
- Measuring Tape: A flexible tape measure is essential for taking long and short measurements.
- Level: Ensures that your partition will be straight and even.
- Square: Helps in checking right angles, which is crucial for corners.
- Pencil and Paper: For recording measurements and making notes.
Follow these steps to measure your space effectively:
- Identify the Area: Determine where the partition will be placed. Clear any furniture or obstacles for accurate measurements.
- Measure Length and Width: Use your measuring tape to measure the length and width of the space. Record these dimensions carefully.
- Check for Obstacles: Look for any protruding elements like vents, electrical outlets, or windows that might affect the partition’s design.
- Account for Baseboards: If your area has baseboards, measure their height and adjust your partition’s dimensions accordingly.
- Double-Check Your Measurements: Always measure twice to ensure accuracy before proceeding with the build.
While measuring, be mindful of these common mistakes:
- Inaccurate Measurements: Always use the same reference point when measuring to avoid discrepancies.
- Neglecting Room Shape: Irregularly shaped rooms may require more complex measurements. Take extra care in these situations.
- Failing to Consider Height: Don’t forget to measure the height of the space if your partition will extend vertically.
By following these tips and techniques, you can ensure that your wooden partition will fit seamlessly into your space. Remember, taking the time to measure accurately will pay off in the long run, resulting in a partition that not only looks great but also serves its intended purpose effectively.

Designing Your Wooden Partition Layout
When it comes to , careful consideration can significantly enhance both the functionality and visual appeal of your space. A well-thought-out design not only serves its primary purpose but also complements the overall aesthetic of your home or office. Here, we will delve into various design ideas and layout considerations that cater to your specific needs and preferences for the partition.
Before diving into design elements, it’s essential to assess your functional needs. Are you looking for a way to create privacy, reduce noise, or simply define spaces? Understanding the primary function of your partition will guide your design choices. For example, if privacy is a concern, consider a taller partition with solid panels rather than one with slats.
Your partition should not only be functional but also visually appealing. Consider the style of your existing decor. Do you prefer a modern, minimalist look, or are you drawn to a more traditional aesthetic? The choice of wood, finish, and design can all impact the overall look. For a contemporary feel, opt for sleek lines and light-colored woods, while darker woods with intricate carvings can enhance a classic atmosphere.
Don’t underestimate the power of color and texture in your partition design. Adding a splash of color through paint or stain can make your partition a focal point in the room. Additionally, consider incorporating different textures, such as a combination of smooth and rough finishes, to create visual interest. You might also think about using materials like glass or metal accents alongside wood to add depth to your design.
When planning the layout, think about how the partition will affect space and flow. Ensure that it doesn’t block natural light or disrupt the flow of movement within the area. A partition that is too large can make a space feel cramped, while one that is too small may not serve its intended purpose effectively. Use scale and proportion as guiding principles when deciding on the dimensions of your partition.
To maximize the utility of your partition, consider integrating functional elements such as shelves, hooks, or even a small desk area. This not only enhances the partition’s usability but also adds to its aesthetic appeal. For instance, a partition with built-in shelves can serve as a display area for plants or decorative items, making it a dual-purpose feature in your space.
Finally, don’t forget to add your unique touch to the design. Personalization can be achieved through decorative elements such as artwork, photos, or even a chalkboard surface for notes and reminders. These additions can make the partition feel more like a part of your home or office, reflecting your personality and style.
In summary, designing your wooden partition layout involves a blend of functionality and aesthetics. By considering your specific needs, incorporating color and texture, and personalizing the design, you can create a partition that not only serves its purpose but also enhances the overall ambiance of your space.
Step-by-Step Guide to Building the Partition
Building a freestanding wooden partition can be a rewarding project that enhances both the functionality and aesthetics of your space. This step-by-step guide will walk you through the entire process, ensuring you have a clear understanding at every stage, from selecting materials to the final assembly.
Before you begin, it’s essential to gather all the necessary materials. Here’s a list of what you will need:
- Wood panels (choose the type based on your design preference)
- Wood screws and nails
- Wood glue
- Sandpaper
- Wood finish (stain or paint)
- Tools (saw, drill, measuring tape, level, and screwdriver)
Start by preparing your wood. Measure and cut the wood panels according to your design specifications. Ensure your cuts are straight and accurate to avoid any fitting issues later. Once cut, sand the edges and surfaces to remove any splinters or rough spots. This step is crucial for achieving a smooth finish.
Next, you’ll want to assemble the base frame of your partition. Begin by laying out the cut pieces on a flat surface. Use wood screws to join the corners securely, ensuring that the frame is square. It’s advisable to use a level to check that everything is even. This frame will serve as the foundation for your partition, so make sure it is sturdy.
Once the base frame is complete, it’s time to add the vertical supports. These should be spaced evenly according to your design. Use wood glue in addition to screws to enhance stability. Ensure each support is aligned vertically; a level can help with this. This structure will provide the necessary strength and support for the partition.
With the frame and supports in place, you can now attach the wooden panels. Start from one end and work your way to the other, securing each panel with screws. Ensure that the panels are flush with the frame for a clean look. If you desire a more decorative finish, consider using decorative trim around the edges.
After assembly, it’s time to focus on the finishing touches. Sand any rough edges and apply your chosen wood finish. This not only enhances the appearance but also protects the wood from wear and tear. Allow the finish to dry completely before moving the partition into place.
Once the finish has dried, carefully move the partition to its designated location. Ensure it stands securely and make any necessary adjustments. You may want to add weights at the base if additional stability is required, especially in high-traffic areas.
By following this comprehensive step-by-step guide, you can successfully create a freestanding wooden partition that meets your needs and enhances your space. Remember, patience and attention to detail are key to achieving the best results.
Preparing the Wood
is an essential step in the construction of your freestanding wooden partition. Proper preparation not only enhances the aesthetic appeal of the final product but also ensures its durability and structural integrity. In this section, we will delve into the key processes involved in preparing your wood, including cutting, sanding, and treating the material before assembly.
To begin with, cutting the wood accurately is crucial. Use a high-quality saw to ensure clean edges and precise dimensions. Measure twice and cut once to avoid waste and ensure that all pieces fit together seamlessly. It is advisable to mark your cuts with a pencil and use a square to maintain straight lines. If you’re unsure about your cutting skills, consider using a miter saw for angled cuts or a table saw for straight cuts, as these tools provide greater accuracy.
Once the wood is cut, the next step is sanding. This process smooths out rough edges and surfaces, preventing any splinters that could arise later. Start with a coarse grit sandpaper (around 80 grit) to remove any major imperfections, and gradually move to finer grits (up to 220 grit) for a polished finish. Be sure to sand in the direction of the wood grain to avoid scratches. For larger surfaces, a power sander can save time and effort, but always finish with hand sanding to ensure a smooth touch.
After sanding, it is important to treat the wood to protect it from moisture, pests, and wear. Depending on the type of wood you are using, choose an appropriate wood treatment product. For instance, a wood preservative can help prevent decay, while a sealant can provide a protective barrier against moisture. Apply the treatment in a well-ventilated area, using a brush or sprayer for even coverage. Allow adequate drying time as per the manufacturer’s instructions before proceeding to assembly.
In addition to cutting, sanding, and treating, consider staining or painting your wood to enhance its visual appeal. Stains can bring out the natural beauty of the wood grain, while paints offer a wide range of colors to match your decor. Ensure that any finishes are compatible with the treatment you’ve used and allow for proper drying times between applications.
By following these steps—cutting, sanding, treating, and finishing—you will set a solid foundation for assembling your wooden partition. The time invested in preparing the wood will pay off in the form of a more polished and professional-looking final product.
Assembling the Partition Frame
is a crucial step in building a freestanding wooden partition. The stability and durability of your partition depend significantly on how well the frame is assembled. This section will delve into essential techniques, joint types, fastening methods, and practical tips to ensure your structure is robust and secure.
When starting the assembly process, it is important to understand the different joint types available. Common joints include:
- Butt Joints: Simple and easy to create, but may lack strength without additional support.
- Mortise and Tenon Joints: Provides a strong connection, ideal for load-bearing sections.
- Dado Joints: Great for adding shelves or panels, offering good stability.
- Lap Joints: Useful for overlapping pieces, enhancing strength.
Choosing the right joint type can significantly enhance the structural integrity of your partition. For instance, if you are constructing a tall partition, mortise and tenon joints may be preferable due to their strength.
Next, let’s explore various fastening methods. Proper fastening is essential for ensuring that the joints hold firm under stress. Some effective fastening methods include:
- Screws: Provide excellent holding power and are easy to remove if adjustments are needed.
- Nails: Generally quicker to use but may not offer the same level of strength as screws.
- Wood Glue: An excellent choice for reinforcing joints, especially when combined with screws or nails.
- Brackets and Corner Braces: Add extra support at joints, particularly for larger frames.
As you assemble the frame, pay attention to achieving stability. Here are some tips to consider:
- Ensure that all pieces are cut to the correct dimensions to avoid gaps.
- Use a level to confirm that your frame is square and plumb.
- Consider adding diagonal bracing to prevent racking, which can occur when the frame is under stress.
- Regularly check for any shifts in alignment as you work, making adjustments as needed.
Finally, take your time during the assembly process. Rushing can lead to mistakes that may compromise the integrity of your partition. By following these guidelines, you can create a sturdy and visually appealing wooden partition that meets your needs.
Finishing Touches for Your Partition
The finishing touches can significantly elevate the overall look of your wooden partition, transforming it from a mere divider to a stunning focal point in your space. These final details not only enhance the aesthetics but also improve the longevity of your partition, making it a worthwhile investment for your home or office.
When considering finishing options, you have a variety of choices that can align with your style and functional needs. Here are some popular finishing techniques:
- Stains: Staining your wooden partition can bring out the natural grain of the wood, adding depth and character. Choose from a range of colors, from light to dark, to complement your existing decor.
- Paint: If you prefer a more vibrant look, painting your partition can add a splash of color and personality. Opt for a matte or glossy finish depending on the effect you wish to achieve.
- Protective Coatings: Applying a protective coating, such as polyurethane or varnish, is essential for durability. These coatings shield your partition from scratches, moisture, and other environmental factors, ensuring it maintains its beauty over time.
Before applying any finish, proper preparation is crucial. Make sure the surface is clean and smooth, as this will help the finish adhere better and create a more polished look. Sanding the wood before applying any stain or paint will eliminate imperfections and allow for an even application.
Another important aspect to consider is the environment in which the partition will be placed. If it will be exposed to high humidity or direct sunlight, selecting a finish that offers UV protection and moisture resistance is paramount. This will not only enhance the appearance but also prolong the life of your partition.
For those who enjoy DIY projects, experimenting with different techniques can be a fun way to personalize your partition. Consider using a distressing technique to give your partition a rustic look, or incorporate stencils for a unique design. The possibilities are endless!
In summary, the finishing touches on your wooden partition are not just about looks; they play a vital role in its overall performance and durability. By carefully selecting stains, paints, and protective coatings, you can create a partition that is both beautiful and resilient. Take the time to prepare and choose the right finishes, and you’ll be rewarded with a stunning addition to your space that stands the test of time.
Incorporating Storage Solutions into Your Partition
In today’s fast-paced world, maximizing space is essential, especially in homes and offices where every square foot counts. not only enhances functionality but also contributes to a more organized and aesthetically pleasing environment. This section delves into innovative ways to integrate shelves, cabinets, and other storage elements into your partition design.
Integrating storage solutions into your partition design offers numerous benefits. First and foremost, it optimizes available space. Instead of having standalone storage units that consume valuable floor area, built-in shelves and cabinets can provide storage without compromising on room size. Additionally, this approach creates a seamless look that enhances the overall aesthetic of your space.
- Floating Shelves: These are a popular choice for modern interiors. They can be mounted on the partition to hold books, decorative items, or office supplies, adding both style and functionality.
- Built-in Cabinets: If your partition is sturdy enough, consider adding cabinets that can be accessed from both sides. This design maximizes utility and provides a clean, organized look.
- Corner Shelves: Utilize corner spaces effectively by installing corner shelves. These can be perfect for displaying plants or small items while saving space.
- Vertical Storage Solutions: Consider tall, narrow shelving units that take advantage of vertical space. This can be especially beneficial in smaller rooms where floor space is limited.
When designing your partition with storage solutions, it’s essential to consider several factors:
- Assess Your Needs: Determine what items you need to store. This will help you decide on the type and size of the storage solutions to incorporate.
- Choose the Right Materials: Ensure that the materials used for shelves and cabinets match or complement the partition’s design. This will create a cohesive look.
- Plan for Accessibility: Make sure that the storage solutions are easy to reach. Avoid placing frequently used items on high shelves.
- Incorporate Lighting: Adding lighting to your storage areas can enhance visibility and highlight decorative items.
Another effective strategy is to create multifunctional partitions. For instance, a partition can serve as both a room divider and a storage unit. This dual-purpose design is particularly useful in smaller spaces where every element must serve multiple functions.
Moreover, consider using modular storage solutions that can be easily rearranged or expanded as your needs change. This flexibility allows you to adapt your space over time without significant renovations.
In conclusion, incorporating storage solutions into your partition design not only maximizes functionality but also enhances the overall appeal of your space. By carefully planning and executing these ideas, you can create an organized, stylish environment that meets your needs.

Maintenance Tips for Longevity
Proper maintenance is essential for preserving the integrity of your wooden partition. With the right care, you can ensure that your partition not only looks great but also functions well over time. Here are some practical maintenance tips to help you achieve this:
- Regular Cleaning: Dust and dirt can accumulate on your wooden partition, making it look dull. Use a soft, dry cloth to wipe down surfaces regularly. For deeper cleaning, a damp cloth with a mild soap solution can be used, but be sure to dry the wood immediately to prevent moisture damage.
- Avoid Excessive Moisture: Wood is susceptible to water damage. Ensure that your wooden partition is not exposed to excessive moisture. If spills occur, clean them up promptly and avoid placing potted plants or other items that may leak on the surface.
- Inspect for Damage: Regularly check your partition for any signs of damage, such as cracks or warping. Early detection can prevent more extensive repairs. If you notice any issues, address them immediately to maintain the integrity of the structure.
- Reapply Finish: Over time, the finish on your wooden partition may wear off. Depending on the type of finish used, consider reapplying it every couple of years to protect the wood and enhance its appearance. Choose a finish that complements the existing one for a seamless look.
- Control Temperature and Humidity: Fluctuations in temperature and humidity can cause wood to expand and contract, leading to warping. Maintain a consistent indoor climate, ideally between 60-75°F (15-24°C) and 30-50% humidity, to help preserve your partition.
- Use Coasters and Mats: To prevent scratches and dents, always use coasters under drinks and mats under heavy objects placed on the partition. This simple step can significantly reduce wear and tear.
- Consider Professional Maintenance: If your partition requires more extensive care, consider hiring a professional. They can provide services such as refinishing, which can restore the wood’s original beauty and protect it for years to come.
By following these maintenance tips, you can keep your wooden partition in excellent condition, enhancing both its aesthetic appeal and functionality. Regular care not only extends the life of your partition but also ensures it remains a beautiful focal point in your home or office.
Common Mistakes to Avoid When Building a Partition
When embarking on the journey of constructing a freestanding wooden partition, it’s crucial to recognize that avoiding common pitfalls can save both time and resources. This section delves into frequent mistakes made during the construction process and provides practical advice on how to steer clear of them, ensuring a successful project outcome.
Building a partition may seem straightforward, but overlooking essential details can lead to costly errors. Understanding these pitfalls not only enhances the quality of your work but also improves efficiency and satisfaction with the final product.
- Inaccurate Measurements: One of the most common mistakes is failing to take precise measurements. Always double-check your dimensions before cutting any materials to ensure a perfect fit.
- Poor Material Selection: Choosing the wrong type of wood can compromise the durability and aesthetics of your partition. Research various wood types and their properties to make an informed decision.
- Neglecting Design Planning: Jumping into construction without a solid design plan can lead to functional and visual issues. Spend adequate time sketching your layout and considering how the partition will fit into your space.
- Ignoring Structural Stability: A partition that is not securely assembled can lead to safety hazards. Use appropriate joints and fasteners to ensure a stable structure.
- Overlooking Finishing Touches: Skipping the finishing process can result in a partition that looks unfinished and may not withstand wear and tear. Invest time in sanding, staining, or painting your partition for a polished look.
To avoid these common pitfalls, consider the following tips:
- Measure Twice, Cut Once: This age-old adage is crucial. Always verify your measurements before making cuts to prevent material waste.
- Choose Quality Materials: Invest in high-quality wood that suits your needs, ensuring longevity and visual appeal.
- Plan Your Design Thoroughly: Create detailed sketches and consider factors such as lighting, space utilization, and the overall aesthetic of your environment.
- Follow Assembly Guidelines: Familiarize yourself with various assembly techniques to ensure your partition is both sturdy and visually pleasing.
- Prioritize Finishing: Don’t rush through the finishing process. Properly treat the wood to enhance durability and maintain its appearance.
By being aware of these common mistakes and implementing the suggested tips, you can significantly increase the chances of your partition project being a success. Remember that careful planning and execution are key to achieving a beautiful and functional freestanding wooden partition.
Frequently Asked Questions
- What materials do I need for building a freestanding wooden partition?
To build a freestanding wooden partition, you will need quality wood (like plywood or hardwood), screws, wood glue, sandpaper, and finishing materials such as paint or stain. Don’t forget essential tools like a saw, drill, and measuring tape!
- How do I measure my space accurately for the partition?
Start by measuring the height and width of the area where you plan to install the partition. Use a measuring tape and double-check your measurements to avoid mistakes. It’s a good idea to mark the dimensions on the floor or wall to visualize how the partition will fit.
- Can I customize the design of my wooden partition?
Absolutely! Freestanding wooden partitions can be designed in various styles, sizes, and finishes. You can incorporate shelves, cabinets, or even artistic elements to match your decor and enhance functionality.
- What are the common mistakes to avoid when building a partition?
Some common mistakes include inaccurate measurements, using the wrong type of wood, and neglecting to sand the edges properly. Always plan ahead and take your time during the construction process to ensure a successful build!
- How can I maintain my wooden partition for longevity?
Regular maintenance includes cleaning the surface, checking for any loose screws, and applying protective coatings as needed. Keeping the partition away from excessive moisture and direct sunlight will also help preserve its integrity.

