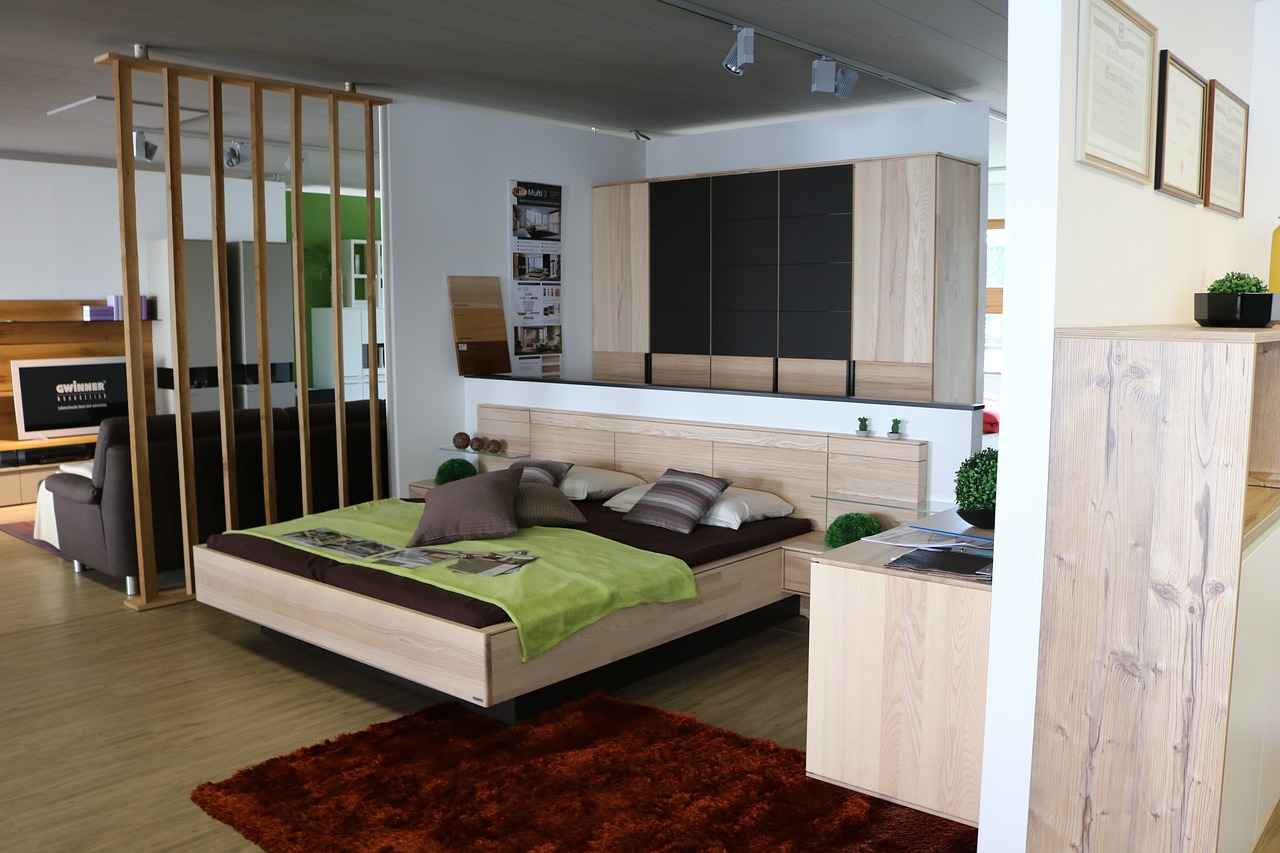
This article provides a step-by-step guide on creating a stylish folding room divider using hinges, offering practical tips and insights for a successful DIY project.
Understanding the necessary materials is crucial for a successful DIY project. Gather the following items:
- Wood: Choose a type that suits your style and durability needs.
- Hinges: Select sturdy hinges that can support the weight of your panels.
- Screws: Ensure they are compatible with your hinges and wood type.
- Paint or Stain: This will enhance the aesthetic appeal of your divider.
Selecting the appropriate type of wood is essential for durability and appearance. Consider these factors:
- Weight: Lighter woods are easier to handle.
- Grain: Aesthetics can vary widely with different wood grains.
- Finish: Decide if you want a natural look or a painted finish.
Having the right tools on hand can significantly streamline your project. Essential tools include:
- Saw: For cutting wood panels to size.
- Drill: To make holes for screws and hinges.
- Screwdriver: For securing screws in place.
- Measuring Tape: To ensure accurate measurements.
- Sandpaper: For a smooth finish on your wood panels.
Accurate measurements and cuts are vital for a well-fitting room divider. Follow these steps:
1. Measure the height and width of your desired divider space.2. Mark your wood panels according to the measurements.3. Use a saw to cut the panels, ensuring straight cuts for a professional look.
Assembling the panels correctly ensures stability and ease of use. Here’s how:
1. Lay the panels flat in the desired folding arrangement.2. Attach hinges to the edges of the panels, ensuring they are evenly spaced.3. Secure the hinges with screws for a strong hold.
Proper hinge placement is key to the functionality of your room divider. Use these techniques:
- Alignment: Ensure hinges are aligned at the same height on each panel.
- Securing: Use screws to firmly attach the hinges, allowing for smooth movement.
Adding decorative elements can enhance the visual appeal of your divider. Consider:
- Painting: Choose colors that complement your room’s decor.
- Staining: This preserves the natural look of the wood.
- Fabric: Attach fabric or wallpaper for a unique touch.
Finishing touches can elevate the overall look of your room divider. Options include:
- Sealing: Protect your wood from moisture and wear.
- Varnishing: Adds a glossy finish and enhances durability.
- Hardware: Decorative knobs or handles can add a stylish element.
Ensuring your folding room divider is stable and durable is essential for long-term use. Here are some tips:
- Reinforcement: Consider adding cross supports for added stability.
- Regular Checks: Periodically check screws and hinges for wear.
Avoiding common pitfalls can save time and resources. Be mindful of:
- Incorrect Measurements: Always double-check your measurements before cutting.
- Poor Hinge Placement: Ensure hinges are installed correctly for smooth operation.
Regular maintenance can prolong the life of your room divider. Follow these simple tips:
- Cleaning: Wipe down with a damp cloth to keep it dust-free.
- Touch-ups: Repaint or refinish as needed to maintain appearance.
What Materials Do You Need for Your Folding Room Divider?
Creating a folding room divider can be a rewarding DIY project that enhances both the functionality and aesthetics of your space. To embark on this journey, it is essential to understand the materials required to ensure a successful outcome. Below, we will explore the necessary components in detail, emphasizing their importance in crafting a beautiful and practical room divider.
Understanding the necessary materials is crucial for a successful DIY project. Gather the following items to ensure your folding room divider is both functional and aesthetically pleasing:
- Wood: The backbone of your divider, wood provides structure and style. Choose a type that suits your decor and is durable enough for frequent use. Options like plywood or solid hardwood are popular choices due to their strength and versatility.
- Hinges: These are vital for the folding mechanism. Select high-quality hinges that can support the weight of the wood panels. Brass or stainless steel hinges are excellent for durability and smooth operation.
- Screws: Essential for securing the hinges and panels together. Choose screws that are compatible with your wood type to prevent splitting. Wood screws are typically the best option.
- Paint or Stain: To enhance the visual appeal, consider applying a coat of paint or stain. This not only adds color but also protects the wood from wear and tear. Select a finish that complements your interior design.
- Sandpaper: A smooth finish is important for both aesthetics and safety. Use sandpaper to smooth the edges and surfaces of your wood panels before painting or staining.
- Measuring Tape: Accurate measurements are crucial for a well-fitting divider. A measuring tape will help you determine the dimensions of your space and the size of your panels.
- Drill: This tool is necessary for making holes for the screws and hinges. A power drill can save time and ensure precision.
- Screwdriver: A reliable screwdriver will help you secure the screws into place once you’ve drilled the holes.
By gathering these materials, you set the foundation for a successful DIY folding room divider project. Each component plays a significant role in the overall functionality and appearance of the divider, ensuring it meets your needs and enhances your space.
Additionally, consider your personal style when selecting materials. Whether you prefer a modern look with sleek finishes or a rustic charm with natural wood grains, the choices you make will reflect your taste and enhance your home’s ambiance.
As you prepare for your project, remember that investing time in selecting the right materials will pay off in the long run. A well-constructed folding room divider not only serves a practical purpose but also adds to the aesthetic appeal of your living space.
How to Choose the Right Wood for Your Divider?
When embarking on a DIY project to create a folding room divider, one of the most critical decisions you’ll face is how to choose the right wood. The type of wood you select can significantly impact both the durability and appearance of your finished product. Here, we will explore the essential factors to consider when selecting wood for your divider.
Choosing the correct type of wood not only affects the structural integrity of your divider but also its aesthetic appeal. Different wood types offer various characteristics, such as grain patterns, color, and weight, which can enhance or detract from your overall design.
- Weight: Heavier woods, like oak or maple, are more durable but can make your divider cumbersome. Lighter woods, such as pine or poplar, are easier to handle but may not offer the same level of durability.
- Grain: The grain of the wood can dramatically affect the look of your divider. A fine, straight grain is often preferred for a modern look, while a more pronounced grain can add character and rustic charm.
- Finish: Consider how you plan to finish the wood. Some woods, like birch, take stain well and can be transformed to match any decor. Others may require a specific treatment to enhance their natural beauty.
- Cost: Budget is always a factor. While exotic woods may be visually stunning, they can also be quite expensive. Weigh the benefits of aesthetics against your budget constraints.
- Availability: Ensure you can source the wood easily. Local availability can save time and shipping costs, making the project more feasible.
Here are some commonly used woods for room dividers, along with their benefits:
| Wood Type | Benefits |
|---|---|
| Oak | Durable, strong, and has a beautiful grain. |
| Pine | Lightweight, easy to work with, and budget-friendly. |
| Maple | Hard and durable, with a smooth surface ideal for finishing. |
| Plywood | Cost-effective and available in various finishes. |
Before making a final decision, it’s wise to test the wood quality. Here are a few practical tips:
- Inspect for Knots: Knots can weaken the structural integrity of the wood. Look for boards with minimal knots.
- Check for Warping: Ensure the wood is straight and free from warps, as this can affect the assembly and functionality of your divider.
- Feel the Texture: Run your hand over the wood to check for rough spots or imperfections that may need sanding.
In summary, selecting the right wood for your folding room divider is crucial for achieving both durability and visual appeal. By considering factors such as weight, grain, finish, and cost, you can ensure that your DIY project not only meets your functional needs but also enhances your living space.
What Tools Are Required for This DIY Project?
When embarking on a DIY project, particularly one as intricate as creating a folding room divider, having the right tools on hand is essential for a smooth and successful experience. The right tools not only enhance efficiency but also ensure the quality of your final product. Below, we delve into the specific tools you will need for this DIY endeavor.
To create a folding room divider, you will need a variety of tools that will assist you in measuring, cutting, assembling, and finishing your project. Here are the essential tools:
- Saw: A saw is crucial for cutting your wood panels to the desired dimensions. Depending on your comfort level and the type of wood you choose, you may opt for a hand saw, circular saw, or jigsaw.
- Drill: A power drill will simplify the process of making holes for screws and attaching hinges. It’s advisable to have a set of drill bits that match the size of your screws.
- Screwdriver: A screwdriver is necessary for securing screws into place. A cordless electric screwdriver can save time and effort.
- Measuring Tape: Accurate measurements are paramount for a well-fitting divider. A measuring tape will help you ensure that all your cuts are precise.
- Sandpaper: Sandpaper is vital for smoothing edges and surfaces, giving your divider a polished and professional finish. Consider using various grits for different stages of sanding.
- Clamps: Clamps will hold your pieces securely in place while you work, preventing any movement that could lead to inaccurate cuts or assembly.
- Level: A level ensures that your panels are straight and even, which is essential for both aesthetics and functionality.
- Paintbrushes or Rollers: If you plan to paint or stain your divider, having the right applicators will help achieve an even coat.
Having these tools readily available will not only streamline your project but also enhance the overall quality of your folding room divider. Each tool plays a significant role in ensuring that the construction process is efficient and that the final product meets your expectations.
In addition to these basic tools, investing in safety gear such as goggles and gloves is recommended to protect yourself while working. Always prioritize safety to ensure a smooth and enjoyable DIY experience.
By preparing adequately with the right tools, you set the stage for a successful project that will not only meet your functional needs but also serve as a beautiful addition to your home decor.

How to Measure and Cut Your Wood Panels?
Creating a folding room divider can be an exciting DIY project, and getting the measurements and cuts right is crucial for achieving a seamless fit. This section will guide you through the essential steps for measuring your space accurately and cutting your wood panels to the desired dimensions.
Accurate measurements are vital to ensure that your room divider fits perfectly in the designated space. A poorly measured divider can lead to gaps, instability, and an overall unprofessional look. Taking the time to measure correctly will save you from potential headaches later on.
- Measuring tape
- Pencil
- Square
- Level
- Saw (circular or miter saw)
Having the right tools at your disposal will make the measuring and cutting process much easier and more accurate.
Begin by measuring the area where you plan to install your room divider. Use a measuring tape to determine the height and width. It’s a good idea to measure multiple times to ensure accuracy. Record your measurements in a notebook for reference.
Additionally, consider any obstacles in the space, such as electrical outlets or furniture, which might affect the placement of your divider.
Once you have your measurements, decide how many panels you want for your divider and their dimensions. A common approach is to create panels that are equal in width and height. For instance, if your space is 6 feet wide and you want three panels, each panel should be 2 feet wide. Make sure to account for the thickness of the hinges when planning your cuts.
Using your measurements, mark the wood panels with a pencil. Use a square to ensure that your lines are straight and accurate. Double-check your measurements before proceeding to cut.
With your wood panels marked, it’s time to cut. Ensure you are using the appropriate safety gear, such as goggles and gloves. Follow these tips for a clean cut:
- Make sure your saw blade is sharp.
- Cut along the marked lines slowly and steadily.
- Support the wood properly to avoid splintering.
After cutting, check each panel for uniformity. If necessary, use sandpaper to smooth out any rough edges.
Before assembling your room divider, place the cut panels in the intended space to check for fit. This step is crucial to ensure that everything aligns well and functions as intended. Adjustments can be made at this stage if any panels are too large or small.
By following these steps, you can ensure that your wood panels are measured and cut accurately, leading to a well-fitting and functional folding room divider. Remember, patience and precision are key to a successful DIY project!

What is the Best Way to Assemble the Panels Together?
Assembling the panels correctly is crucial for creating a sturdy and functional folding room divider. A well-assembled divider not only ensures stability but also enhances ease of use, allowing you to open and close the panels seamlessly. Below are the detailed steps and tips for securely attaching the panels using hinges, which will help you achieve a professional-looking result.
- Gather Your Materials: Before you start, make sure you have all the necessary materials ready. You will need your pre-cut wood panels, hinges, screws, a screwdriver, and a level to ensure everything aligns perfectly.
- Choose the Right Hinges: Select hinges that are suitable for the weight and thickness of your panels. Consider using continuous hinges for added stability, especially if your divider is large.
- Position the Panels: Lay out your wood panels on a flat surface in the order you want them to be connected. This arrangement will help you visualize the final product and make adjustments if necessary.
- Mark Hinge Placement: Using a pencil, mark where each hinge will be attached on both the edge of the panel and the adjoining panel. A common practice is to place hinges about 6 inches from the top and bottom of each panel, with an additional hinge in the center for larger dividers.
- Drill Pilot Holes: To prevent the wood from splitting, drill pilot holes at the marked locations. Ensure the holes are slightly smaller than the screws you will be using.
- Attach the Hinges: Align the hinges with the pilot holes and use a screwdriver to secure them in place. Make sure the hinges are flush with the surface of the wood to allow for smooth folding.
- Check Alignment: After attaching the hinges, stand the panels up to check their alignment. Use a level to ensure that everything is even. Adjust as necessary before proceeding.
- Test the Folding Mechanism: Gently open and close the panels to ensure they fold smoothly. If you notice any resistance, double-check the hinge placement and make adjustments as needed.
By following these steps, you will create a folding room divider that is not only stable but also easy to operate. Proper assembly is key to the longevity and functionality of your DIY project. Remember, taking your time during this process will yield the best results, so don’t rush through the assembly.
Additionally, consider reinforcing the corners with brackets or additional screws for extra support, especially if the divider will be moved frequently. This added stability will help maintain the integrity of your creation over time.
In summary, assembling the panels correctly is vital for a successful folding room divider. By choosing the right materials, marking accurately, and ensuring proper hinge placement, you can achieve a seamless folding mechanism that enhances both the functionality and aesthetic appeal of your space.
How to Attach Hinges for Smooth Folding?
When creating a folding room divider, proper hinge placement is essential for ensuring that the panels operate smoothly. The functionality of your divider hinges directly on how well they are aligned and secured. In this section, we will explore techniques that will help you achieve optimal hinge placement, allowing for effortless opening and closing of the panels.
Hinge placement is not just a technical detail; it significantly impacts the overall performance of your room divider. If the hinges are misaligned, the panels may not fold correctly, leading to frustration and potential damage. Therefore, investing time in precise alignment will pay off in the long run.
- Type of Hinge: Select hinges that are designed for folding applications. Continuous hinges, also known as piano hinges, provide support along the entire length of the panel, making them ideal for room dividers.
- Size and Weight Rating: Ensure that the hinges can support the weight of your panels. Check the manufacturer’s specifications to choose the appropriate size.
To achieve perfect hinge placement, accurate measurements are crucial. Start by measuring the height of your panels. Typically, hinges should be placed at the top and bottom of each panel, with an additional hinge in the center for added stability, especially for taller dividers.
Once you have your measurements, use a pencil to mark the locations on the edge of the panels. Make sure that the marks are level to avoid any misalignment during installation. A level tool can be beneficial in this step.
With your marks in place, it’s time to drill holes for the screws. Use a drill bit that matches the size of the screws you will be using. Pre-drilling the holes will help prevent the wood from splitting, ensuring a secure fit.
Align the hinges with the pre-drilled holes and secure them using screws. It’s advisable to start with the top hinge, as this will help stabilize the panel while you attach the others. Use a screwdriver to tighten the screws, ensuring they are snug but not overly tight, which could damage the wood.
After installing the hinges, it’s crucial to test the movement of your room divider. Open and close the panels several times to ensure they fold smoothly. If you notice any resistance, double-check the alignment and make adjustments as necessary.
Once you are satisfied with the operation of your divider, consider adding a small amount of lubricant to the hinges to enhance their performance. Regular maintenance, such as checking the screws for tightness and cleaning the hinges, will help prolong the life of your room divider.
By following these guidelines for hinge placement, you can create a room divider that not only looks great but also functions seamlessly. The right techniques and attention to detail will ensure that your DIY project is a success.

How to Decorate Your Folding Room Divider?
Decorating your folding room divider can transform it from a simple functional piece into a stunning focal point in your space. By adding decorative elements, you not only enhance its visual appeal but also create a unique piece that reflects your personal style. Here are some effective ways to customize your folding room divider.
One of the simplest ways to decorate your room divider is through painting. You can choose a solid color that complements your existing decor or get creative with techniques like:
- Ombre Effect: Gradually blend two or more colors for a stunning gradient look.
- Stenciling: Use stencils to add intricate designs or patterns that match your theme.
- Stripes or Geometric Patterns: Create modern designs by masking off sections with painter’s tape.
If you prefer a more natural aesthetic, consider staining your wood panels. Staining enhances the wood grain and adds depth to the appearance. Choose a stain that matches or contrasts with your room’s color palette. Remember to test the stain on a small area first to ensure the desired effect.
Using fabric is another excellent way to decorate your folding room divider. You can:
- Upholster Panels: Attach fabric to the panels for a soft, textured look.
- Use Removable Wallpaper: This option allows for easy changes without permanent commitment.
- Hang Tapestries or Curtains: This creates a cozy atmosphere and can be changed seasonally.
Incorporating decorative hardware can elevate your divider’s style. Consider using:
- Unique Hinges: Opt for decorative hinges that stand out and add character.
- Knobs or Handles: Functional yet stylish, they can enhance the overall look.
Another creative approach is to attach artwork or framed photos to your divider. This not only personalizes the space but also allows you to display your favorite pieces. Use adhesive hooks or clips for easy attachment and removal.
Once you have decorated your folding room divider, consider adding finishing touches such as:
- Sealing: Apply a clear sealant to protect painted or stained surfaces from wear and tear.
- Lighting: Incorporate LED strip lights along the edges for an ambient glow.
In conclusion, decorating your folding room divider is an exciting opportunity to express your creativity. By exploring various painting, staining, and fabric options, as well as incorporating hardware and artwork, you can customize your divider to perfectly match your decor. With these tips, your folding room divider will not only serve its functional purpose but also become a beautiful addition to your home.
What Finishing Touches Should You Consider?
When it comes to creating a stunning folding room divider, the finishing touches can truly make a difference. These final details not only enhance the aesthetic appeal but also contribute to the durability and functionality of your divider. Here are some key considerations to elevate your project:
- Sealing: Applying a sealant is a crucial step in protecting your wood from moisture and wear. Consider using a clear polyurethane sealant to provide a durable barrier against environmental factors.
- Varnishing: A good varnish can enhance the natural grain of the wood while providing a glossy finish. Choose between satin, semi-gloss, or high-gloss finishes based on your desired look. A well-varnished surface not only looks appealing but also increases longevity.
- Painting: If you prefer a pop of color, painting your room divider can transform it into a statement piece. Use high-quality paint that is suitable for wood surfaces to ensure a smooth and even application. Consider using a spray paint for a professional finish.
- Adding Hardware: Decorative hardware such as handles or knobs can add an elegant touch to your divider. Opt for materials that complement the overall design, such as brushed nickel or antique brass, to create a cohesive look.
- Staining: If you want to enhance the wood’s natural beauty, consider staining it. Stains can add depth and richness to the wood grain, allowing you to achieve the desired tone while still showcasing the wood’s texture.
- Edge Treatment: Don’t overlook the edges of your divider. Sanding the edges smoothly can prevent splinters and give a more finished appearance. You might also consider adding a decorative trim or molding for an added touch of sophistication.
- Textiles: Incorporating fabric can soften the look of your divider and add a touch of warmth. You can attach fabric panels or hang curtains that coordinate with your room’s decor. This not only enhances aesthetics but also provides privacy when needed.
- Lighting: Consider integrating LED strip lights along the edges or behind the divider. This can create a stunning ambiance, especially in the evening, and highlight the beauty of your DIY project.
By implementing these finishing touches, you can ensure that your folding room divider not only serves its practical purpose but also becomes a stylish addition to your interior space. Whether you choose to seal, paint, or add decorative elements, each choice contributes to a polished and professional appearance that showcases your creativity and craftsmanship.

How to Ensure Stability and Durability?
When it comes to creating a functional and stylish folding room divider, ensuring its stability and durability is paramount. A well-constructed divider not only enhances the aesthetics of your space but also stands the test of time. Below are some essential tips and techniques to reinforce the structure of your DIY creation.
Stability is crucial for any piece of furniture, especially for a folding room divider that may be frequently moved or adjusted. A stable divider prevents tipping and damage, ensuring it remains a reliable part of your home decor. Additionally, a sturdy structure enhances the overall functionality, allowing for smooth operation without the risk of collapse.
- High-Quality Wood: Opt for hardwoods like oak or maple, which offer superior strength compared to softer woods. These materials withstand wear and tear better, ensuring longevity.
- Reinforced Hinges: Choose heavy-duty hinges that can support the weight of the panels. This prevents sagging and ensures a smooth folding mechanism.
- Quality Fasteners: Use screws that are appropriate for the thickness of your wood. Avoid using nails, as screws provide a more secure attachment.
To enhance the overall stability of your folding room divider, consider the following techniques:
- Add Corner Braces: Installing metal corner braces at the joints can significantly improve stability. These braces prevent the panels from wobbling and provide additional support.
- Use Cross Supports: Adding cross supports between the panels can help distribute weight evenly and reduce the risk of bending or warping over time.
- Secure the Base: Ensure the base of the divider is wide enough to prevent tipping. A wider base offers better balance and support.
Regular maintenance is essential to keep your folding room divider looking great and functioning well. Here are some tips:
- Regular Cleaning: Dust the surface regularly and clean with a damp cloth to prevent buildup that can affect the finish.
- Inspect Hinges and Fasteners: Periodically check the hinges and screws to ensure they are tight and free of rust. Tighten or replace them as necessary.
- Avoid Excessive Moisture: Keep the divider away from areas with high humidity, as moisture can warp the wood over time.
When constructing your folding room divider, be mindful of these common pitfalls:
- Neglecting Measurements: Always measure twice before cutting. Incorrect measurements can lead to instability.
- Underestimating Weight: Ensure your hinges and fasteners can handle the weight of the materials used. Overloading can cause failure.
- Skipping Finishing Touches: Failing to seal or varnish your wood can lead to moisture damage and premature aging.
By following these guidelines, you can ensure that your folding room divider remains stable and durable, providing you with a practical and stylish solution for your space.

What Are Common Mistakes to Avoid?
When embarking on a DIY room divider project, it is essential to recognize and avoid common mistakes that can lead to frustration and wasted resources. Understanding these pitfalls not only saves time but also enhances the overall quality of your work. Below are some frequent errors to watch out for, along with tips to ensure a smoother building experience.
- Inadequate Planning: One of the most significant mistakes is diving into the project without a clear plan. Take the time to sketch your design, measure your space, and outline your materials. This preparation will guide you through the process and help avoid costly miscalculations.
- Choosing the Wrong Materials: Selecting inappropriate materials can compromise both the look and durability of your room divider. Ensure that the wood you choose is suitable for your design, considering factors like weight and finish. Opt for high-quality hinges as well to ensure smooth operation.
- Neglecting Measurements: Accurate measurements are crucial. Many DIY enthusiasts underestimate the importance of precise dimensions. Always measure twice before cutting to prevent errors that can lead to wasted materials.
- Improper Tool Usage: Using tools incorrectly can result in poor craftsmanship and safety hazards. Familiarize yourself with each tool’s operation and follow safety guidelines to prevent accidents and ensure a professional finish.
- Skipping the Sanding Process: Many DIYers overlook the importance of sanding their wood panels. Skipping this step can lead to rough edges and an unprofessional appearance. Sanding not only improves aesthetics but also helps paint or stain adhere better.
- Incorrect Hinge Placement: The placement of hinges is vital for the functionality of your room divider. Misalignment can cause the panels to bind or not fold correctly. Take the time to mark and drill pilot holes accurately to ensure proper alignment.
- Ignoring Stability: A common oversight is not reinforcing the structure adequately. Ensure that your room divider is stable by using proper joinery techniques and considering additional bracing if needed. A wobbly divider can be both frustrating and unsafe.
- Forgetting the Finishing Touches: The final appearance of your room divider can be significantly enhanced by adding finishing touches. Don’t overlook the importance of sealing, varnishing, or adding decorative hardware, which can elevate the overall look of your project.
- Lack of Maintenance Consideration: Many DIYers fail to consider how they will maintain their room divider. Plan for cleaning and upkeep to ensure your divider remains functional and attractive over time.
By being aware of these common mistakes and taking proactive steps to avoid them, you can ensure a more enjoyable and successful DIY room divider project. Remember that preparation and attention to detail are key components in achieving a satisfying outcome.
How to Maintain Your Folding Room Divider?
Maintaining your folding room divider is essential for ensuring its longevity and functionality. With regular care, you can keep your divider looking fresh and stylish for years to come. Here are some practical tips to help you maintain your folding room divider effectively.
Regular maintenance is crucial because it helps to prevent wear and tear. A well-maintained room divider not only enhances the aesthetic appeal of your space but also ensures that it functions properly. Neglecting maintenance can lead to issues such as loose hinges, scratches, and discoloration.
- Microfiber cloths: Ideal for dusting and cleaning without scratching surfaces.
- Gentle cleaning solution: A mild soap mixed with water is perfect for most surfaces.
- Wood polish: Enhances the shine and protects the wood finish.
Start by dusting the surface with a microfiber cloth to remove any loose particles. For deeper cleaning:
- Mix a small amount of gentle soap with warm water.
- Dip a cloth into the solution, wring it out, and gently wipe down the panels.
- Rinse the cloth with clean water and wipe again to remove any soap residue.
- Dry the surface with a clean cloth to prevent moisture damage.
Hinges are essential for the functionality of your folding room divider. To maintain them:
- Check for any signs of rust or wear.
- Apply a few drops of lubricating oil to the hinges to ensure smooth operation.
- Tighten any loose screws to keep the panels securely attached.
To protect the finish of your room divider, consider the following:
- Use coasters or mats under items placed on the divider to prevent scratches.
- Avoid exposing the wood to direct sunlight to prevent fading.
- Consider applying a protective sealant every few years to maintain the wood’s integrity.
If your folding room divider has minor scratches or dents, you can easily fix them:
- For scratches, use a wood touch-up marker that matches the color of your divider.
- For deeper dents, consider using a wood filler to fill in the damaged area, then sand it smooth once dry.
It’s advisable to perform a thorough cleaning and maintenance check every 3 to 6 months. However, if you notice any signs of wear, address them immediately to prevent further damage.
By following these maintenance tips, you can ensure that your folding room divider remains a functional and beautiful addition to your home. Regular care not only enhances its lifespan but also keeps it looking its best.
Frequently Asked Questions
- What materials do I need to create a folding room divider?
You’ll need some wood, hinges, screws, and paint. These materials will help you build a divider that’s not only functional but also looks great in your space!
- How do I choose the right type of wood?
Consider the weight, grain, and finish of the wood. You want something sturdy yet visually appealing, so pick a wood that complements your decor!
- What tools should I have for this DIY project?
Essential tools include a saw, drill, screwdriver, measuring tape, and sandpaper. Having the right tools on hand will make your project much smoother!
- How do I measure and cut the wood panels accurately?
Take precise measurements of your space and carefully cut the wood panels to those dimensions. Accuracy is key for a well-fitting divider!
- What are the best practices for assembling the panels?
Securely attach the panels using hinges, ensuring they are aligned properly for a seamless folding mechanism. This will enhance both stability and ease of use!
- How can I decorate my folding room divider?
Get creative! You can paint, stain, or even add fabric to customize your divider. Make it a reflection of your personal style!
- What finishing touches should I consider?
Think about sealing, varnishing, or adding hardware for a polished look. These details can really elevate your divider’s appearance!
- How do I ensure my divider is stable and durable?
Reinforce the structure during assembly and regularly check for any wear and tear. A sturdy divider will last you for years!
- What common mistakes should I avoid?
Familiarize yourself with common pitfalls like incorrect measurements or poor hinge placement. Avoiding these can save you time and frustration!
- How do I maintain my folding room divider?
Regular cleaning and care are essential. Simple maintenance will keep your divider looking fresh and functional for a long time!
