This article delves into the exciting world of DIY room dividers, offering creative methods to design and customize a divider that not only serves a practical purpose but also complements your home decor. Whether you’re looking to create a cozy reading nook or separate spaces in a studio apartment, a well-crafted room divider can enhance both functionality and aesthetics.
Choosing the right materials is essential for building a durable and stylish room divider. Here are some popular options:
- Wood: Offers sturdiness and a classic look. Consider using reclaimed wood for an eco-friendly choice.
- Fabric: Provides softness and can add color and texture. Look for heavy-duty fabrics for better durability.
- Metal: Perfect for modern designs, adding an industrial touch.
- Glass: Ideal for a sleek and contemporary feel while allowing light to flow through.
Selecting a design that harmonizes with your existing decor can significantly enhance the aesthetic appeal of your room. Here are some popular styles to consider:
- Modern: Emphasizes clean lines and minimalism.
- Rustic: Brings warmth and charm, often using natural materials.
- Traditional: Features ornate designs and classic elements.
Customization techniques can transform a basic room divider into a unique piece. Here are some effective methods:
Painting is an effective way to add color and personality. Popular techniques include:
- Ombre: A gradient effect that adds depth.
- Distressing: Creates a vintage look that enhances character.
Incorporating fabric can add texture and warmth. When choosing fabric, consider:
- Durability: Opt for fabrics that can withstand wear and tear.
- Patterns: Select patterns that align with your room’s theme.
A room divider should not only look good but also be stable and functional. Here are some tips:
Properly securing your room divider is essential for safety. Consider these methods:
- Anchoring: Use brackets or L-brackets to secure the divider to the wall.
- Weighted Bases: Add weights at the bottom for stability.
Consider designing your divider to serve multiple purposes. Here are some ideas:
- Shelving: Incorporate shelves to display books or decor.
- Hooks: Add hooks for hanging items like bags or coats.
By following these guidelines and utilizing the right materials and techniques, you can create a DIY room divider that not only meets your functional needs but also enhances your home’s decor. Embrace your creativity and enjoy the process of crafting a unique piece that reflects your personal style.
What Materials Do You Need for Your DIY Room Divider?
Creating a DIY room divider is an exciting project that can enhance both the functionality and aesthetics of your living space. One of the most critical aspects of this endeavor is choosing the right materials. The materials you select will not only determine the durability of your room divider but also its overall style and how well it integrates with your existing decor.
When embarking on your DIY room divider project, consider the following materials:
- Wood: Wood is a classic choice for room dividers, offering both strength and versatility. You can opt for hardwoods like oak or maple for a more polished look, or softwoods like pine for a rustic charm. Reclaimed wood can also add character and sustainability to your design.
- Fabric: If you’re looking to introduce softness and texture, fabric is an excellent option. Choose from a variety of materials such as cotton, linen, or even heavy-duty canvas. Consider using patterned fabrics to make a bold statement or solid colors for a more subtle approach.
- Metal: Incorporating metal elements can give your room divider a modern edge. Use metal frames or accents to create an industrial look. Options include steel, aluminum, or even brass for a touch of elegance.
- Glass: For a sleek and contemporary feel, glass panels can be an ideal choice. They allow light to pass through, making your space feel larger while maintaining privacy. Ensure to use tempered glass for safety.
- Plastic or Acrylic: These materials can be lightweight and durable, making them easy to work with. They come in various colors and finishes, allowing for unique customization.
Each material has its unique properties and benefits, so consider the following factors when making your selection:
- Durability: Ensure the material can withstand daily use, especially in high-traffic areas.
- Maintenance: Some materials require more upkeep than others. For instance, wood may need periodic sealing, while metal might require polishing to prevent rust.
- Style: Choose materials that align with your decor style. A modern space may benefit from sleek metal or glass, while a cozy, rustic area may call for warm wood tones.
- Budget: Some materials can be more expensive than others. Set a budget and explore options within that range to avoid overspending.
Once you have selected your materials, it’s time to think about the design and functionality of your room divider. Remember, the right materials can transform your DIY project into a stunning focal point in your home.
In summary, when planning your DIY room divider, consider the various materials available. Each option offers unique benefits that can enhance the style and functionality of your space. By carefully selecting the right materials, you can create a room divider that is not only durable but also stylish, perfectly tailored to your needs.

How to Choose the Right Design for Your Space?
Choosing the right design for your space is a pivotal step in creating a harmonious and visually appealing environment. A well-selected room divider can not only serve its functional purpose but also enhance the overall aesthetic of your home. Here are some key considerations to guide you in selecting a design that complements your existing decor.
When it comes to room dividers, there are several popular styles to consider. Each style offers a unique character that can either blend seamlessly with your decor or stand out as a statement piece.
- Modern: Characterized by clean lines, minimalism, and a focus on functionality, modern designs often utilize materials like metal and glass. This style is perfect for contemporary homes looking for a sleek and uncluttered look.
- Rustic: Rustic designs bring warmth and charm to a space, often incorporating natural materials like reclaimed wood. This style is ideal for cozy homes that value a connection to nature and a sense of history.
- Traditional: Traditional designs often feature intricate details and classic materials, such as wood and fabric. These dividers can add a touch of elegance and sophistication, making them suitable for more formal spaces.
Before selecting a design, it’s essential to assess your current decor. Take note of the following:
- Color Palette: Identify the dominant colors in your room. A room divider should harmonize with these colors to create a cohesive look.
- Furniture Style: Consider the style of your furniture. A modern divider may clash with antique pieces, so aim for a design that complements your existing furnishings.
- Room Functionality: Think about how the divider will be used. Will it separate spaces, provide privacy, or simply serve as a decorative element? Understanding its purpose will guide your design choice.
Once you’ve determined your style and assessed your decor, the next step is to choose the right materials. Here are some suggestions based on style:
| Style | Recommended Materials |
|---|---|
| Modern | Metal, Glass, Acrylic |
| Rustic | Reclaimed Wood, Natural Fabrics |
| Traditional | Wood, Upholstered Panels, Decorative Accents |
Adding personal touches to your room divider can make it uniquely yours. Consider the following options:
- Artwork: Use the divider as a canvas for your favorite artwork or photographs.
- Color: Paint or stain the divider to match your desired color scheme, or use techniques like stenciling for added flair.
- Textiles: Incorporate fabric elements to add texture, warmth, and softness to the design.
In summary, selecting the right design for your space involves a thoughtful assessment of your existing decor, a clear understanding of your style preferences, and a careful choice of materials. By considering these factors, you can create a room divider that not only fulfills its purpose but also enhances the beauty of your home.
Modern Room Divider Ideas
are essential for anyone looking to create a stylish and functional space in their home. The trend towards minimalism and clean lines has made modern designs increasingly popular. This article will explore how to effectively incorporate geometric shapes and neutral colors into your room divider to achieve a contemporary look.
Modern designs often emphasize simplicity and functionality. By opting for a minimalist approach, you can create a serene atmosphere that enhances the overall aesthetic of your home. Utilizing geometric shapes can add a unique visual interest, while neutral colors provide a versatile backdrop that complements various decor styles.
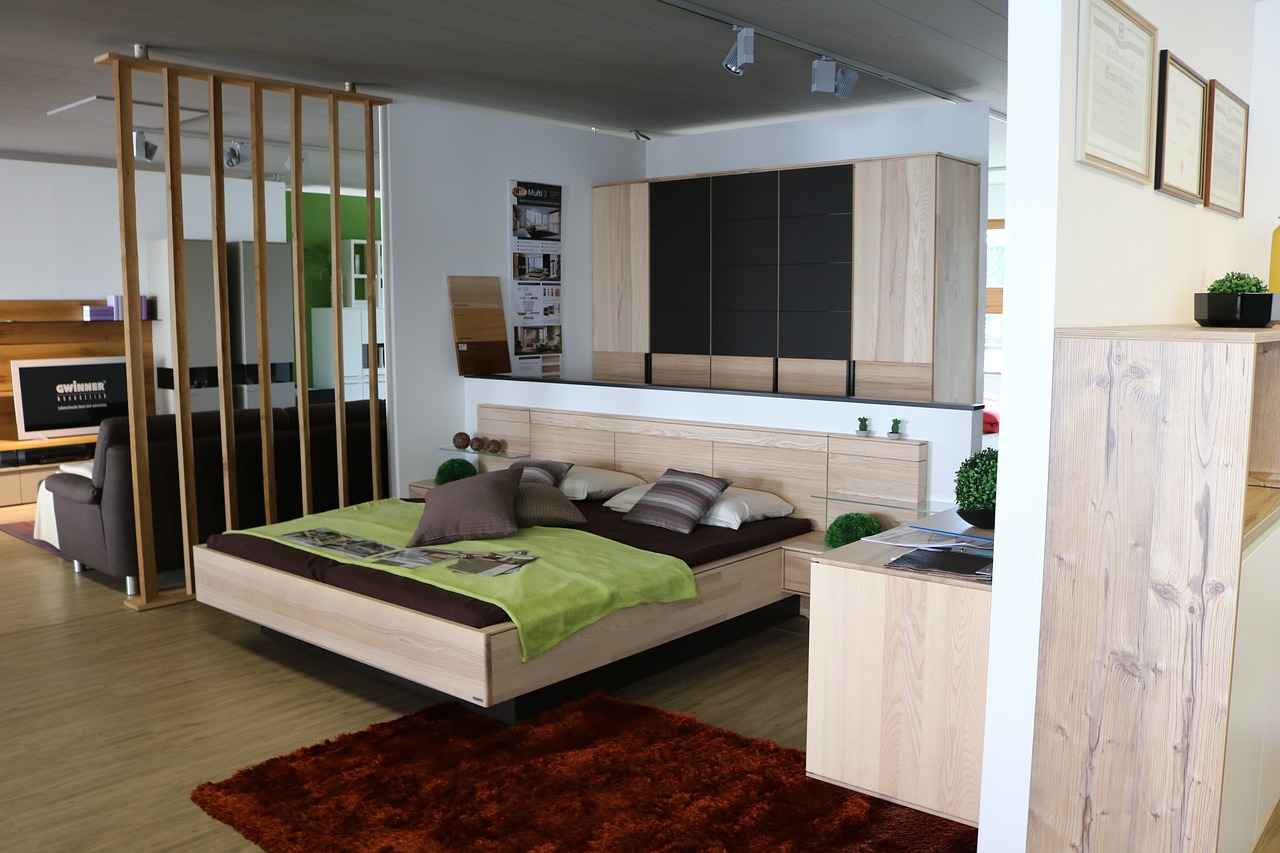
- Triangles and Squares: These shapes can be used to create a dynamic pattern on your divider. Consider using plywood or MDF to cut out geometric shapes that can be painted or stained to match your decor.
- Layering Shapes: By layering different geometric forms, you can create depth and texture. For example, a combination of circles and rectangles can bring a modern twist to your divider.
Neutral colors such as whites, grays, and beiges are ideal for achieving a contemporary feel. These shades not only create a calm environment but also allow for easy integration with other design elements in your space. You can also consider adding accent colors sparingly to create focal points within your design.
Incorporating different textures can elevate your modern room divider. For instance, combining smooth surfaces with rough textures can create visual interest. Wood and metal elements work well together, providing a balanced contrast that enhances the modern aesthetic.
Absolutely! Integrating lighting into your room divider can significantly enhance its appeal. Consider using LED strips or spotlights to highlight geometric shapes or textures. This not only adds functionality but also creates a dramatic effect, especially in the evening.
While aesthetics are important, functionality should not be overlooked. Ensure that your room divider is stable and can withstand everyday use. Consider adding storage solutions like shelves or hooks to maximize the utility of your space while keeping the design sleek and modern.
Here are a few tips to help you get started on your DIY room divider:
- Plan Your Design: Sketch out your ideas and decide on the dimensions before starting your project.
- Choose Quality Materials: Invest in durable materials that will stand the test of time.
- Follow Safety Guidelines: Always wear protective gear when working with tools and materials.
By focusing on modern designs that highlight clean lines, geometric shapes, and neutral colors, you can create a stunning room divider that not only serves a practical purpose but also enhances your home’s aesthetic. Embrace the beauty of minimalism, and let your creativity shine through in your DIY project!
Using Glass Panels in Modern Designs
In the realm of interior design, glass panels have emerged as a popular choice for enhancing the aesthetic appeal of room dividers. Their ability to introduce lightness and elegance makes them an ideal element for modern spaces. This article delves into the benefits of using glass panels in your DIY room divider project, ensuring a sleek and sophisticated finish.
Glass panels are not only visually striking but also serve several practical purposes. They allow natural light to flow through, creating an illusion of a larger space while maintaining separation between areas. Additionally, glass panels can be easily customized to fit various design themes.
When working with glass, safety should always be a priority. Here are some essential tips:
- Choose Tempered Glass: This type of glass is heat-treated to be more durable and less prone to shattering.
- Use Proper Tools: Invest in a glass cutter or hire a professional to ensure precise measurements and cuts.
- Secure Edges: Use edge banding or silicone sealant to smooth sharp edges and enhance safety.
Whether you’re aiming for a minimalist look or a more eclectic design, glass panels can seamlessly fit into various styles:
- Modern: Clean lines and geometric shapes work beautifully with glass, creating a sleek, contemporary feel.
- Industrial: Pair glass with metal frames for an edgy, urban vibe.
- Scandinavian: Combine glass with light woods to achieve a cozy yet airy atmosphere.
To further elevate the design of your glass panel room divider, consider incorporating other materials:
- Wood Accents: Wooden frames or shelves can add warmth and contrast to the coolness of glass.
- Lighting: Integrate LED strips or pendant lights to highlight the beauty of the glass and create ambient lighting.
- Decorative Films: Apply frosted or patterned films to add privacy while still allowing light to pass through.
Keeping your glass panels clean and in good condition is essential for longevity. Here are some maintenance tips:
- Regular Cleaning: Use a glass cleaner and a microfiber cloth to avoid streaks and maintain clarity.
- Inspect for Damage: Regularly check for any cracks or chips and replace panels as necessary to ensure safety.
- Protect from Impact: Be mindful of furniture placement and avoid heavy objects near the glass to prevent accidental damage.
Incorporating glass panels into your DIY room divider can transform your space, making it feel more open and inviting. With careful planning and attention to detail, you can create a stunning feature that not only serves a functional purpose but also enhances your home’s overall aesthetic.
Incorporating Metal Elements
When designing a DIY room divider, can significantly enhance its modern appeal. Metal accents not only add a touch of elegance but also contribute to the overall aesthetic harmony of your space. In this section, we will explore how various metal finishes and styles can elevate your design, making your room divider a standout feature in your home.
Metal is a versatile material that can complement various decor styles. Its durability and strength make it an excellent choice for room dividers that need to withstand daily use. Additionally, metal finishes come in a range of options, allowing you to customize your divider according to your personal taste.
- Brushed Nickel: This finish provides a sleek and contemporary look, perfect for modern interiors.
- Antique Brass: Adds a touch of vintage charm, suitable for eclectic or rustic designs.
- Matte Black: Offers a bold statement, ideal for minimalist or industrial styles.
- Polished Chrome: Brings a shiny, reflective quality that can brighten up any space.
There are various ways to incorporate metal into your room divider design. Here are a few ideas:
- Metal Grilles: Consider using decorative metal grilles that can be attached to wooden frames. These grilles can add intricate designs while still allowing light to filter through.
- Metal Rods: Use metal rods to create a frame for your divider. This approach works well with fabric or other materials, providing a sturdy structure.
- Mixed Materials: Combine metal with wood or glass for a striking contrast. For example, a wooden divider with metal accents can create a warm yet modern aesthetic.
When selecting metal elements for your room divider, consider the following:
- Color Palette: Ensure the metal finish complements the existing color scheme of your room.
- Style Cohesion: Choose metal accents that align with the overall style of your home, whether it’s modern, rustic, or industrial.
- Functionality: Think about how the metal elements will be used. For example, if your divider will serve as a shelving unit, ensure the metal is strong enough to support weight.
Here are some practical tips to effectively incorporate metal into your DIY room divider:
- Mix and Match: Don’t hesitate to combine different metal finishes for a unique look. Just ensure they complement each other.
- Use Hardware: Consider using metal brackets, hinges, and handles to enhance both functionality and style.
- Paint or Finish: If you prefer a specific color, consider painting your metal accents or applying a finish to achieve your desired look.
Incorporating metal elements into your DIY room divider can transform it from a simple partition into a striking design feature. By carefully selecting finishes, styles, and practical elements, you can create a divider that not only serves its purpose but also enhances the overall aesthetic of your space.
Rustic Room Divider Inspirations
Rustic designs have a unique ability to infuse warmth and charm into any space, making them an ideal choice for room dividers. By utilizing reclaimed wood and natural finishes, you can create a cozy atmosphere that not only serves a functional purpose but also enhances your home’s aesthetic appeal. Below are some inspiring ideas and techniques to help you achieve a rustic look with your DIY room divider.
Reclaimed wood is not only environmentally friendly but also brings a sense of history and character to your decor. Each piece tells a story, adding a layer of depth to your space. Consider the following benefits of using reclaimed wood:
- Sustainability: Using reclaimed materials reduces waste and promotes eco-friendly practices.
- Unique Appearance: The natural imperfections of reclaimed wood create a one-of-a-kind look.
- Warmth: The rich tones and textures of wood evoke a feeling of comfort and coziness.
Natural finishes, such as oils, waxes, or stains, can enhance the beauty of your wood while preserving its organic feel. Here are some ways to apply these finishes:
- Oil Finishes: These penetrate the wood, highlighting its grain and providing a subtle sheen.
- Waxes: A wax finish can create a soft, matte appearance that feels inviting to the touch.
- Stains: Using a wood stain allows you to customize the color while still showcasing the wood’s natural beauty.
When creating a rustic room divider, consider various design elements that align with the overall theme:
- Sliding Barn Doors: Incorporate sliding barn doors for a functional yet stylish divider that adds a touch of farmhouse charm.
- Open Shelving: Design your divider with open shelving to display plants, books, or decorative items, enhancing both functionality and aesthetics.
- Mixed Materials: Combine wood with metal or fabric to create visual interest and texture.
Customization is key to making your room divider truly unique. Here are some techniques to consider:
- Stenciling: Use stencils to add patterns or quotes that resonate with your personal style.
- Paint Techniques: Consider distressing or using a whitewash technique to achieve a vintage feel.
- Incorporating Artwork: Attach small pieces of art or framed photos to the divider for a personal touch.
While aesthetics are important, ensuring your divider is stable and functional is crucial. Here are some tips:
- Secure Anchoring: Use brackets or wall anchors to secure the divider in place, especially if it’s tall or heavy.
- Multi-Functional Design: Consider adding hooks or integrated storage to maximize utility.
- Weight Distribution: Ensure that the weight is evenly distributed to prevent tipping.
By embracing rustic designs and utilizing reclaimed wood along with natural finishes, you can create a stunning room divider that brings warmth and charm to your living space. These ideas and techniques will help you craft a piece that is not only beautiful but also functional, enhancing the overall ambiance of your home.

What Techniques Can You Use for Customization?
Customization techniques can transform a basic room divider into a unique piece that reflects your personal style and enhances your living space. By employing various creative methods, you can easily personalize your project to ensure it aligns with your home decor. Below, we explore some effective techniques to customize your DIY room divider.
- Painting: One of the simplest and most impactful ways to customize your room divider is through painting. You can choose a color palette that complements your existing decor or opt for a bold hue to make a statement. Techniques such as ombre or distressing can add depth and character to your divider.
- Stenciling: If you’re looking to add intricate designs without the commitment of freehand painting, stenciling is a fantastic option. You can create patterns or images that resonate with your style, whether it’s floral, geometric, or abstract. This technique allows for precision and can be used to cover large areas or highlight specific sections of your divider.
- Fabric Application: Incorporating fabric into your room divider can introduce texture and warmth. You can choose fabrics that match your color scheme or add a pop of contrasting color. Techniques such as upholstering or using fabric panels can create a soft, inviting look.
- Decoupage: This creative method involves applying decorative paper or fabric to your divider using a special adhesive. You can create a collage of images, patterns, or textures that tell a story or reflect your interests. Decoupage adds a personal touch and can be a fun project to undertake.
- Adding Lighting: For a truly unique element, consider integrating LED lights or other forms of lighting into your divider. This not only enhances the aesthetic appeal but also serves a functional purpose. Lighting can create ambiance and highlight specific areas of your room.
- Natural Elements: Incorporating elements like wood, plants, or even stones can add an organic feel to your divider. You can use reclaimed wood for a rustic look or create a vertical garden that serves as a living piece of art.
Each of these techniques offers a way to customize your room divider, allowing you to create a piece that is not only functional but also a reflection of your personal style. By mixing and matching these methods, you can achieve a truly one-of-a-kind design that enhances your space.
When embarking on your customization journey, consider the overall theme and color scheme of your room to ensure harmony in your design. Don’t hesitate to experiment with different techniques to find the perfect combination that resonates with your vision. With creativity and a little effort, your DIY room divider can become a stunning focal point in your home.
Painting Techniques for a Personal Touch
When it comes to personalizing your living space, painting techniques can significantly elevate the aesthetic appeal of a DIY room divider. Not only does painting add color, but it also infuses personality into your decor. From soft pastels to vibrant hues, the right choice can transform a plain divider into a stunning focal point. Below, we explore various painting techniques that can enhance your project, making it uniquely yours.
Understanding different painting techniques can help you achieve the desired effect for your room divider. Here are a few popular methods:
- Ombre Technique: This technique involves blending colors from dark to light, creating a gradient effect. It adds depth and visual interest to your divider.
- Distressing: For a rustic look, consider distressing your paintwork. This method involves sanding down areas of the painted surface to reveal the natural wood beneath, giving it a worn, vintage feel.
- Stenciling: Use stencils to create intricate patterns or designs on your divider. This technique allows for creativity and can be customized to fit any theme.
- Color Blocking: This modern approach involves painting sections of your divider in different colors or patterns. It can create a striking visual impact and is perfect for contemporary spaces.
Before you start painting, proper preparation is crucial to achieving a professional finish:
- Clean the Surface: Ensure that your divider is clean and free from dust or grease. Use a mild detergent and water to wipe it down.
- Sand the Wood: Lightly sand the surface to allow the paint to adhere better. This step is especially important for previously finished surfaces.
- Prime the Wood: Applying a primer can enhance paint adhesion and improve the final color payoff. Choose a primer suitable for the type of paint you plan to use.
The type of paint you choose can significantly impact the outcome of your project. Here are some options:
- Acrylic Paint: This water-based paint is easy to work with and dries quickly. It’s ideal for indoor projects and comes in a wide variety of colors.
- Chalk Paint: Perfect for achieving a matte finish, chalk paint is great for a vintage look. It adheres well to most surfaces and often requires little to no priming.
- Spray Paint: For a smooth, even finish, spray paint is an excellent choice. It’s ideal for intricate designs and can reach difficult areas easily.
Once you have prepared your divider and chosen your paint, it’s time to apply it:
1. Use a high-quality brush or roller for even application.2. Start with the edges and corners before moving to larger areas.3. Apply multiple thin coats instead of one thick coat for a smoother finish.4. Allow adequate drying time between coats to prevent smudging.
Incorporating these painting techniques into your DIY room divider project not only enhances its appearance but also allows you to express your creativity. Whether you opt for a bold ombre effect or a subtle distressed finish, the result will be a personalized piece that complements your home decor beautifully.
Using Fabric for Texture and Color
When it comes to enhancing the aesthetic appeal of your DIY room divider, incorporating fabric is a fantastic choice. Not only does it add texture and warmth, but it also creates a soft, inviting look that can transform the atmosphere of any space. Here’s how to select the right fabric and apply it effectively to your divider.
Choosing the right fabric is crucial for achieving the desired effect. Here are some popular options:
- Canvas: Durable and available in various colors, canvas is an excellent choice for a modern look.
- Linen: This lightweight fabric offers a natural texture and is perfect for a soft, airy feel.
- Velvet: For a touch of luxury, velvet adds depth and richness, making your divider a statement piece.
- Sheer Fabrics: If you want to maintain light flow while adding some privacy, sheer fabrics like organza or chiffon are ideal.
The color and pattern of the fabric can significantly influence the overall look of your room divider. Here are some tips:
- Match Your Decor: Select colors that complement your existing decor to create a harmonious look.
- Bold Patterns: If you want your divider to be a focal point, consider using bold patterns or vibrant colors.
- Neutral Tones: For a more subtle approach, neutral tones can add sophistication without overwhelming the space.
Once you’ve chosen your fabric, the next step is to apply it to your room divider. Here are some effective techniques:
- Stapling: For a quick and easy application, you can staple the fabric directly onto the frame of your divider. Ensure the fabric is taut to avoid sagging.
- Using Velcro: This method allows for easy removal and cleaning. Attach one side of the Velcro to the frame and the other to the fabric.
- Fabric Glue: If you prefer a more permanent solution, fabric glue can securely bond the fabric to the divider.
To keep your fabric room divider looking fresh and clean, consider the following maintenance tips:
- Regular Dusting: Use a soft cloth or a vacuum with a brush attachment to remove dust.
- Spot Cleaning: For stains, use a mild detergent and water solution to gently clean the affected area.
- Periodic Washing: If the fabric is machine washable, periodically remove it and wash it according to the care instructions.
Incorporating fabric into your DIY room divider not only enhances its visual appeal but also adds a layer of comfort and warmth to your space. By carefully selecting the right fabric, color, and application method, your divider can become a stunning focal point that complements your decor.
How to Ensure Stability and Functionality?
Ensuring stability and functionality in your DIY room divider is essential for both safety and aesthetic appeal. A well-constructed room divider not only enhances the decor of your space but also serves its intended purpose effectively. Here are some detailed tips to help you create a sturdy and practical room divider that stands the test of time.
Stability is crucial because a flimsy divider can easily tip over, posing a risk to both people and property. A stable room divider can also withstand daily use, ensuring that it remains a functional part of your living space. To achieve this, consider the following:
- Choose the Right Materials: Select durable materials such as hardwood or plywood for the frame of your divider. These materials provide a solid foundation that can support the overall structure.
- Weight Distribution: Ensure that the weight of the divider is evenly distributed. This can be achieved by using a wider base or adding weight to the bottom of the divider, which helps prevent tipping.
Securing your room divider is essential for maintaining its stability. Here are some effective methods:
- Anchor to the Wall: If possible, anchor your divider to the wall using brackets or hooks. This provides additional support and prevents it from moving.
- Use a Weighted Base: Adding a weighted base can significantly enhance stability. Consider using sandbags, bricks, or specially designed weighted bases that blend with your decor.
- Adjustable Feet: Incorporate adjustable feet to your divider. This allows you to level the divider on uneven surfaces, ensuring it stands firmly.
A room divider can serve multiple purposes, adding both style and functionality to your space. Here are some ideas:
- Incorporate Shelving: Design your divider with built-in shelves to display books, plants, or decorative items. This not only adds functionality but also enhances the visual appeal of the divider.
- Add Hooks or Racks: Consider adding hooks or racks for hanging items like coats, bags, or accessories. This feature can be particularly useful in entryways or small rooms.
- Use as a Display Area: Transform your divider into a gallery space by using it to showcase artwork or photographs. This adds a personal touch while serving a practical purpose.
When designing your room divider, consider how the design can enhance its functionality:
- Height and Width: Ensure that the height and width are appropriate for your space. A taller divider can create privacy, while a shorter one can maintain an open feel.
- Open vs. Closed Design: Decide between an open design that allows light to pass through or a closed design that offers more privacy. Each has its benefits depending on your needs.
- Mobility: If you anticipate needing to move your divider frequently, consider adding wheels. This makes it easy to reposition the divider as needed.
In summary, by focusing on stability, securing methods, multi-functionality, and thoughtful design considerations, you can create a DIY room divider that not only looks great but also serves its purpose effectively. This approach ensures that your project will stand the test of time, providing both beauty and practicality in your living space.
Securing Your Divider Properly
When designing your DIY room divider, ensuring its stability is paramount. A well-secured divider not only enhances the aesthetic of your space but also guarantees safety, especially in high-traffic areas. Here, we explore various methods to effectively anchor your divider, ensuring it remains stable and functional in any environment.
Room dividers can serve multiple purposes, from creating privacy to adding a decorative touch. However, if they are not secured properly, they can become a hazard. Loose dividers may tip over, causing injury or damage, particularly in homes with children or pets. Therefore, understanding how to secure your divider is essential for both safety and longevity.
- Weighted Bases: One of the simplest methods is to use weighted bases. You can purchase or create bases that add stability to the bottom of your divider. This is particularly effective for lightweight materials.
- Wall Mounting: For a more permanent solution, consider wall-mounting your divider. This method involves attaching the divider securely to the wall using brackets or anchors, ensuring it remains upright.
- Floor Anchors: Using floor anchors can also provide additional stability. These anchors can be installed directly into the floor, keeping your divider firmly in place.
- Brackets and L-Braces: Utilizing brackets or L-braces can reinforce the structure of your divider. These can be attached at the joints where the divider meets the floor or wall, providing extra support.
When selecting a method to secure your room divider, consider the layout of your space and the materials used. For instance, if your divider is made of lightweight fabric, weighted bases may suffice. However, a heavier wooden divider may require wall mounting or floor anchors for optimal stability.
- Regular Checks: Periodically check your divider to ensure it remains secure. Over time, wear and tear can loosen anchors or brackets.
- Adjustments for Movement: If your divider is frequently moved, consider using portable anchors that can be easily adjusted or removed.
- Consider the Environment: If your divider is placed in a high-traffic area, ensure it is secured with more robust methods to withstand potential bumps or nudges.
In conclusion, securing your room divider is not just about aesthetics; it is a crucial aspect of ensuring safety and functionality. By choosing the right anchoring method and regularly checking its stability, you can enjoy a beautifully divided space without compromising on safety. Remember, a well-secured room divider can enhance your living environment while providing the necessary separation and style.
Making Your Divider Multi-Functional
When it comes to creating a room divider, functionality is just as important as aesthetics. By designing your divider to serve multiple purposes, you can enhance the usability of your space while maintaining a stylish appearance. This section explores various ways to incorporate shelving and hooks into your DIY room divider, ensuring it meets your needs without compromising on design.
A multi-functional room divider can significantly improve the efficiency of your space. It allows you to:
- Maximize Storage: Utilize vertical space by incorporating shelves that can hold books, plants, or decorative items.
- Enhance Organization: Hooks can be added for hanging coats, bags, or accessories, keeping your area tidy.
- Improve Aesthetics: A well-designed divider can serve as a focal point in your room, showcasing your style.
Adding shelves to your room divider not only enhances its functionality but also allows you to display personal items. Here are some tips:
- Select the Right Height: Consider the height of your shelves based on what you plan to store. Lower shelves are great for books, while higher ones can showcase decorative pieces.
- Use Open Shelving: Open shelves create an airy feel and allow light to pass through, making your space feel larger.
- Choose Complementary Materials: Ensure that the materials used for the shelves match or complement the overall design of your divider for a cohesive look.
Hooks are an excellent addition to any room divider, providing versatile storage solutions. Consider the following:
- Wall-Mounted Hooks: These can be installed directly onto the divider, perfect for hanging items like jackets or bags.
- Adjustable Hooks: Look for hooks that can be moved or repositioned depending on your needs, allowing for flexibility.
- Decorative Hooks: Choose stylish hooks that align with your decor theme; they can serve as both functional and decorative elements.
While it’s essential to ensure your divider is functional, it’s equally important to maintain its aesthetic appeal. Here are some strategies:
- Incorporate Color: Use paint or stain to give your divider a fresh look that matches your decor while ensuring it remains practical.
- Mix Materials: Combining wood with metal or glass can create a visually appealing contrast that enhances both style and durability.
- Personal Touches: Add personal items to your shelves or hooks, such as framed photos or unique decor pieces, to make the space feel inviting.
In conclusion, designing a multi-functional room divider can transform your space into a more organized and stylish area. By incorporating shelving and hooks, you can maximize functionality without sacrificing aesthetics. With thoughtful planning and creativity, your DIY project can serve as a practical solution that enhances your living environment.
Frequently Asked Questions
- What materials are best for a DIY room divider?
When it comes to crafting a DIY room divider, the best materials often include wood, fabric, and metal. Each material brings a unique aesthetic and functionality, so consider what suits your style and needs best!
- How can I choose the right design for my space?
Selecting the right design is key to enhancing your room’s vibe. Think about your current decor and whether you prefer a modern, rustic, or traditional look. A well-chosen design can make your space feel cohesive and inviting!
- What customization techniques can I use?
Customization is where the magic happens! You can use techniques like painting, stenciling, or even incorporating fabric to add a personal touch. These methods allow you to express your creativity and make the divider truly yours!
- How do I ensure my room divider is stable?
Stability is crucial for safety. Make sure to properly secure your divider using anchors or weights. This way, you can enjoy your stylish new addition without worrying about it tipping over!
- Can I make my room divider multi-functional?
Absolutely! Consider incorporating shelves or hooks into your design. This way, your divider can serve multiple purposes, like displaying decor or providing extra storage, all while looking fabulous!
