This article delves into creative and budget-friendly methods to create room dividers, offering practical tips and ideas to enhance your space without breaking the bank. Whether you’re looking to create privacy, separate living areas, or simply add some style to your home, there are numerous DIY options available that won’t strain your wallet.
What Are the Benefits of Using Room Dividers?
- Privacy: Room dividers can provide a sense of seclusion in shared spaces.
- Space Definition: They help in defining different areas, making a room feel larger and more organized.
- Aesthetic Appeal: A well-designed divider can enhance the visual appeal of your home.
What Materials Can You Use for DIY Room Dividers?
Selecting the right materials is crucial for making an effective room divider. Here are some popular options:
- Fabric: Lightweight and customizable, fabric dividers can be easily manipulated.
- Wood: Provides a sturdy and permanent solution; consider repurposing old furniture.
- Plants: Living dividers can bring nature indoors and improve air quality.
Fabric Room Dividers: Affordable and Versatile
Fabric dividers are not only affordable but also versatile. By using curtains or fabric panels, you can create a soft and inviting atmosphere. Consider the following:
- How to Choose the Right Fabric for Your Divider? Look for durable materials that complement your decor. Consider colors and patterns that enhance your space.
- Creative Ways to Hang Fabric Dividers: Use tension rods, ceiling hooks, or even decorative curtain tracks for easy installation.
Wooden Room Dividers: A Sturdy Option
Wooden dividers offer a more permanent solution. You can repurpose old furniture or pallets to create stylish wooden dividers. This option is not only eco-friendly but also adds a rustic charm to your home.
How to Use Plants as Natural Dividers?
Plants can serve as beautiful natural dividers, adding greenery and life to your space. Here’s how to effectively use them:
- Choosing the Right Plants for Your Space: Opt for indoor plants that thrive in your environment and can grow tall enough to provide separation.
- Arranging Plants for Maximum Impact: Create a layered look by varying plant heights and using attractive pots.
How to Incorporate Bookshelves as Dividers?
Bookshelves are functional and stylish room dividers. They not only separate spaces but also serve as a display for your favorite books and decor. Consider these points:
- Types of Bookshelves That Work Best: Open bookshelves allow light to pass through, while closed bookshelves provide more privacy.
- Styling Your Bookshelf Divider: Use decorative items, plants, and books to create a visually appealing display.
What Are Some Budget-Friendly DIY Ideas for Room Dividers?
If you’re on a tight budget, there are plenty of DIY options available. Here are some creative ideas:
- Using Pallets for Rustic Dividers: Disassemble pallets and reassemble them to create a unique look.
- Crafting a Divider from Old Doors: Sand, paint, and hinge old doors to create stunning dividers that add character to your space.
What Are the Benefits of Using Room Dividers?
Room dividers are more than just functional elements in a space; they are versatile tools that can transform the way we interact with our environments. Understanding the benefits of using room dividers can help you make informed decisions about incorporating them into your home or office.
- Enhanced Privacy: One of the primary advantages of room dividers is their ability to create private spaces. Whether you live in a studio apartment or a large open office, dividers can help you carve out personal areas for work, relaxation, or socializing.
- Space Separation: Room dividers effectively separate different functional areas within a room. This is especially useful in multifunctional spaces, allowing you to designate areas for work, play, or sleep without the need for permanent walls.
- Aesthetic Appeal: Beyond functionality, room dividers can significantly enhance the visual appeal of a space. With various styles, colors, and materials available, you can choose dividers that complement your existing decor and add a touch of style.
- Flexibility: Room dividers offer a level of flexibility that fixed walls cannot provide. They can be moved, reconfigured, or even removed altogether, allowing you to adapt your space to your changing needs.
- Noise Reduction: In busy environments, such as open-plan offices or shared living spaces, room dividers can help reduce noise levels, creating a more peaceful atmosphere for concentration and relaxation.
- Cost-Effective Solutions: Compared to the expense of construction, room dividers present a budget-friendly alternative for redefining spaces without the need for major renovations.
By understanding these benefits, you can better assess which type of room divider best suits your needs. Whether you’re looking for something temporary, like fabric curtains, or a more permanent solution, such as wooden screens, the possibilities are endless.
Moreover, room dividers can be tailored to fit your personal style and the specific requirements of your space. For instance, if you desire a softer ambiance, fabric dividers can introduce warmth and texture, while wooden dividers can evoke a sense of rustic charm. Additionally, incorporating plants as dividers can bring a touch of nature indoors, enhancing both aesthetics and air quality.
Ultimately, the choice of room divider will depend on your individual preferences, the layout of your space, and your budget. By exploring the various options available, you can create a harmonious environment that meets your functional and aesthetic needs.
What Materials Can You Use for DIY Room Dividers?
When it comes to creating a functional and aesthetically pleasing space, selecting the right materials for your DIY room divider is essential. The materials you choose not only affect the overall look and feel of the divider but also its durability and functionality. Here, we will explore various options that cater to different styles and budgets, ensuring you find the perfect fit for your home.
Fabric dividers are an excellent choice for those seeking an affordable and flexible option. They can easily be customized to match your decor and can be made from a variety of materials, including cotton, linen, or even sheer fabrics. Here are some popular fabric options:
- Curtains: These can be hung from a rod or track system, allowing for easy opening and closing.
- Fabric Panels: Stretched over a frame, they can add a modern touch to your space.
- Quilts: For a cozy, bohemian vibe, consider using colorful quilts as dividers.
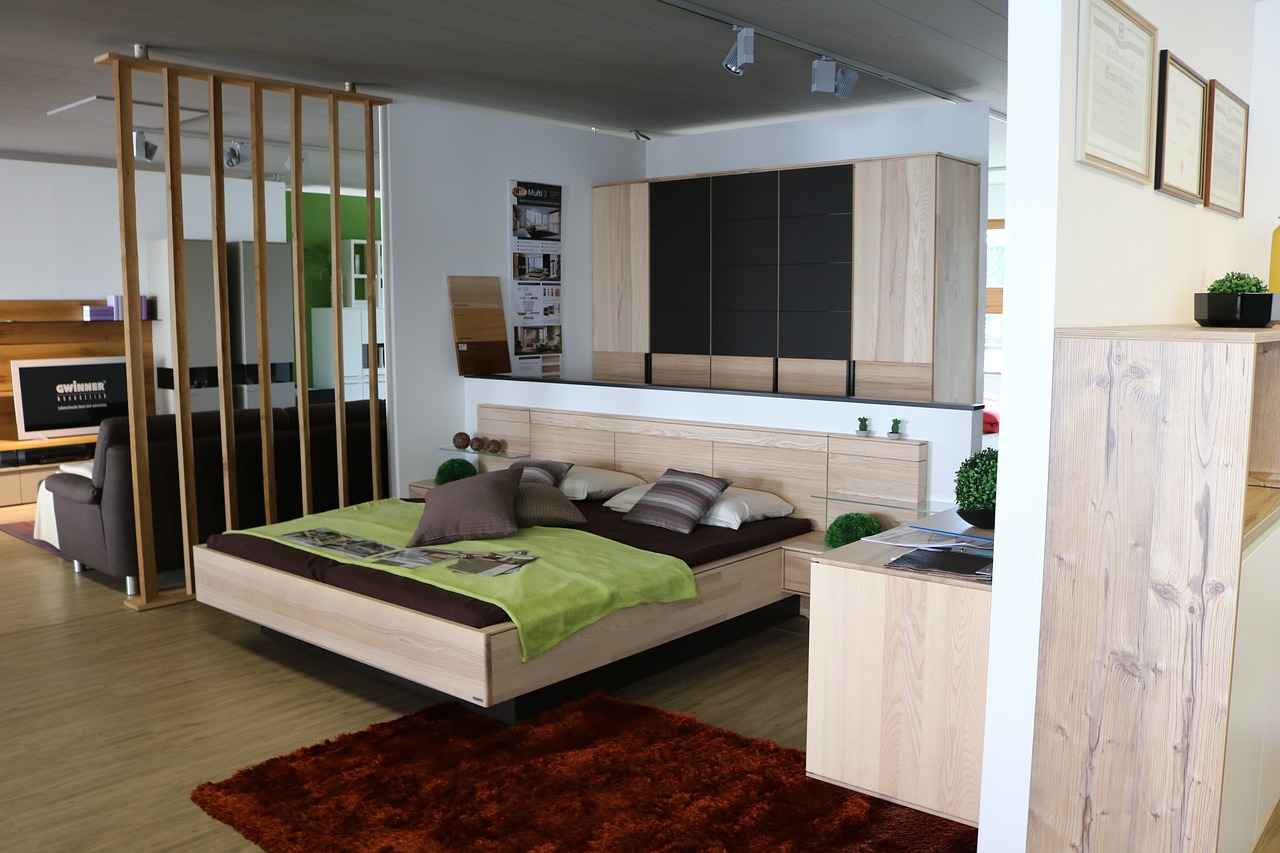
If you’re looking for something more permanent, wooden dividers offer a robust solution. They can be crafted from reclaimed wood, pallets, or even old furniture. Here are some ideas:
- Pallets: Disassemble and reassemble pallets to create a rustic look.
- Old Doors: Sand down and paint old doors to transform them into stylish dividers.
- Bookshelves: Use tall bookshelves to create a functional divider while displaying your favorite books.
For those who love greenery, plants can serve as beautiful and natural dividers. They not only enhance the aesthetic of your space but also improve air quality. Consider the following:
- Tall Plants: Use large potted plants like fiddle leaf figs or snake plants for effective separation.
- Hanging Plants: Create a vertical garden that acts as a living divider.
- Plant Shelves: Incorporate shelves filled with various plants to add depth and dimension.
Room screens and partitions are another versatile option for creating divisions in your space. They come in various styles, from traditional folding screens to modern, minimalist designs. Here are some benefits:
- Easy to Move: Screens can easily be relocated to change the layout of your space.
- Variety of Designs: Choose from intricate patterns to solid colors that fit your style.
- Space-Saving: Many screens can be folded away when not in use.
While there are many great materials for room dividers, some should be approached with caution:
- Cheap Plastics: These can look unappealing and may not provide the durability you need.
- Heavy Materials: Avoid materials that are too heavy to move or install easily.
- Non-Durable Fabrics: Steer clear of materials that may wear out quickly or are difficult to clean.
In conclusion, the materials you choose for your DIY room divider can significantly impact both the functionality and aesthetic of your space. By considering options like fabric, wood, plants, and screens, you can create a divider that not only meets your needs but also enhances your home’s decor.
Fabric Room Dividers: Affordable and Versatile
Fabric room dividers are an innovative solution for those looking to create distinct areas within a space without the hefty price tag associated with traditional dividers. They are not only lightweight but also highly customizable, making them a popular choice for both temporary and permanent setups. Whether you are looking to add a touch of elegance or simply want to delineate spaces in a functional manner, fabric dividers can help you achieve your vision.
Fabric dividers offer several advantages over more rigid options. They are easy to install and can be moved or adjusted with minimal effort. Additionally, fabric dividers can serve multiple purposes, such as blocking light, providing privacy, or simply enhancing the aesthetic appeal of your space. Their versatility allows you to switch out fabrics according to seasonal trends or personal preferences, making them a dynamic addition to any room.
One of the simplest ways to create a fabric divider is by using curtains or fabric panels. Here are some effective methods:
- Ceiling-mounted tracks: Install a track system on the ceiling to hang curtains. This allows for smooth movement and easy opening or closing.
- Tension rods: For a no-drill solution, use tension rods to secure fabric panels between walls or in window frames.
- Freestanding frames: Create a simple frame using lightweight materials, then drape fabric over it for a portable divider.
When selecting fabric for your dividers, consider the following:
- Durability: Choose fabrics that can withstand wear and tear, especially in high-traffic areas.
- Opacity: Depending on your need for privacy, select sheer fabrics for a light, airy feel or thicker materials for more seclusion.
- Color and texture: Opt for colors and textures that complement your existing decor, enhancing the overall ambiance of the room.
Beyond functionality, fabric dividers can serve as a decorative element. Here are some creative styling ideas:
- Add embellishments: Consider adding fringe, tassels, or decorative trims to enhance the visual interest of your fabric.
- Layering: Layer different fabrics for a rich, textured look that can add depth to your space.
- Artwork: Use fabric with printed designs or patterns that resonate with your personal style, turning your divider into a statement piece.
To ensure your fabric dividers remain in good condition, regular maintenance is essential:
- Cleaning: Depending on the fabric, follow care instructions for washing or dry cleaning to keep them looking fresh.
- Storage: If you change out your dividers seasonally, store them in a cool, dry place to avoid mildew and damage.
- Repurposing: When it’s time for a change, consider repurposing old fabric into cushions or throws, minimizing waste and maximizing style.
In summary, fabric room dividers are a cost-effective and versatile option for anyone looking to enhance their living space. With a variety of materials and styles available, you can easily create a soft, inviting atmosphere that meets your specific needs.
How to Choose the Right Fabric for Your Divider?
When it comes to creating an effective room divider, choosing the right fabric is essential. The fabric not only impacts the overall aesthetic of your space but also determines the durability and functionality of the divider. Below, we explore key considerations to help you select the perfect material for your project.
The fabric you choose for your room divider plays a crucial role in how the space feels and functions. A well-selected fabric can enhance your decor while providing necessary privacy. Here are some factors to consider:
- Durability: Consider how often the divider will be used. Fabrics like canvas or polyester offer durability, making them suitable for high-traffic areas.
- Color: The color of your fabric should complement your existing decor. Lighter colors can make a space feel larger, while darker shades can add warmth and intimacy.
- Texture: Texture can drastically change the feel of a room. Soft fabrics like velvet create a cozy atmosphere, while smoother materials like silk can add elegance.
Exploring different fabric options can help you find the right fit for your needs. Here are some popular choices:
- Cotton: This versatile fabric is breathable and easy to maintain. It comes in various colors and patterns, making it a great choice for casual settings.
- Linen: Known for its natural texture, linen adds a sophisticated touch. However, it wrinkles easily, so consider its placement carefully.
- Polyester: A synthetic alternative, polyester is durable and resistant to stains, making it ideal for families with children or pets.
- Sheer Fabrics: If you want to maintain light flow while creating a division, sheer fabrics like organza or voile can be perfect. They offer a soft separation without blocking light.
To ensure your room divider seamlessly integrates with your decor, consider the following:
- Complementary Colors: Use a color wheel to find shades that work well together. A bold color can serve as a statement piece, while neutral tones can blend in.
- Patterns: If your room features intricate designs, opt for solid fabrics to avoid clashing. Conversely, a patterned fabric can add interest to a minimalist space.
- Layering: Consider layering fabrics for added depth. For instance, combine a solid base with a patterned overlay for a unique look.
Before committing to a fabric, it’s advisable to test it out. Here are some practical tips:
- Swatches: Request fabric swatches to see how they look in your space. Observe how they interact with light at different times of the day.
- Durability Tests: Check the fabric’s durability by gently pulling or rubbing it to see how it holds up.
- Maintenance: Consider how easy it is to clean the fabric. Some materials may require dry cleaning, while others can be machine washed.
By taking the time to consider these factors, you can select a fabric that not only enhances your decor but also meets your practical needs. A well-chosen fabric will elevate your room divider, making it a functional and stylish addition to your home.
Creative Ways to Hang Fabric Dividers
When it comes to creating flexible spaces in your home or office, hanging fabric dividers offer a versatile and cost-effective solution. These dividers not only enhance privacy but also add a decorative touch to your environment. In this section, we will explore , making the installation process easy and efficient.
Fabric dividers are lightweight, customizable, and can be easily adapted to suit any room style. They allow for light filtration while providing a sense of separation. Additionally, fabric dividers can be changed seasonally or according to your mood, offering endless possibilities for your space.
There are several innovative methods to hang fabric dividers, ensuring that your installation is both functional and aesthetically pleasing. Here are some popular options:
- Tension Rods: One of the simplest solutions is to use tension rods. These rods can be easily adjusted to fit any space between walls or ceilings, making them perfect for temporary or permanent installations. Simply slide your fabric onto the rod and secure it in place.
- Ceiling Hooks: For a more permanent option, consider using ceiling hooks. By installing hooks in the ceiling, you can hang fabric panels or curtains to create a beautiful divider that can be drawn open or closed as needed.
- Track Systems: If you want a more sophisticated setup, a track system allows for smooth movement of fabric panels. This method is ideal for larger spaces and can be customized to fit your specific needs.
- Wall-Mounted Rods: Wall-mounted rods provide a sturdy option for hanging fabric. You can choose decorative rods that complement your decor, creating a stylish focal point in the room.
Selecting the appropriate fabric is crucial for both functionality and aesthetics. Consider the following factors:
- Durability: Choose fabrics that withstand wear and tear, especially if they will be moved frequently.
- Color and Texture: Opt for colors and textures that enhance your room’s theme. Light fabrics can make a space feel airy, while darker tones can create a cozy atmosphere.
- Opacity: Depending on your need for privacy, select fabrics that range from sheer to opaque.
Absolutely! Here are some DIY tips to enhance your hanging fabric divider project:
- Mix and Match Fabrics: Combine different fabrics for a unique look. Use patterned fabrics alongside solid colors to create visual interest.
- Use Clips or Rings: If you prefer a more flexible setup, consider using clips or rings to attach your fabric to the rod. This allows for easy removal and cleaning.
- Personalize with Accessories: Add decorative elements such as tassels, beads, or trims to your fabric dividers for a personalized touch.
In summary, hanging fabric dividers can be achieved through various innovative methods such as tension rods, ceiling hooks, and track systems. By choosing the right materials and employing creative DIY tips, you can transform your space into a stylish and functional area without spending a fortune. Whether you are looking to create privacy, define spaces, or simply enhance your decor, fabric dividers are an excellent choice.
Wooden Room Dividers: A Sturdy Option
When it comes to creating distinct areas in your home, wooden room dividers stand out as a durable and aesthetically pleasing choice. These dividers not only enhance the visual appeal of your space but also provide a sense of permanence that other materials may lack. In this section, we will explore how to effectively repurpose old furniture or pallets to craft stylish wooden dividers that suit your decor and budget.
Wooden dividers offer numerous advantages. They are sturdy, providing a reliable barrier between spaces. Unlike temporary solutions, wooden dividers can withstand the test of time, making them a worthwhile investment. Additionally, wood brings a warm, natural feel to any room, enhancing its overall ambiance.
If you have old furniture lying around, consider giving it a new life as a room divider. Here are some ideas:
- Bookshelves: Old bookshelves can be transformed into dividers by placing them strategically in your space. You can leave them open for a light feel or paint them to match your decor.
- Doors: Repurposed doors can create stunning dividers. Sand them down, paint them a vibrant color, or leave them rustic to add character to your room.
- Dressers: A tall dresser can serve as a unique divider while offering additional storage. Style it with decorative items to enhance its appeal.
Pallets are another fantastic option for creating wooden dividers. They are often available at little to no cost and can be easily transformed. Here’s how to make the most of pallets:
- Disassemble and Reassemble: Start by taking apart the pallets. You can then reassemble them into a new configuration that suits your space.
- Sand and Stain: Sand the wood to remove any rough edges, then apply a stain or paint to match your interior design.
- Attach to a Frame: For added stability, consider attaching the pallet to a frame or securing it to the floor.
When designing your wooden divider, consider the following:
- Height and Width: Ensure that the divider is tall enough to provide privacy without overwhelming the space. A width that can easily fit within the area is also crucial.
- Style Consistency: Match the style of your divider with the existing decor. Whether your home is modern, rustic, or traditional, choose wood finishes that complement your overall theme.
- Functionality: Think about the purpose of your divider. Will it serve as a backdrop for plants or artwork? Ensure it is functional as well as decorative.
To keep your wooden dividers looking their best, regular maintenance is key. Dust them frequently and apply wood polish as needed to maintain their luster. If your divider is exposed to sunlight, consider placing it in a shaded area to prevent fading.
In summary, wooden dividers can be an excellent addition to your home, providing both functionality and style. By repurposing old furniture or pallets, you can create a unique and sturdy room divider that enhances your living space without breaking the bank.
How to Use Plants as Natural Dividers?
Plants are not only essential for our environment but also serve as stunning decor elements in our homes. One of the most creative ways to utilize plants is by using them as natural room dividers. This approach not only adds a touch of greenery but also enhances the overall ambiance of your space. In this article, we will explore the various ways to effectively use plants as natural dividers, ensuring your home feels both inviting and organized.
Using plants as dividers offers numerous advantages:
- Privacy: Tall plants can create a sense of seclusion in open spaces.
- Aesthetic Appeal: Greenery adds color and life, making spaces more visually appealing.
- Improved Air Quality: Plants can purify the air, contributing to a healthier environment.
- Flexibility: Unlike traditional dividers, plants can be easily moved or rearranged.
Not all plants are suitable for use as dividers. When selecting plants, consider the following:
- Size: Opt for taller plants like Fiddle Leaf Figs or Rubber Plants for effective separation.
- Light Requirements: Ensure the plants you choose can thrive in your specific lighting conditions.
- Maintenance: Select plants that fit your lifestyle; some require more care than others.
The arrangement of plants is crucial for creating an effective divider. Here are some tips to enhance your display:
- Layering: Use plants of varying heights to create depth. Place taller plants at the back and shorter ones in front.
- Grouping: Cluster plants together in groups of three or five for a more natural look.
- Containers: Use decorative pots that complement your decor style. Consider using hanging planters to save floor space.
To keep your plant dividers looking their best, regular maintenance is essential:
- Watering: Ensure your plants receive adequate moisture without overwatering.
- Pruning: Trim any dead or yellowing leaves to encourage new growth.
- Fertilizing: Feed your plants with appropriate fertilizers during the growing season.
Here are some innovative ways to incorporate plants as dividers in your home:
- Plant Shelves: Install shelves filled with various plants to create a living wall.
- Room Corners: Place large potted plants in corners to define spaces.
- Indoor Gardens: Create a mini indoor garden with a variety of plants that can act as a natural barrier.
In conclusion, using plants as natural dividers is a beautiful and practical way to enhance your living space. With the right selection and arrangement of plants, you can create a vibrant atmosphere that not only looks great but also promotes well-being. Embrace the beauty of nature in your home and enjoy the benefits that come with it.
Choosing the Right Plants for Your Space
When it comes to creating distinct areas within your home, using plants as natural dividers can be an innovative and aesthetically pleasing solution. However, not all plants are suitable for this purpose. Understanding which plants thrive indoors and can effectively serve as dividers is essential for achieving the desired look and functionality.
Using plants as dividers offers several benefits. They not only add a touch of nature but also improve air quality and create a calming atmosphere. Moreover, plants can be arranged to suit various design styles, making them a versatile choice for any space.
- Fiddle Leaf Fig (Ficus lyrata): This popular indoor plant features large, glossy leaves that can grow tall, making it an excellent choice for creating a green wall effect.
- Rubber Plant (Ficus elastica): Known for its attractive dark green leaves, the Rubber Plant can reach impressive heights and works well in larger spaces.
- Snake Plant (Sansevieria): This hardy plant is perfect for beginners. Its upright growth makes it ideal for narrow spaces, providing a modern look.
- Pothos (Epipremnum aureum): With its trailing vines, Pothos can be used in hanging planters to create a layered divider effect.
- Peace Lily (Spathiphyllum): Not only does it produce beautiful white flowers, but its lush foliage also provides a soft barrier between spaces.
When selecting plants for your space, consider the following:
- Light Requirements: Ensure the plants you choose can thrive in the lighting conditions of your room, whether it’s bright, indirect light or low-light conditions.
- Size and Growth Habit: Consider how tall or wide the plants will grow. Taller plants can provide more privacy, while shorter plants may serve as subtle dividers.
- Maintenance Needs: Choose plants that fit your lifestyle. Some plants require more care than others, so it’s important to select those that match your ability to maintain them.
The arrangement of your plants can significantly influence the effectiveness of your divider. Here are some tips:
- Layering: Use a variety of plant heights to create depth. Taller plants should be placed in the back, with medium and smaller plants in front.
- Grouping: Group plants of similar care requirements together to simplify maintenance and create a cohesive look.
- Using Planters: Consider decorative planters that complement your interior design. This adds an extra layer of style to your plant divider.
To ensure that your plant divider blends seamlessly with your decor, think about the overall color scheme and style of your space. You can choose plants with leaves that complement your furniture or decor, or opt for planters that match your existing color palette.
In conclusion, using plants as natural dividers is a fantastic way to enhance your home’s aesthetics while providing functionality. By carefully selecting the right plants and arranging them thoughtfully, you can create beautiful and effective dividers that bring life to your space.
Arranging Plants for Maximum Impact
Creating an inviting atmosphere within your home can be achieved through the thoughtful arrangement of plants. Not only do plants enhance the aesthetic appeal of your space, but they also contribute to a sense of tranquility and well-being. In this section, we will explore effective strategies for arranging plants to maximize their impact as natural dividers.
The way you arrange your plants can significantly influence the overall visual appeal of your room. A well-planned plant display can create a harmonious balance, drawing the eye and enhancing the ambiance. Here are some key factors to consider:
- Height Variation: Incorporate plants of varying heights to create depth and interest. Taller plants can serve as focal points, while shorter ones can fill in gaps.
- Color Coordination: Choose plants with complementary colors to create a cohesive look. Consider the colors of your walls and furniture when selecting plant varieties.
- Texture Contrast: Mixing plants with different leaf shapes and textures can add visual intrigue. For example, pairing a spiky succulent with a soft-leaved fern can create a striking contrast.
To achieve a balanced and attractive plant display, follow these practical tips:
- Group Plants in Odd Numbers: Arranging plants in groups of three or five tends to be more visually appealing than even-numbered groupings.
- Use Plant Stands: Elevate some plants using stands to create layers. This adds dimension to your display and allows for better visibility.
- Consider Lighting: Ensure that your plants receive adequate light. Position them according to their light requirements, placing sun-loving plants near windows and shade-tolerant ones in darker corners.
Plants can effectively delineate spaces within a room, creating distinct zones for different activities. Here’s how to use plants as natural dividers:
- Line Up Tall Plants: Use tall plants like fiddle leaf figs or snake plants to create a visual barrier between areas.
- Layer with Smaller Plants: Place smaller plants in front of taller ones to soften the transition between spaces and add lushness.
- Utilize Shelving: Incorporate plants on shelves to create vertical layers, allowing for a dynamic display that also serves as a divider.
To keep your plant arrangement looking its best, regular maintenance is essential. Here are some tips:
- Watering: Ensure your plants are watered according to their specific needs. Overwatering or underwatering can lead to unhealthy plants.
- Pruning: Regularly prune dead leaves and spent flowers to encourage growth and maintain an attractive appearance.
- Fertilizing: Use appropriate fertilizers to promote healthy growth and vibrant foliage.
In conclusion, arranging plants thoughtfully can transform your space into a beautiful sanctuary. By considering height, color, and texture, and following practical tips for maintenance and zoning, you can create a stunning plant display that serves as both a decorative element and a functional room divider.
How to Incorporate Bookshelves as Dividers?
When it comes to maximizing space in your home, bookshelves can serve as both functional and stylish room dividers. They allow you to create distinct areas within a larger room while also displaying your favorite books and decorative items. This article will delve into the various ways you can effectively use bookshelves as dividers, ensuring your space remains organized and visually appealing.
Using bookshelves as dividers offers numerous benefits. Firstly, they provide privacy by separating spaces without completely closing them off. Secondly, they can enhance the aesthetic appeal of your room by adding character and charm. Lastly, they allow for easy access to your books and decor, making them a practical choice for any home.
Not all bookshelves are created equal when it comes to serving as room dividers. Here are a few types that work particularly well:
- Open Bookshelves: These allow light to flow through and create a sense of openness, making them ideal for smaller spaces.
- Closed Bookshelves: Offering more privacy, these can be used to store items out of sight, creating a cleaner look.
- Corner Bookshelves: Perfect for utilizing unused corners, these can help define areas in an open-concept layout.
A well-styled bookshelf can significantly enhance your room’s aesthetic. Here are some tips for arranging books and decorative items:
- Mix Books with Decor: Combine books with decorative items like vases, picture frames, and plants to create visual interest.
- Color Coordination: Arrange books by color to create a visually appealing gradient effect.
- Layering: Use varying heights of items to create depth and dimension on your shelves.
Positioning your bookshelf effectively is crucial for maximizing its impact. Consider these strategies:
- Center Stage: Place the bookshelf in the middle of the room to create a focal point.
- Against a Wall: If you prefer a more subtle approach, positioning the bookshelf against a wall can still define spaces without overwhelming the room.
- Floating Dividers: For a modern touch, consider using floating shelves that can serve as dividers while maintaining an airy feel.
Adding lighting can elevate the look and functionality of your bookshelf divider. Here are some ideas:
- LED Strip Lights: Install LED lights along the edges of the shelves for a contemporary look.
- Spotlights: Use small spotlights to highlight specific decor pieces or sections of your bookshelf.
- Table Lamps: Place a stylish lamp on top of the bookshelf to add warmth and ambiance to the space.
In conclusion, incorporating bookshelves as dividers in your home is a cost-effective and stylish solution to defining spaces. By choosing the right type of bookshelf, styling it thoughtfully, and considering its position and lighting, you can enhance both the functionality and aesthetic appeal of your living area.
Types of Bookshelves That Work Best
When it comes to using bookshelves as room dividers, it’s essential to recognize that not all bookshelves are created equal. The style and design of a bookshelf can significantly impact its functionality as a divider, as well as its aesthetic contribution to your space. In this section, we will explore various types of bookshelves, including their features and how they can effectively serve as dividers in your home.
Open bookshelves are characterized by their lack of doors or panels, allowing for easy visibility of books and decorative items. These shelves can create a sense of openness while still providing a visual barrier between spaces. They are perfect for smaller rooms, as they help maintain a light and airy atmosphere.
- Advantages: Open bookshelves can make a room feel larger and more connected, allowing light to flow through.
- Styling Options: You can style them with colorful books, plants, and decorative objects to enhance their visual appeal.
Closed bookshelves, on the other hand, come with doors or panels that conceal the contents inside. These shelves provide a more structured look and can help reduce visual clutter, making them ideal for more formal spaces.
- Advantages: They protect your books and items from dust and damage, offering a cleaner look.
- Styling Options: You can use the exterior of closed bookshelves for displaying art or personal items, while keeping the interior organized.
Corner bookshelves are designed to fit snugly into the corner of a room, making them an excellent choice for maximizing space. They can serve as both a functional storage solution and a stylish divider, effectively separating areas without taking up too much floor space.
- Advantages: They utilize often-overlooked areas of a room and can create cozy nooks.
- Styling Options: Place them in a reading corner or next to a workspace to delineate these areas visually.
Floating bookshelves are mounted directly onto the wall, creating a unique and modern look. These shelves can be arranged in various configurations, allowing for creative designs that act as room dividers without overwhelming the space.
- Advantages: They create the illusion of floating books, adding a contemporary touch to your decor.
- Styling Options: Use them to display art or small plants alongside your books for a personalized touch.
When selecting a bookshelf to use as a room divider, consider the following factors:
- Space and Size: Ensure the bookshelf fits well within the dimensions of your room without overwhelming it.
- Functionality: Determine whether you need more storage or if you want to use it primarily for decoration.
- Style Cohesion: Choose a bookshelf that complements the existing decor of your space, whether it’s modern, rustic, or traditional.
In conclusion, incorporating bookshelves as room dividers can enhance both the functionality and aesthetic of your space. By understanding the different types of bookshelves available and their unique benefits, you can make an informed choice that suits your needs and style.
Styling Your Bookshelf Divider
When it comes to enhancing the aesthetic appeal of your room, a well-styled bookshelf can serve as a stunning focal point. Not only does it provide a practical storage solution for your books, but it also allows for creative expression through the arrangement of decorative items. In this guide, we will explore effective tips for styling your bookshelf divider to maximize its visual impact.
A beautifully styled bookshelf can transform a mundane space into a vibrant one. It allows you to showcase your personality and interests while maintaining a cohesive look in your room. A well-organized bookshelf can also create a sense of order, making your space feel more inviting.
Before diving into styling, consider the type of bookshelf that best fits your space. Options include:
- Open Shelving: Great for displaying decorative items alongside your books.
- Closed Cabinets: Ideal for a cleaner look, hiding clutter while still allowing for display.
- Corner Shelves: Perfect for maximizing space in smaller rooms.
When it comes to arranging books, consider the following strategies:
- Color Coordination: Organizing books by color can create a visually striking effect.
- Size Variation: Mix tall and short books to create depth and interest.
- Horizontal Stacking: Use horizontal stacks to break the monotony of vertical rows and create platforms for decorative items.
Incorporating decorative items is essential for enhancing the visual appeal of your bookshelf. Here are some ideas:
- Use Plants: Adding greenery can bring life to your bookshelf. Consider small potted plants or trailing vines.
- Artwork and Frames: Displaying small pieces of art or framed photos can personalize your space.
- Unique Objects: Incorporate items like sculptures, globes, or vintage finds to add character.
Achieving balance is crucial for a visually appealing bookshelf. Here are some tips:
- Symmetry: Create symmetry by placing similar items on either side of the shelf.
- Vary Heights: Ensure a mix of heights among books and decorative items to create visual interest.
- Negative Space: Don’t overcrowd your shelves; leave some space empty to avoid a cluttered look.
Once you have styled your bookshelf, it’s important to maintain its look. Regularly dust your books and decorative items, and rearrange as necessary to keep the display fresh. Consider seasonal changes, swapping out items or colors to keep it dynamic.
In conclusion, styling your bookshelf divider is not just about storing books; it’s an opportunity to showcase your taste and creativity. By carefully selecting your bookshelf, arranging your books thoughtfully, and incorporating decorative elements, you can create a stunning display that enhances your room’s aesthetic and reflects your personal style.
What Are Some Budget-Friendly DIY Ideas for Room Dividers?
Creating a room divider on a budget can be both a fun and rewarding project. With a little creativity and some basic materials, you can transform your space without spending a fortune. Here are some budget-friendly DIY ideas that will help you achieve the desired separation in your living area.
- Pallet Projects: Repurposing wooden pallets is an excellent way to create a rustic room divider. You can easily disassemble pallets and reassemble them into various designs. Simply sand the wood for a smoother finish, and consider painting or staining them to match your decor.
- Old Doors: Instead of discarding old doors, consider giving them a new life as a stylish divider. With some sanding, painting, or even adding decorative hinges, old doors can add character to your space. Hang them using sturdy brackets or hinges to create a movable divider.
- Fabric Panels: Fabric is a versatile option for creating soft room dividers. Use curtains or large fabric panels hung from a tension rod or a decorative curtain track. This method allows for flexibility, as you can easily open or close the divider as needed.
- Bookshelves: An old bookshelf can serve as a functional room divider while also showcasing your favorite books and decor items. Opt for an open bookshelf design to maintain a sense of openness while still providing separation.
- Hanging Plants: Utilize hanging planters to create a natural and vibrant divider. Choose trailing plants to create a lush effect. This not only divides the space but also adds a touch of greenery and life to your room.
- DIY Screens: Crafting a folding screen from cardboard or wood can be a straightforward project. Paint or cover the panels with fabric or wallpaper to match your decor. This option is lightweight and can be easily moved around your space.
To ensure your DIY room divider serves its purpose effectively, consider the following tips:
- Measure Your Space: Before starting your project, measure the area where you plan to place the divider. This will help you determine the size and scale of your design.
- Choose the Right Materials: Select materials that not only fit your budget but also complement your existing decor. Consider durability and maintenance when making your choice.
- Incorporate Lighting: If possible, integrate lighting elements into your divider. String lights or LED strips can enhance the ambiance of your space while providing functionality.
Finding the right inspiration for your DIY room divider can make all the difference. Here are some places to look:
- Online Platforms: Websites like Pinterest and Instagram are treasure troves of DIY ideas. Search for terms like “room divider DIY” or “budget room decor” to find creative solutions.
- Home Improvement Stores: Visiting local home improvement stores can provide you with material ideas and inspiration. Many stores also offer workshops on DIY projects.
- DIY Blogs and YouTube Channels: There are countless blogs and YouTube channels dedicated to home improvement and DIY projects. These resources often provide step-by-step guides and tips.
With these budget-friendly DIY ideas, you can create a unique and functional room divider that enhances your living space without straining your finances. Embrace your creativity and enjoy the process of transforming your home!
Using Pallets for Rustic Dividers
Pallets are an excellent choice for creating rustic room dividers that not only enhance the aesthetic appeal of your space but also provide an eco-friendly solution. By repurposing pallets, you can create unique dividers that reflect your personal style without spending a fortune. In this guide, we will explore how to effectively disassemble and reassemble pallets to create stunning room dividers.
Using pallets for room dividers comes with several benefits:
- Cost-Effective: Pallets are often available for free or at a low cost, making them an affordable option.
- Customizable: You can easily modify the size and design to fit your specific space requirements.
- Eco-Friendly: Repurposing pallets reduces waste and is a sustainable choice for home decor.
- Rustic Charm: The natural wood finish of pallets adds a warm, rustic touch to any room.
Before you can create your divider, you need to disassemble the pallets. Here’s how:
- Gather Your Tools: You will need a pry bar, hammer, and safety goggles.
- Remove the Slats: Carefully pry apart the slats from the base of the pallet, being cautious not to damage the wood.
- Sand the Wood: Once disassembled, sand the wood pieces to remove any rough edges or splinters.
After disassembling, it’s time to reassemble the pallets into a divider:
- Plan Your Design: Decide on the height and width of your divider. Consider whether you want it to be a full wall or a partial divider.
- Assemble the Frame: Use sturdy wood screws to connect the pallet slats together. You can create a frame by using additional wood pieces for support.
- Finish the Surface: Apply a wood stain or paint to match your decor. This step is optional but can enhance the overall look.
Once your pallet divider is assembled, consider these creative ideas to enhance its look:
- Incorporate Shelves: Add small shelves to display decorative items or plants.
- Hang Curtains: For added privacy, consider hanging lightweight curtains from the divider.
- Use String Lights: String lights can create a cozy atmosphere, especially in the evenings.
To ensure your pallet divider remains in good condition:
- Regular Cleaning: Dust your divider regularly and clean any stains promptly.
- Inspect for Damage: Check for any loose screws or damaged wood and repair as necessary.
By following these steps, you can successfully transform pallets into a stylish and functional room divider that adds character to your home. With a little creativity and effort, your rustic divider will serve as a beautiful focal point in your living space.
Crafting a Divider from Old Doors
can transform your living space while adding a unique character to your home. With a bit of creativity and effort, you can repurpose old doors into stunning dividers that not only serve a functional purpose but also enhance the aesthetic appeal of your rooms.
Using old doors as room dividers is an excellent choice for several reasons:
- Cost-effective: Repurposing old doors is a budget-friendly option compared to purchasing new dividers.
- Unique Character: Each door has its own history and charm, adding personality to your space.
- Versatility: Old doors can be painted or stained to match your decor, making them a customizable solution.
Before you can use old doors as dividers, it’s essential to prepare them properly:
- Cleaning: Start by cleaning the door thoroughly to remove any dirt or grime. Use a mild detergent and water, and let it dry completely.
- Sanding: Sand the surface to smooth out any rough spots. This step is crucial if you plan to paint the door, as it helps the paint adhere better.
- Repairing: Check for any damages, such as cracks or loose hinges, and make necessary repairs to ensure stability.
Once your doors are clean and repaired, it’s time to give them a fresh look:
- Choosing the Right Paint: Select a paint that complements your interior design. Consider using chalk paint for a matte finish or a glossy enamel for a more polished look.
- Applying the Paint: Use a brush or roller to apply the paint evenly. Multiple coats may be necessary for full coverage. Allow each coat to dry before applying the next.
- Finishing Touches: Consider adding a protective sealant to enhance durability, especially if the divider will be in high-traffic areas.
After painting, you’ll need to install hinges to turn your old doors into functional dividers:
- Choosing Hinges: Select sturdy hinges that can support the weight of the door. Brass or stainless steel options are popular for their durability.
- Positioning the Hinges: Measure and mark where the hinges will go on the door and the wall or frame. Ensure they are level for smooth operation.
- Mounting: Secure the hinges to the door first, then attach them to the wall or a vertical support. Ensure the door swings freely.
To add more charm to your door divider, consider these accessories:
- Decorative Handles: Replace standard doorknobs with unique handles that reflect your style.
- Lighting: Adding string lights or wall sconces can create an inviting ambiance.
- Artwork: Hang artwork or decorative items on the door to personalize it further.
In summary, crafting a divider from old doors is a rewarding project that allows you to express your creativity while enhancing your living space. By following these steps, you can create a stunning and functional divider that adds both charm and character to your home.
Frequently Asked Questions
- What are the best materials for DIY room dividers?
When it comes to DIY room dividers, you can get creative! Some popular materials include fabric, wood, and even plants. Fabric dividers are lightweight and customizable, while wooden dividers offer sturdiness. You can also use bookshelves or repurpose old doors for a unique touch!
- How can I ensure my fabric divider looks good?
Choosing the right fabric is key! Look for durable materials that match your room’s color scheme and texture. When hanging your fabric, consider using tension rods or ceiling hooks for a clean look. Don’t forget to play around with patterns to add some flair!
- Can I use plants as room dividers?
Absolutely! Plants not only divide spaces but also bring life into your home. Opt for indoor plants that thrive in your lighting conditions, like tall snake plants or fiddle leaf figs. Arrange them in a way that creates a natural barrier while still allowing light to flow through.
- What are some budget-friendly ideas for room dividers?
If you’re on a budget, consider using repurposed items like pallets or old doors. Pallets can be easily assembled into rustic dividers, while old doors can be sanded and painted for a charming effect. These options are not only cost-effective but also add character to your space!
