This article explores the step-by-step process of creating a functional and stylish room divider with built-in shelves, enhancing both the aesthetics and utility of your living space. A DIY room divider not only serves as a practical solution for defining spaces but also adds a unique character to your home.
A DIY room divider can be a cost-effective solution to enhance your living space. It allows for complete customization based on your personal style and the specific needs of your area. Whether you need to separate a large room into smaller sections or simply want to add a decorative element, a DIY approach gives you the freedom to create something truly unique.
Gathering the right materials is crucial for the success of your DIY room divider. Essential items include:
- Wood: Choose high-quality plywood or solid wood for durability.
- Screws: Ensure you have the right size and type for wood assembly.
- Tools: A saw, drill, measuring tape, and sandpaper are essential.
Choosing a design can be overwhelming. Here are a few popular styles:
- Modern Minimalist: Clean lines and neutral colors.
- Rustic Farmhouse: Reclaimed wood and vintage finishes.
- Industrial: Metal accents paired with wooden shelves.
Accurate measurements are vital for a successful DIY project. Measure the height and width of the area where the divider will go, ensuring it fits perfectly and does not obstruct pathways.
Building your room divider involves several steps:
- Preparing the Wood: Sand and cut the wood to the desired size.
- Assembling the Frame: Securely assemble the frame to ensure stability.
- Incorporating Built-in Shelves: Design and attach shelves for added functionality.
Adding built-in shelves enhances both functionality and aesthetics. Consider the following:
- Choosing the Right Shelf Height: Determine the optimal height based on what you plan to store or display.
- Securing the Shelves: Use brackets and supports to ensure they can hold weight safely.
The finishing touches can elevate your DIY project. Options include:
- Painting: Choose colors that complement your existing decor.
- Staining: Enhance the natural beauty of the wood.
- Decorating: Add plants, books, or art to personalize your divider.
To ensure your DIY room divider lasts, regular maintenance is key. Here are some practical tips:
- Clean the surface regularly to avoid dust buildup.
- Check for loose screws and tighten them as needed.
- Apply wood polish or protective finish periodically to maintain its appearance.
By following these steps, you can create a stunning and functional room divider with built-in shelves that enhances your living space. Enjoy the process of designing and building your custom piece!

Why Choose a DIY Room Divider?
When it comes to enhancing the functionality and aesthetics of your living space, a DIY room divider stands out as an excellent choice. This innovative solution not only helps in defining different areas within a room but also adds a unique character that reflects your personal style. Whether you’re looking to create a cozy reading nook, a home office, or simply separate spaces in a studio apartment, a DIY room divider can be tailored to meet your specific needs.
A DIY room divider can be a cost-effective solution to define spaces while adding character to your room. It allows for customization based on your unique style and space requirements. Unlike store-bought dividers, which can be expensive and may not fit your design preferences, a DIY option gives you the freedom to choose materials, colors, and styles that resonate with your home decor.
- Affordability: Creating your own room divider can save you money compared to purchasing pre-made options. With just a few materials and tools, you can construct a divider that meets your budget.
- Customization: A DIY project allows you to design a divider that fits perfectly in your space. You can adjust the dimensions, style, and functionality based on your specific needs.
- Creative Expression: Building your own divider is an opportunity to showcase your creativity. You can incorporate various design elements, such as built-in shelves or decorative panels, to make it truly unique.
- Functional Benefits: A room divider can serve multiple purposes, such as providing additional storage with built-in shelves or creating a backdrop for artwork and plants.
Furthermore, a DIY room divider can enhance your home’s aesthetic appeal. By selecting materials and finishes that complement your existing decor, you can create a seamless look that enhances the overall atmosphere of your space. For instance, a rustic wooden divider can bring warmth to a modern setting, while a sleek, minimalist design can add sophistication to a contemporary room.
Moreover, engaging in a DIY project can be a fulfilling experience. It allows you to learn new skills, such as woodworking or painting, and gives you a sense of accomplishment once the project is completed. You can involve family members or friends in the process, making it a fun and collaborative activity.
In conclusion, opting for a DIY room divider is not just a practical solution for spatial organization; it also opens up a world of creative possibilities. By investing time and effort into this project, you can create a functional and stylish addition to your home that reflects your personality and enhances your living environment.

Materials Needed for Your DIY Project
Creating a DIY room divider can be an exciting project that not only enhances your living space but also allows for personal expression. To achieve the best results, it is essential to gather the right materials. This section outlines the necessary items you will need to ensure your room divider is both sturdy and stylish.
When embarking on your DIY room divider project, consider the following essential materials:
- Wood: The primary material for your room divider. Choose high-quality plywood or solid wood for durability. The thickness and type of wood will depend on your design and the weight it needs to support.
- Screws: Select screws that are appropriate for wood construction. Wood screws are ideal for joining pieces together securely. Ensure they are long enough to provide strong connections without splitting the wood.
- Wood Glue: For added stability, wood glue can be used in conjunction with screws. It helps to create a stronger bond between wood pieces, especially in high-stress areas.
- Tools: Having the right tools is crucial. You will need a saw (circular or miter saw), drill, screwdriver, measuring tape, and a level. A sander is also essential for smoothing edges and surfaces.
- Paint or Stain: To finish your room divider, choose a paint or stain that complements your home decor. This not only enhances the aesthetic appeal but also protects the wood from wear and tear.
- Brackets and Supports: If you plan to add shelves, sturdy brackets are necessary to ensure they are securely mounted. Choose brackets that can handle the weight of items you intend to place on the shelves.
- Decorative Elements: Consider adding decorative elements such as fabric, wallpaper, or plants to personalize your divider and make it a unique focal point in your room.
The choice of materials directly impacts the stability and longevity of your room divider. Using high-quality wood and appropriate fasteners will ensure that your divider withstands daily use. Additionally, the right tools will make the construction process smoother and more efficient.
When sourcing materials, consider visiting local hardware stores or lumber yards. Many of these places offer expert advice and can help you select the best materials for your project. Online retailers also provide a wide range of options, often at competitive prices.
For those on a budget, consider repurposing materials from old furniture or pallets. This not only saves money but also contributes to a more sustainable approach to DIY projects.
Before starting your project, take the time to prepare your materials:
- Measure Twice, Cut Once: Accurate measurements are vital. Always double-check your dimensions before cutting the wood to avoid mistakes.
- Sanding: Sand all surfaces and edges to prevent splinters and ensure a smooth finish. This step is crucial for achieving a professional look.
- Pre-drill Holes: To avoid splitting the wood, pre-drill holes for your screws. This is especially important for thicker pieces of wood.
By gathering the right materials and preparing them properly, you set the foundation for a successful DIY room divider project. The effort you put into selecting and preparing your materials will pay off in the durability and aesthetic appeal of your finished product.

Design Ideas for Your Room Divider
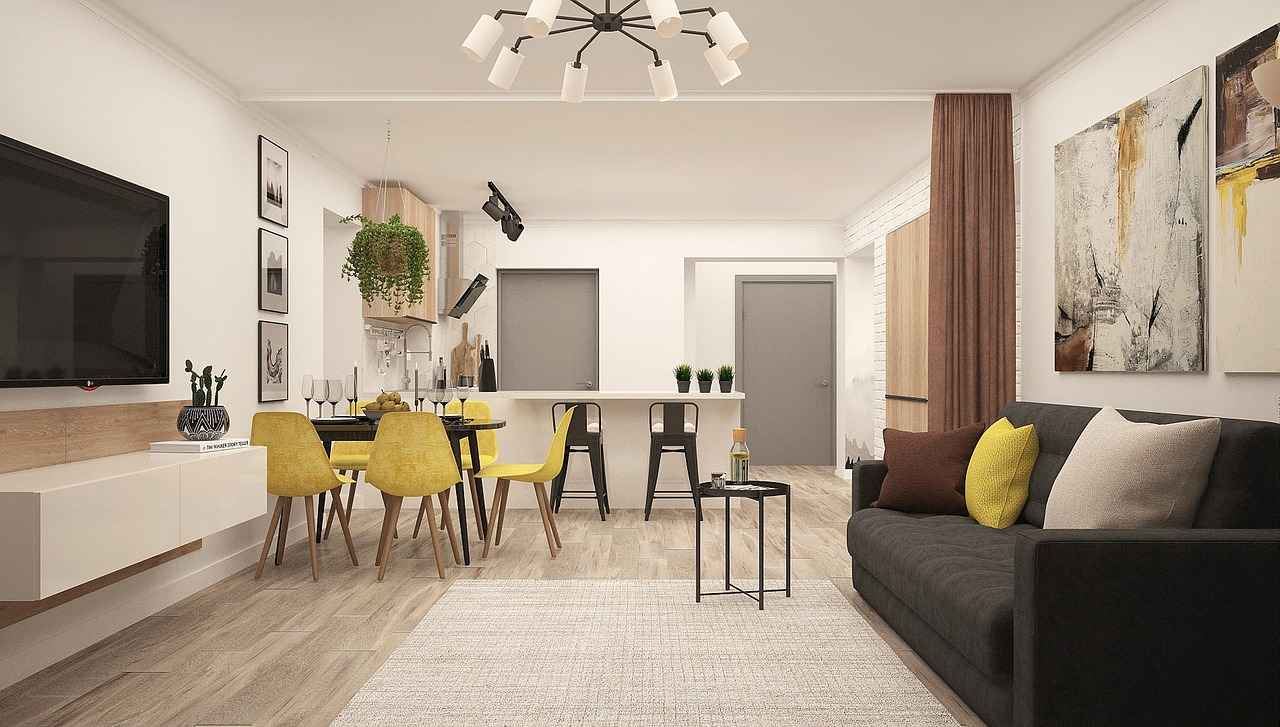
When it comes to enhancing your living space, a room divider serves as both a functional and aesthetic element. The design choices available can be quite overwhelming; however, exploring various styles can help you find the perfect fit for your home decor. Below, we delve into some inspiring design ideas that range from modern minimalist to rustic farmhouse, ensuring you have ample options to ignite your creativity.
The modern minimalist design emphasizes clean lines and simplicity. This style often features neutral colors and materials like metal or glass, creating an open and airy feel. Consider a room divider that incorporates:
- Transparent panels to maintain visibility while defining spaces.
- Geometric shapes that add a contemporary touch.
- Integrated lighting for a stylish ambiance.
If you prefer a cozier atmosphere, the rustic farmhouse style might be ideal for you. This design embraces natural materials and earthy tones. To achieve this look, think about:
- Reclaimed wood for a weathered, authentic appearance.
- Open shelving to display decorative items or plants.
- Textured fabrics like burlap or linen to soften the space.
The industrial chic style combines raw materials and a rugged aesthetic. It’s perfect for urban dwellers looking to make a statement. Key features include:
- Metal accents, such as iron frames or piping.
- Concrete finishes for a modern touch.
- Vintage elements like old crates or factory carts for added character.
The Scandinavian design focuses on functionality and simplicity, often utilizing light colors and natural materials. To create a Scandinavian-style room divider, consider:
- Light woods, such as birch or pine, for a fresh look.
- Modular designs that can be easily rearranged.
- Soft textiles like wool or cotton to add warmth.
If you love vibrant colors and patterns, a bohemian style room divider can express your personality. This design allows for creativity and layering of textures. Try incorporating:
- Bright fabrics or tapestries that showcase your unique style.
- Decorative screens with intricate designs.
- Plants for a lively, organic touch.
Choosing the right design for your room divider can significantly impact your space’s overall look and feel. Whether you are drawn to the sleek lines of modern minimalism or the warmth of rustic farmhouse, the options are limitless. Consider your personal style, the functionality you need, and how the divider will complement your existing decor. With the right design, your room divider can become a stunning focal point that enhances both the beauty and utility of your home.

Measuring Your Space Effectively
When embarking on a DIY project, accurate measurements play a crucial role in ensuring the success of your endeavor. This is especially true when creating a room divider, as precise measurements will guarantee that your divider fits seamlessly into your space and meets your functional needs. In this section, we will delve into the essential steps for measuring your area effectively, ensuring your room divider serves its intended purpose.
- Assess Your Space: Begin by evaluating the area where you plan to install the room divider. Consider the dimensions of the room, including the length, width, and height. Take note of any architectural features such as windows, doors, or existing furniture that may affect the placement of your divider.
- Use the Right Tools: To achieve accurate measurements, equip yourself with essential tools such as a tape measure, a level, and a pencil. A laser measuring tool can also be beneficial for larger spaces, providing quick and precise readings.
- Measure Twice, Cut Once: This age-old adage holds true in DIY projects. Take multiple measurements of the same area to ensure consistency. Record your findings clearly, noting down the longest and shortest distances to avoid any discrepancies.
- Consider the Divider’s Dimensions: Once you have the measurements of your space, think about the dimensions of your room divider. Will it be a full-height divider or a partial one? Determine the width and height based on your preferences and the available space.
In addition to measuring the physical space, it’s important to consider how the room divider will function. Will it provide privacy, serve as a decorative element, or both? Understanding its purpose will help you make informed decisions about its size and placement.
Moreover, think about how the divider will interact with your existing decor. A well-measured divider should complement your room’s aesthetics, adding to the overall design rather than detracting from it. Use your measurements to visualize the divider in the space—consider using painter’s tape to outline where the divider will go, giving you a better sense of scale and flow.
Finally, don’t overlook the potential for adjustments. Sometimes, the initial measurements may not account for factors like uneven flooring or wall irregularities. Be prepared to make slight modifications to your design or installation process to accommodate these variables.
By following these steps and emphasizing careful measurement, you can ensure that your DIY room divider fits perfectly in your space, enhancing both its functionality and aesthetic appeal. Remember, the goal is to create a divider that not only divides but also elevates your living area.

Step-by-Step Construction Process
Creating a DIY room divider can be an exciting project that enhances both the functionality and aesthetic of your space. The is crucial for achieving a sturdy and visually appealing result. Below, we delve into the essential stages involved in building your room divider, ensuring that you have all the information needed to succeed.
Before you begin, it’s important to have all the necessary tools and materials at hand. Here’s a list of what you’ll need:
- Wood boards (plywood or solid wood)
- Screws and wood glue
- Measuring tape
- Power drill
- Saw (circular or hand saw)
- Sander or sandpaper
- Paint or stain for finishing
Accurate measurements are vital for a successful build. Start by measuring the area where you plan to position your room divider. Consider the height and width you desire:
Height: _______ inchesWidth: _______ inches
Once you have your measurements, carefully mark and cut the wood to size. Ensure that all cuts are straight and clean for a professional finish.
After cutting, it’s essential to prepare the wood. This includes:
- Sanding the edges and surfaces to remove splinters and rough areas.
- Applying a wood treatment or sealant to protect against moisture and damage.
The frame serves as the backbone of your room divider. Begin by laying out the pieces on a flat surface. Use wood glue and screws to join the vertical and horizontal pieces securely. Ensure that the frame is square by measuring diagonally from corner to corner.
Adding shelves can enhance both the utility and style of your divider. To incorporate shelves:
- Decide on the height of your shelves based on what you plan to display.
- Secure the shelves using brackets or supports to ensure stability.
Once the structure is complete, it’s time to add your finishing touches. Consider painting or staining the wood to match your decor. You can also add decorative elements such as:
- Wall decals
- Picture frames
- Plants or other decorative items
To keep your DIY room divider looking great, regular maintenance is key. Dust the shelves and frame frequently, and use a damp cloth for any stains. If you notice any wear or damage, address it promptly to ensure your divider remains a beautiful and functional part of your home.
Preparing the Wood
When embarking on a DIY project, particularly one as intricate as a room divider with built-in shelves, is an essential first step. This preparation not only ensures a smoother assembly process but also enhances the overall durability and appearance of the finished product. Here’s a detailed guide on how to effectively prepare your wood before diving into assembly.
Proper wood preparation is crucial for several reasons. It helps to improve the adhesion of finishes, reduces the risk of warping, and ensures that your pieces fit together seamlessly. Additionally, well-prepared wood can significantly enhance the longevity of your project, making it resistant to wear and tear over time.
- Sanding: Start by sanding the surfaces of your wood. This process removes any rough spots and imperfections, creating a smooth surface that is ready for finishing. Use progressively finer grits of sandpaper, starting from a coarser grit (around 80) and moving to a finer grit (220 or higher). Always sand in the direction of the grain to avoid scratches.
- Cutting to Size: Measure your space accurately and cut the wood to the required dimensions. Use a miter saw or circular saw for straight cuts, ensuring that you wear safety goggles and follow all safety protocols. Double-check your measurements before cutting to avoid any costly mistakes.
- Treating the Wood: To enhance the longevity of your wood, consider treating it with a protective finish. This could include applying a wood preservative to prevent damage from moisture, insects, and decay. If you plan to paint or stain the wood, ensure the treatment is compatible with your chosen finish.
Having the right tools on hand can make the preparation process much more efficient. Here’s a list of essential tools you may need:
- Sander (orbital or hand)
- Measuring tape
- Square for precise angles
- Cutting saw (miter or circular)
- Paintbrush or roller for applying finishes
- Safety gear (gloves, goggles, mask)
Even experienced DIYers can make mistakes during the wood preparation phase. Here are some common pitfalls to avoid:
- Skipping Sanding: Many underestimate the importance of sanding. Skipping this step can lead to a rough finish and poor adhesion of paints or stains.
- Incorrect Measurements: Always double-check your measurements before cutting. A small error can lead to significant issues in assembly.
- Neglecting Safety: Always prioritize safety by wearing appropriate gear and using tools correctly to avoid injuries.
By taking the time to properly prepare your wood, you set a solid foundation for your DIY room divider project. This meticulous approach not only enhances the aesthetic appeal but also ensures that your creation will stand the test of time. Remember, the effort you invest in preparation will pay off in the final product.
Assembling the Frame
Assembling the frame of your DIY room divider is a crucial step that sets the foundation for both stability and functionality. A well-constructed frame not only supports the weight of the shelves but also ensures that your divider stands firm and secure in your living space. In this section, we will delve into the essential steps to assemble your frame effectively, keeping in mind the importance of durability and support.
Before you begin assembling, it’s important to understand the various components that make up the frame. Typically, a room divider frame consists of:
- Vertical Posts: These are the main supports that hold the structure upright.
- Horizontal Rails: These connect the vertical posts and provide stability.
- Diagonal Braces: Optional but recommended for added support, these help prevent wobbling.
Follow these steps to assemble your frame securely:
- Gather Your Tools: Ensure you have all necessary tools on hand, including a drill, screws, a level, and a measuring tape.
- Cut the Wood to Size: Based on your design, cut the vertical posts and horizontal rails to the desired lengths. Precision is key here to ensure a snug fit.
- Lay Out the Frame: On a flat surface, lay out the vertical posts and horizontal rails according to your design. This will give you a visual reference before assembly.
- Secure the Corners: Using screws, attach the horizontal rails to the vertical posts at each corner. It’s advisable to pre-drill holes to prevent the wood from splitting.
- Check for Level: After securing the corners, use a level to ensure that the frame is even. Adjust as necessary before fully tightening the screws.
- Add Diagonal Braces: If you choose to include diagonal braces, attach them at a 45-degree angle between the vertical posts and horizontal rails for added stability.
To ensure that your frame can support shelves effectively, consider the following:
- Use Quality Materials: Opt for sturdy wood, such as pine or plywood, which can handle the weight of items placed on the shelves.
- Reinforce Joints: For added strength, consider using wood glue in conjunction with screws at the joints.
- Test the Frame: Before adding shelves, gently shake the frame to check for any movement. If it feels unstable, reinforce the joints further.
By following these guidelines, you will create a strong and reliable frame for your room divider. This foundational structure will not only support the shelves but also enhance the overall aesthetic of your space. Remember, a well-assembled frame is the backbone of any successful DIY project, ensuring that your room divider stands the test of time.

Incorporating Built-in Shelves
When designing a room divider, incorporating built-in shelves is a fantastic way to enhance both functionality and aesthetics. Not only do these shelves provide additional storage space, but they also create opportunities for decorative displays that can personalize your living area. This section delves into best practices for integrating shelves into your room divider design, ensuring that they are both practical and visually appealing.
Built-in shelves serve multiple purposes. They can maximize vertical space, allowing you to utilize areas that might otherwise remain empty. Additionally, they can act as a visual focal point, drawing attention to your favorite decor items, books, or plants. By incorporating shelves, you can transform a simple divider into a multifunctional piece that enhances the overall design of your room.
- Consider the Purpose: Before adding shelves, think about what you plan to store or display. Are you showcasing decorative items, or do you need practical storage for books and everyday items?
- Choose the Right Material: Select materials that complement your room’s decor. Wood is a popular choice for its warmth, while metal can add a modern touch.
- Design for Accessibility: Ensure that the shelves are at a height that is easy to reach. This is especially important if you plan to use them for everyday items.
The height of your shelves can significantly affect their usability. A common guideline is to position the bottom shelf about 12 to 18 inches off the ground, making it accessible for most users. The top shelf should be placed at a height that allows for easy access without the need for a step stool. Consider the items you plan to store; larger items may require more space between shelves.
To ensure safety and durability, it’s crucial to secure shelves properly. Use brackets or supports that can bear the weight of the items you plan to display. For heavier items, consider using reinforced brackets or anchors that attach to the wall or the frame of the room divider.
Adding lighting to your built-in shelves can create an inviting atmosphere. Consider installing LED strip lights under the shelves or using decorative lamps to highlight your displayed items. This not only enhances visibility but also adds a touch of elegance to your room divider.
Once your shelves are installed, it’s time to style them. Mix and match items of varying heights and textures to create visual interest. Use books as bases for decorative pieces, and incorporate plants for a touch of nature. Remember to leave some space empty to avoid a cluttered look, which can detract from the overall aesthetic.
Incorporating built-in shelves into your room divider design is an excellent way to enhance both functionality and style. By following these best practices, you can create a beautiful and practical space that reflects your personal taste and meets your storage needs.
Choosing the Right Shelf Height
When it comes to creating a beautiful and functional space, is crucial. Shelves not only serve as storage solutions but also play a significant role in the overall aesthetic of a room. In this section, we will delve into how to determine the optimal shelf height based on your specific needs and style preferences.
The height of your shelves can greatly influence both functionality and aesthetics. Properly positioned shelves can enhance the visual appeal of a room while also ensuring that your items are easily accessible. When shelves are too high or too low, it can create a disjointed look and make it difficult to utilize the space effectively.
- Consider the Room’s Purpose: Think about what you will be storing on the shelves. For example, if you’re placing books or decorative items, ensure the height allows for visibility and accessibility.
- Evaluate Ceiling Height: In rooms with high ceilings, you have more flexibility in shelf height. However, in smaller spaces, lower shelves can create a more inviting atmosphere.
- Factor in Furniture: Take into account the height of other furniture in the room. Shelves should complement the overall layout, avoiding a cluttered or cramped feel.
To determine the best height for your shelves, consider the following tips:
- Eye Level: Aim to place frequently used items at eye level. This not only makes them easier to reach but also enhances visibility.
- Adjustable Shelving: If you anticipate changing your storage needs, consider installing adjustable shelves. This allows for flexibility in height as your needs evolve.
- Style Considerations: The style of your room can dictate shelf height. For a modern look, consider floating shelves positioned higher up, while traditional styles may benefit from lower, more accessible shelves.
Once you’ve determined the ideal shelf height, it’s essential to install them correctly:
- Use a Level: Ensure that your shelves are perfectly level during installation to avoid any slippage or accidents.
- Secure Brackets: For added stability, use high-quality brackets that can support the weight of your items.
- Test Before Finalizing: Before committing to a height, use temporary supports to visualize how the shelves will look and function.
In conclusion, the height of your shelves is not a mere detail; it significantly impacts the usability and beauty of your space. By carefully considering your needs, the room’s purpose, and your personal style, you can create a shelving solution that is both practical and visually appealing. Remember, the right shelf height can transform your room into a well-organized and stylish area.
Securing the Shelves
When creating a DIY room divider with built-in shelves, is not just a matter of aesthetics; it is crucial for ensuring safety and stability. A well-secured shelf can hold the weight of books, decorative items, and other belongings without the risk of collapsing. Here are some essential tips and techniques to help you effectively secure your shelves.
Properly secured shelves provide not only functional stability but also peace of mind. If shelves are not adequately supported, they can sag or even fall, potentially causing damage to your items or injury to individuals nearby. This is especially critical in homes with children or pets.
One of the most effective ways to secure your shelves is by using brackets. Here are some types to consider:
- L-brackets: These are simple and effective for most shelving needs.
- Heavy-duty brackets: Ideal for holding heavier items, ensuring that your shelves remain stable.
- Floating shelf brackets: For a sleek, modern look, these can provide support while remaining hidden.
In addition to brackets, consider using supports to enhance the stability of your shelves:
- Center supports: For long shelves, adding a support in the center can prevent sagging.
- Back supports: Attaching a strip of wood along the back can provide extra support and prevent shelves from wobbling.
When installing your shelves, follow these best practices to ensure they are securely fastened:
1. Use a level to ensure your shelves are straight.2. Mark the positions of brackets and supports on the wall and shelf.3. Pre-drill holes to avoid splitting the wood.4. Use appropriate screws that match the weight capacity of your shelves.
Understanding weight distribution is essential when securing your shelves. Place heavier items on lower shelves to lower the center of gravity and prevent tipping. Always distribute weight evenly across the shelf to avoid any strain on the brackets and supports.
After installation, it’s important to regularly check the integrity of your shelves. Look for signs of wear, such as:
- Sagging: If a shelf appears to be sagging, it may need additional support.
- Loose brackets: Periodically tighten screws to ensure brackets remain secure.
- Damage: Inspect for any cracks or splits in the wood that may compromise stability.
By following these tips, you can ensure that your shelves are not only visually appealing but also safe and functional. Properly secured shelves will enhance the overall utility of your DIY room divider, allowing you to display your favorite items with confidence.

Finishing Touches for Your Room Divider
Finishing touches can significantly enhance the overall appeal of your DIY room divider, turning a simple structure into a stunning focal point in your living space. Whether you opt for painting, staining, or decorating, the right finish not only complements your home’s aesthetic but also reflects your personal style.
When selecting a finish, consider the existing decor of your room. A cohesive look can be achieved by choosing colors or textures that harmonize with your furniture and wall colors. Neutral tones can create a calm atmosphere, while bold colors can add a vibrant touch.
Painting is one of the most popular options for finishing a room divider. It allows for a wide range of colors and finishes, from matte to glossy. Here are some key points to consider:
- Preparation: Always start by sanding the surface to ensure paint adheres well.
- Primer: Applying a primer can enhance the color and durability of the paint.
- Techniques: Consider using techniques like sponging or stenciling for a unique look.
If you prefer to showcase the natural beauty of the wood, staining is an excellent option. Stains come in various shades, allowing you to enhance the grain of the wood while adding color. Here are some tips:
- Choose the Right Stain: Select a stain that complements your home’s color palette.
- Application: Use a brush or cloth to apply the stain evenly, and wipe off excess for a smoother finish.
- Sealant: Don’t forget to apply a clear sealant to protect the stained wood from wear and tear.
Beyond painting and staining, there are numerous decorative options to personalize your room divider:
- Wall Decals: Use removable wall decals to add patterns or designs without permanent commitment.
- Fabric Panels: Consider attaching fabric panels for a soft, textured look.
- Lighting: Integrate LED strip lights or sconces to highlight your divider and create ambiance.
After all the effort put into finishing your room divider, maintaining its look is crucial. Here are some maintenance tips:
- Regular Cleaning: Dust your divider regularly to prevent buildup. Use a soft cloth for painted surfaces and a gentle cleaner for stained wood.
- Touch-ups: Keep extra paint or stain on hand for quick touch-ups as needed.
- Protection: Use coasters or mats on shelves to prevent scratches and stains from items placed on them.
Incorporating these finishing touches will not only enhance the functionality of your room divider but also ensure it becomes a stylish element in your home decor. Whether you choose to paint, stain, or decorate, the final look should resonate with your personal style while harmonizing with your overall interior design.

Maintenance Tips for Longevity
Maintaining your DIY room divider is essential for ensuring its longevity and aesthetic appeal. Proper care not only keeps it looking great but also preserves its structural integrity. Here, we provide practical tips on how to clean and care for your room divider, allowing you to enjoy it for many years to come.
Regular maintenance is crucial for any home decor item, especially DIY projects. Over time, dust, dirt, and moisture can accumulate, leading to wear and tear. By implementing a consistent maintenance routine, you can:
- Extend the lifespan of your room divider.
- Maintain its visual appeal.
- Prevent costly repairs or replacements.
Cleaning your room divider should be a straightforward process. Here are some tips:
- Dust Regularly: Use a microfiber cloth to dust your divider weekly. This prevents dust buildup and keeps it looking fresh.
- Use Mild Cleaners: For deeper cleaning, opt for a mild soap solution. Avoid harsh chemicals that can damage the finish.
- Wipe Spills Immediately: If any liquids are spilled, clean them up right away to avoid stains or warping.
To ensure your room divider remains in top condition, consider the following protective measures:
- Use Coasters: If you place items on the shelves, such as plants or books, use coasters to prevent scratches and moisture damage.
- Avoid Direct Sunlight: Position your divider away from direct sunlight to prevent fading and warping over time.
- Regularly Check for Loose Parts: Periodically inspect the structure for any loose screws or connections, tightening them as necessary.
Over time, the finish of your room divider may wear down. To rejuvenate its appearance:
- Sand and Repaint: If the paint or stain begins to chip, lightly sand the affected areas and apply a fresh coat.
- Apply a Protective Sealant: Consider applying a sealant to protect the wood from moisture and scratches after refinishing.
In addition to regular cleaning, conducting seasonal maintenance checks can help catch any potential issues early:
- Inspect for Signs of Wear: Look for cracks, chips, or other signs of damage.
- Check for Pests: Ensure that your divider is free from pests, especially if made of wood.
- Evaluate Stability: Ensure the divider remains stable and securely assembled.
By following these maintenance tips, you can ensure that your DIY room divider not only enhances your living space but also remains a durable and functional piece of furniture for years to come. Regular care will keep it looking beautiful and performing well, allowing you to enjoy the benefits of your creative effort.
Frequently Asked Questions
- What materials do I need to create a DIY room divider with shelves?
You’ll need wood, screws, brackets, and essential tools like a saw, drill, and sandpaper. Gathering these materials will set you up for success!
- How do I measure my space for the room divider?
Measure the width and height of the area where you want to place the divider. It’s crucial to ensure a perfect fit, so don’t forget to double-check your measurements!
- Can I customize the design of my room divider?
Absolutely! One of the best parts of a DIY project is the ability to tailor it to your style. Whether you prefer modern or rustic, the design is entirely up to you!
- How do I secure the shelves properly?
Use brackets and supports to secure your shelves. This ensures they can hold weight safely and adds to the overall stability of your room divider.
- What finishing touches should I consider?
Think about painting, staining, or even adding decorative elements that align with your home’s aesthetic. The right finish can make your DIY project shine!
- How do I maintain my DIY room divider?
Regular cleaning and occasional touch-ups will keep your room divider looking great. A little maintenance goes a long way in ensuring its longevity!


")

")


