This article provides a comprehensive, step-by-step guide on creating a stylish and functional room divider using PVC pipes, ideal for those on a budget looking to enhance their living space. Room dividers not only help in defining spaces but also add a decorative element to your home.
PVC pipes are an excellent choice for DIY enthusiasts due to their lightweight and durable nature. Unlike traditional materials like wood or metal, PVC is cost-effective, making it accessible for various budgets. Additionally, PVC is resistant to moisture and easy to clean, which is a significant advantage for home decor.
Before you begin your project, it’s essential to gather all the necessary tools and materials. This preparation will ensure a smooth and efficient building process.
- Measuring Tape: For accurate measurements.
- Pipe Cutter: To cut PVC pipes cleanly.
- Drill: For making holes if needed.
- Sandpaper: To smooth out any rough edges.
Understanding the materials required is vital. You will need:
- PVC Pipes: Choose various diameters for different aesthetics.
- PVC Connectors: For joining pipes together.
- Paint or Finishing Materials: To customize the look of your divider.
- Fabric or Decorative Elements: To enhance the visual appeal.
Now that you have your tools and materials, let’s dive into the construction process.
Before construction, sketch out your desired layout. Consider the dimensions of your space and how you want the divider to function. Will it be purely decorative, or will it provide privacy?
Once your design is ready, use the pipe cutter to cut the PVC pipes to your desired lengths. Assemble the pieces using connectors, ensuring everything is secured tightly for stability. You can create a simple rectangular frame or a more intricate design depending on your skill level.
Enhancing the appearance of your room divider can elevate the overall look of your space.
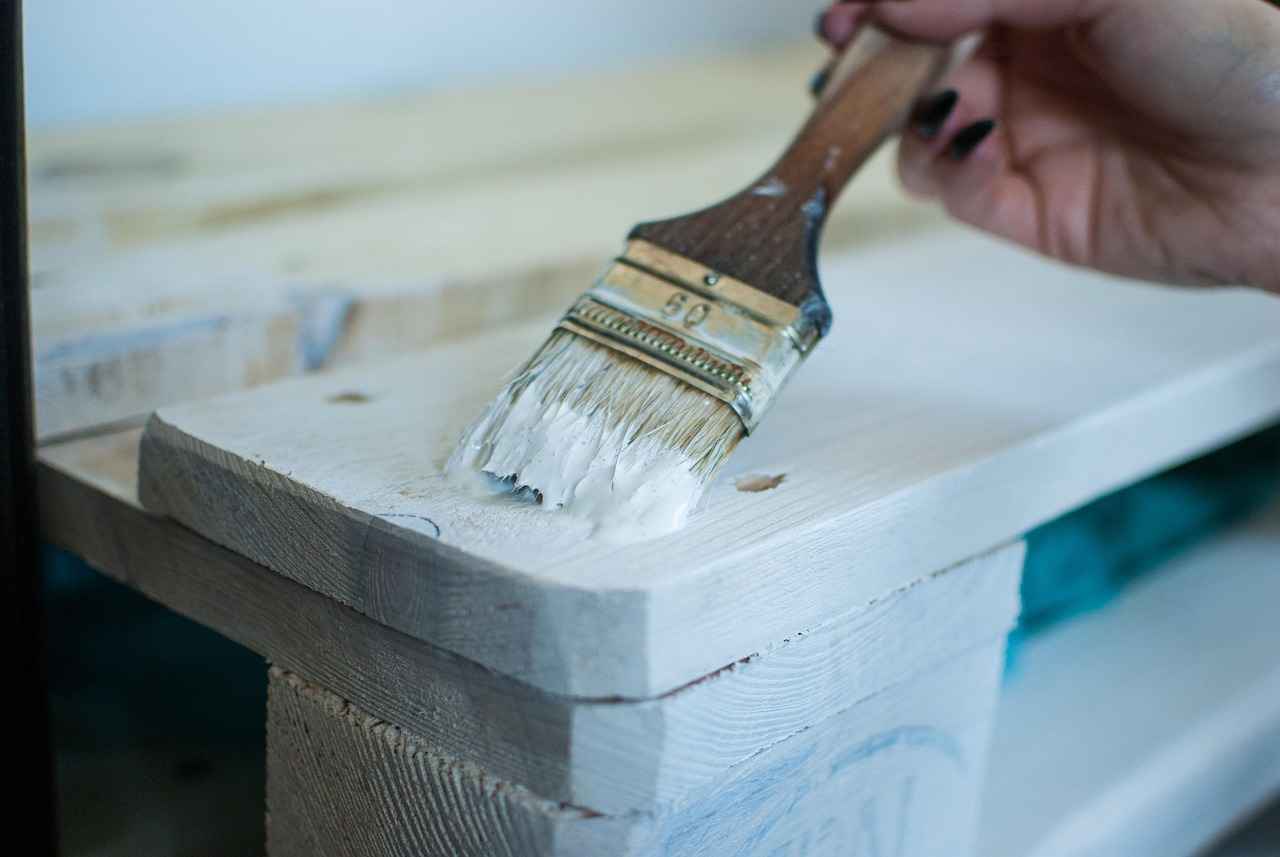
Applying paint or finishes can transform your PVC divider. Use spray paint or a brush to give it a polished look. Choose colors that complement your existing decor for a cohesive feel.
Adding fabric or plants can create a unique look. Consider draping fabric over the divider or attaching small planters for a touch of greenery. This not only beautifies the divider but also adds a personal touch.
Maintaining your room divider is crucial for longevity. Here are some practical tips:
Regular cleaning will keep your divider looking fresh. Use a damp cloth to wipe down the surface and remove any dust or stains. Avoid harsh chemicals that may damage the PVC.
Accidents happen, but repairs are often straightforward. For small cracks, use PVC cement to bond the pieces back together. If a section is severely damaged, you can replace that part easily without needing to rebuild the entire divider.
By following this guide, you can create a stylish and functional room divider that enhances your living space while staying within budget.

Why Choose PVC Pipes for Room Dividers?
When considering materials for DIY projects, PVC pipes have emerged as a popular choice, particularly for creating room dividers. This section delves into the numerous advantages of using PVC pipes over traditional materials such as wood or metal, highlighting their practicality and versatility.
- Lightweight and Easy to Handle: One of the most significant advantages of PVC pipes is their lightweight nature. This makes them easy to transport and manipulate during the construction process, allowing for a hassle-free DIY experience.
- Durability and Longevity: PVC is resistant to moisture, corrosion, and pests, ensuring that your room divider remains intact and functional for years to come. Unlike wood, which can warp or rot, PVC maintains its shape and integrity even in varying environmental conditions.
- Cost-Effective Solution: For those on a budget, PVC pipes offer a cost-effective alternative to traditional materials. They are generally much cheaper than wood or metal, making them accessible for DIY enthusiasts looking to enhance their living spaces without breaking the bank.
- Flexibility in Design: PVC pipes come in various sizes and can be easily cut and shaped to fit your design needs. This flexibility allows for a wide range of creative possibilities, enabling you to customize your room divider to match your personal style.
- Low Maintenance: Maintaining a PVC room divider is straightforward. A simple wipe-down with a damp cloth is often all that is needed to keep it looking fresh. This low maintenance requirement is a significant advantage for busy individuals or families.
- Eco-Friendly Option: Many PVC products are recyclable, making them a more environmentally friendly choice compared to other materials. By choosing PVC, you contribute to sustainability efforts while enjoying the benefits of a modern material.
When assessing the benefits of PVC pipes, it’s essential to compare them to traditional materials:
| Feature | PVC Pipes | Wood | Metal |
|---|---|---|---|
| Weight | Lightweight | Heavy | Moderate |
| Durability | High | Variable | High |
| Cost | Low | Moderate to High | High |
| Maintenance | Low | High | Moderate |
| Design Flexibility | High | Moderate | Low |
As illustrated in the table, PVC pipes offer significant advantages in terms of weight, cost, and maintenance. Their durability further enhances their appeal, making them an excellent choice for anyone looking to create a functional and stylish room divider.
In conclusion, the benefits of using PVC pipes for room dividers are numerous. From their lightweight and durable nature to their cost-effectiveness and low maintenance, PVC pipes stand out as a superior choice compared to traditional materials. Whether you are a seasoned DIYer or a novice looking to enhance your living space, PVC pipes can provide the perfect solution for your room divider needs.
Essential Tools and Materials Needed
When embarking on your DIY project of creating a room divider with PVC pipes, it is crucial to start with a well-thought-out plan. One of the first steps in ensuring a smooth and efficient building process is to gather all the necessary tools and materials. This preparation will not only save you time but also enhance the overall quality of your project.
Before diving into construction, it’s important to have a clear understanding of what you’ll need. Below is a comprehensive list of tools and materials that will facilitate the building of your PVC room divider.
- Measuring Tape: An essential tool for accurately measuring the lengths of your PVC pipes.
- Pipe Cutter: A specialized cutting tool designed for cleanly cutting PVC pipes. A hacksaw can also work but may require more effort.
- Drill: Needed for making holes if you plan to secure your divider to the floor or walls.
- Level: Ensures that your divider is straight and properly aligned during assembly.
- Safety Gear: Don’t forget safety glasses and gloves to protect yourself during the building process.
Understanding the materials required is vital for a successful build. Here are the key materials you will need:
- PVC Pipes: Various diameters may be required depending on your design. Common sizes include 1-inch and 2-inch pipes.
- PVC Elbows and Connectors: These will help you create the desired shape and structure of your divider.
- Base Plates: To provide stability, especially if your divider is freestanding.
- Paint or Finishing Supplies: Optional, but recommended for personalizing your divider and enhancing its aesthetic appeal.
- Fabric or Decorative Elements: If you wish to add a touch of style, consider incorporating fabric or other decorative items.
By gathering all these tools and materials beforehand, you set yourself up for a successful and enjoyable building experience. This preparation will not only streamline the construction process but also help you avoid potential hiccups along the way.
Remember, a well-prepared workspace and organized materials can significantly impact the efficiency of your project. Take the time to ensure you have everything you need, and you will be well on your way to creating a stunning room divider that enhances your living space.
Tools Required for the Project
When embarking on the exciting journey of building your own PVC room divider, it’s essential to have the right tools at your disposal. The success of your project largely hinges on your preparation and the quality of the tools you use. Below is a detailed overview of the , ensuring you are well-equipped to create a stunning divider that meets your needs.
Using the correct tools not only improves the efficiency of your work but also enhances the quality of the final product. With the right equipment, you can achieve precision in cutting and assembling, which is crucial for a sturdy and visually appealing room divider.
- Measuring Tape: A reliable measuring tape is fundamental for obtaining accurate dimensions. Always measure twice to ensure your cuts are precise.
- Square: A carpenter’s square is vital for ensuring that your cuts are at right angles, which is essential for the structural integrity of your divider.
- Level: A level tool will help you ensure that your divider stands straight and does not lean, providing a professional finish.
Choosing the right cutting tools is crucial for achieving clean edges on your PVC pipes. Here are the recommended options:
- PVC Pipe Cutter: This specialized tool is designed to cut PVC pipes quickly and cleanly. It’s user-friendly and minimizes the risk of jagged edges.
- Hack Saw: If a pipe cutter is unavailable, a hack saw can be used. However, it requires more effort and may result in rougher cuts.
- Utility Knife: For smaller adjustments or cutting thinner PVC sheets, a utility knife can be handy. Just be cautious to avoid injuries.
Once you have your pipes cut to the correct lengths, you will need tools for assembly:
- Drill: A power drill will be essential for creating holes for screws or fasteners, ensuring your divider is securely assembled.
- Screwdriver: Depending on the type of screws you’re using, a screwdriver will help you fasten components together tightly.
- Glue or PVC Cement: For a more permanent solution, consider using PVC cement to bond pipes together, providing added stability.
Safety should always be a priority when working with tools. Here are some essential safety items:
- Safety Glasses: Protect your eyes from debris while cutting or drilling.
- Gloves: Wearing gloves can prevent cuts and abrasions while handling sharp tools and materials.
- Dust Mask: If you’re cutting PVC, a dust mask can help you avoid inhaling any particles.
By gathering these essential tools and materials, you will set a solid foundation for your project. The right tools not only streamline the process but also contribute to the overall quality and durability of your PVC room divider. Remember, a well-prepared workspace and the appropriate tools will make your DIY experience enjoyable and successful!
Measuring Tools
Accurate measurements are crucial for creating a well-constructed room divider, especially when working with PVC pipes. The precision of your measurements directly impacts the overall quality and functionality of your project. In this section, we will explore various measuring tools that can help you achieve the precision necessary for a successful build.
When constructing a room divider, precise measurements ensure that all components fit together seamlessly. Inaccurate measurements can lead to gaps, instability, and an overall unprofessional appearance. By using the right measuring tools, you can avoid these common pitfalls and create a divider that not only looks great but also serves its purpose effectively.
- Measuring Tape: A flexible measuring tape is an essential tool for any DIY project. It allows you to easily measure lengths and widths of PVC pipes, ensuring you cut them to the correct size.
- Square: A carpenter’s square helps you achieve right angles, which are crucial for constructing a stable divider. It ensures that your cuts are straight and your joints are secure.
- Level: A level is vital for ensuring that your divider stands straight and does not lean. This tool will help you make adjustments during the assembly process.
- Caliper: For more precise measurements, especially when working with smaller components, a caliper can provide accuracy down to a fraction of an inch.
- Marking Tools: A good marking tool, such as a pencil or chalk line, is necessary for clearly marking your measurements on the PVC pipes before cutting.
To achieve the best results, follow these tips for using your measuring tools:
- Double-check Measurements: Always measure twice before making any cuts. This simple step can save you time and materials.
- Use Clear Markings: Make your markings as visible as possible. This will help prevent mistakes during the cutting process.
- Work on a Flat Surface: Ensure you are measuring and marking on a stable, flat surface to avoid any inaccuracies.
- Keep Tools in Good Condition: Regularly check your measuring tools for wear and tear. A damaged tape measure or square can lead to significant errors.
Even experienced DIYers can make mistakes when measuring. Here are some common errors to watch out for:
- Rounding Off Measurements: Always use exact measurements rather than rounding them off to simplify calculations.
- Ignoring the Thickness of the Pipe: When measuring for cuts, remember to account for the thickness of the PVC pipe itself.
- Not Using the Right Tools: Using inappropriate measuring tools can lead to inaccuracies. Always choose the right tool for the job.
By utilizing the right measuring tools and techniques, you can ensure that your PVC room divider is not only functional but also visually appealing. Accurate measurements lay the foundation for a successful project, allowing you to create a divider that enhances your space effectively.
Cutting Tools
When embarking on a DIY project involving PVC pipes, play a crucial role in achieving clean and precise cuts. Using the right tools not only enhances the quality of your work but also ensures safety and efficiency. This section delves into the best tools available for cutting PVC pipes, helping you make informed decisions.
Choosing the appropriate cutting tool for PVC pipes can significantly impact your project. The right tool ensures clean cuts, minimizes the risk of damage to the pipes, and enhances your overall efficiency. Let’s explore some of the most effective cutting tools available.
- Pipe Cutter: A pipe cutter is a specialized tool designed specifically for cutting pipes. It features a circular blade that rotates around the pipe, providing a clean and straight cut. This tool is ideal for those who need to make multiple cuts quickly.
- Hacksaw: A hacksaw is a versatile tool that can be used for various materials, including PVC. While it requires a bit more effort than a pipe cutter, it is widely available and can be a great option for DIY enthusiasts.
- Reciprocating Saw: For larger projects, a reciprocating saw can be an excellent choice. It allows for quick cuts and can handle thicker pipes with ease. However, it’s important to use a fine-toothed blade to prevent chipping the PVC.
- Utility Knife: For thinner PVC sheets or if you need to make minor adjustments, a utility knife can be effective. It’s essential to score the pipe and then snap it for a clean break.
When selecting a cutting tool, consider the following factors:
- Pipe Thickness: Thicker pipes may require more robust tools like a reciprocating saw, while thinner pipes can be easily handled with a pipe cutter or hacksaw.
- Frequency of Use: If you plan to work with PVC pipes regularly, investing in a high-quality pipe cutter may be worthwhile for its efficiency and longevity.
- Budget: Consider your budget. While some tools can be more expensive, they may save time and effort in the long run.
Regardless of the cutting tool you choose, following these tips will help ensure precision:
- Measure Twice, Cut Once: Accurate measurements are vital. Always double-check your measurements before cutting.
- Secure the Pipe: Use clamps or a vise to hold the pipe steady while cutting, minimizing movement and ensuring a straight cut.
- Use a Guide: For longer cuts, consider using a straight edge as a guide to follow with your saw.
Safety should always be a priority. Here are some essential safety tips:
- Wear protective eyewear to shield against debris.
- Ensure your workspace is well-lit and free of clutter.
- Use gloves to protect your hands from sharp edges.
In conclusion, selecting the right cutting tool is fundamental for any project involving PVC pipes. By understanding the various options available and following best practices, you can achieve clean and precise cuts that will enhance the quality of your work. With the right tools and techniques, your DIY room divider project will be a success.
Materials Needed for Construction
When embarking on the exciting journey of creating a room divider using PVC pipes, understanding the materials required is vital. This section will comprehensively outline the types of PVC pipes and additional materials you’ll need to complete your project successfully.
PVC pipes come in various sizes and types, each suited for different applications. The most common types you might consider for your room divider include:
- Schedule 40 PVC Pipes: These are the most commonly used pipes for DIY projects. They are sturdy, readily available, and ideal for creating a solid structure.
- Schedule 20 PVC Pipes: Thinner and lighter than Schedule 40, these pipes are perfect for lighter dividers or decorative elements.
- PVC Foam Board: While not a pipe, this material can be used as a backing or decorative element for your divider, providing a smooth surface for painting or attaching fabric.
In addition to PVC pipes, several other materials are essential for constructing a functional and aesthetically pleasing room divider:
- PVC Connectors: These fittings are crucial for joining pipes at various angles. Common types include elbows, tees, and crosses.
- Paint or Finishing Products: To enhance the visual appeal of your divider, consider using paint or varnish specifically designed for plastic surfaces.
- Fabric or Decorative Panels: Adding fabric can soften the look of your divider. Choose materials that complement your room’s decor.
- Fasteners and Adhesives: Depending on your design, you may need screws, bolts, or strong adhesives to secure various elements of your divider.
Having the right tools on hand is essential for a smooth building process. Here are some tools you will need:
- Measuring Tape: Accurate measurements are key to ensuring your divider fits perfectly in your space.
- Pipe Cutter or Hacksaw: A specialized pipe cutter will provide clean cuts, but a hacksaw can also do the job effectively.
- Drill: A power drill is useful for creating holes in the PVC for fasteners or decorative elements.
Most of the materials needed for this project can be found at your local hardware store or home improvement center. Additionally, online retailers offer a wide selection of PVC pipes and fittings, often at competitive prices.
By gathering all the necessary materials and tools beforehand, you can streamline your building process and focus on creating a stunning room divider that enhances your living space. Remember, the key to a successful project lies in careful planning and execution!
Step-by-Step Guide to Building Your Room Divider
Creating a room divider using PVC pipes is an excellent way to enhance your living space without breaking the bank. This step-by-step guide will walk you through the entire process, ensuring that you can easily follow along and achieve a stylish and functional result.
Before diving into the construction, it’s essential to have a clear plan and understanding of the steps involved. Below is a detailed breakdown of the process:
- Step 1: Planning Your Design
Start by visualizing how you want your room divider to look. Consider the dimensions of the space where it will be placed and sketch a rough design. Think about whether you want a full-height divider or a lower one that allows light to pass through. This will help you determine the length and number of PVC pipes you need. - Step 2: Gathering Materials
Collect all necessary materials, including PVC pipes, connectors, a measuring tape, a saw, and a marker. Ensure you choose the right diameter of PVC pipes based on your design. For a stable structure, consider using thicker pipes. - Step 3: Measuring and Cutting Pipes
Using your measuring tape, measure the lengths of the PVC pipes according to your design. Mark the cutting points with a marker. When cutting, use a saw designed for PVC to ensure clean and precise cuts. Safety first! Wear goggles to protect your eyes from debris. - Step 4: Assembling the Frame
Begin assembling the frame of your room divider by connecting the cut PVC pipes using the connectors. Make sure that each connection is secure. You can use a level to ensure that everything is straight and even. - Step 5: Adding Panels
Depending on your design, you may want to add panels to your divider. This can be done using fabric, wood, or even decorative screens. Attach the panels securely to the PVC frame using adhesive or additional connectors. - Step 6: Finishing Touches
Once the main structure is complete, consider painting the PVC pipes to match your decor. Use spray paint suitable for plastic for the best results. You can also add decorative elements, such as hanging plants or artwork, to personalize your divider.
By following these steps, you can create a beautiful and practical room divider that enhances your living space. The use of PVC pipes not only makes this project budget-friendly but also ensures durability and ease of maintenance.
Remember, the key to a successful DIY project is patience and attention to detail. Take your time with each step, and don’t hesitate to make adjustments as needed to achieve your desired look.
With your new PVC room divider, you’ll enjoy a stylish addition to your home that offers both functionality and aesthetic appeal!
Planning Your Design
When embarking on the exciting journey of creating a room divider with PVC pipes, is a crucial first step. This phase involves visualizing your space and sketching out your desired layout, ensuring that the final product not only serves its functional purpose but also enhances the aesthetic appeal of your room.
To begin, consider the dimensions of the area where you intend to place the room divider. Measure the height, width, and depth of the space to understand how large or small your divider should be. This will help you avoid any surprises during construction. Additionally, think about the overall style of your room. Is it modern, rustic, or minimalist? Your room divider should complement the existing decor.
Next, visualize how you want your divider to look. Do you prefer a solid wall-like structure, or something more open and airy? Sketching your ideas on paper can be incredibly beneficial. Use graph paper to create a scaled version of your design, allowing you to play with different configurations without committing to any one idea. Consider incorporating patterns or textures that resonate with your personal style.
- Functionality: What will the primary purpose of your room divider be? Is it to create privacy, separate spaces, or simply to add decor?
- Materials: Will you use just PVC pipes, or do you plan to incorporate other materials, such as fabric, wood, or plants?
- Accessibility: Ensure that your divider allows for easy movement between areas, especially if it is a high-traffic space.
Once you have a clear vision, it’s time to create a more detailed sketch. Include measurements and note the specific lengths of PVC pipes you will need. This will streamline the construction process, making it easier to gather materials and execute your plan effectively. Consider using software or apps designed for interior design, which can provide a 3D view of your concept, allowing you to visualize how the divider will interact with your space.
As you finalize your design, think about how the divider will be anchored. Will it be freestanding, or do you need to attach it to the walls or ceiling for stability? This decision will influence the overall structure and materials you choose.
In summary, the planning phase is not just about aesthetics; it also involves practical considerations. By taking the time to visualize and sketch your desired layout, you set the foundation for a successful and satisfying DIY project. Remember, a well-planned design can make all the difference in transforming your space with a stylish and functional room divider.
Cutting and Assembling the PVC Pipes
When it comes to creating your own room divider using PVC pipes, the process of cutting and assembling the pipes is crucial. This stage not only determines the structural integrity of your divider but also sets the foundation for its overall aesthetic. In this section, we will guide you through the essential steps to ensure a sturdy and visually appealing outcome.
Before diving into assembly, it is vital to understand how to accurately cut your PVC pipes. Proper cutting ensures that all pieces fit together seamlessly, resulting in a professional-looking divider. Here’s a simple step-by-step guide to help you:
- Measure Twice, Cut Once: Always double-check your measurements before making any cuts. This old adage holds true, especially in DIY projects.
- Mark Your Cuts: Use a permanent marker or a pencil to clearly mark where you will cut. This will help you maintain precision.
- Choose the Right Cutting Tool: Depending on the thickness of your PVC pipes, you may use a hacksaw, pipe cutter, or even a miter saw for larger pipes. Each tool has its advantages, so choose the one that fits your comfort level and the task at hand.
Once your pipes are cut to the desired lengths, the next step is assembling them. A well-assembled structure will not only be sturdy but also functional. Here’s how to proceed:
- Use PVC Cement: For a strong bond, apply PVC cement to both the pipe and the fitting before joining them. This ensures a secure and permanent connection.
- Follow Your Design Layout: Refer back to your initial design sketch to ensure that you are assembling the pieces in the correct order. This will help you visualize the final product.
- Check for Level and Alignment: As you assemble, use a level to ensure that your divider is straight and aligned. This step is crucial for maintaining a professional appearance.
To enhance the stability of your room divider, consider incorporating additional reinforcement techniques:
- Cross Bracing: Adding diagonal braces can provide extra support and prevent wobbling.
- Base Weights: If your divider is tall, consider adding weights at the base to prevent it from tipping over.
By following these detailed steps for cutting and assembling your PVC pipes, you will create a sturdy and visually appealing room divider that enhances your living space. Remember, patience and precision are key to achieving the best results.
With your structure complete, you can now move on to adding aesthetic touches and personalizing your divider, making it a true reflection of your style.

Adding Aesthetic Touches to Your Room Divider
can significantly enhance the overall ambiance of your living space. Personalizing your divider not only makes it functional but also transforms it into a statement piece that reflects your style. In this section, we will explore various creative ways to enhance the appearance of your room divider.
- Color Schemes and Paint Techniques
- Incorporating Fabric
- Adding Plants
- Lighting Elements
- Artwork and Decorative Items
One of the simplest ways to elevate your room divider is through color. Choose a color scheme that complements your existing decor. You can opt for bold colors to create a vibrant focal point or soft pastels for a more subdued look. Consider using spray paint for a smooth finish or a brush for a textured effect. Stenciling patterns or designs can also add a unique touch.
Fabric can add warmth and texture to your PVC room divider. Hang curtains or drapes from the top of the divider to create a soft, flowing look. Alternatively, you can use fabric panels to cover sections of the divider. Choose fabrics that are easy to clean and maintain, such as cotton or polyester blends. Layering different fabrics can also create an interesting visual effect.
Integrating plants into your room divider design can bring life to your space. Consider using hanging planters or attaching small shelves to display potted plants. Succulents or trailing vines work particularly well as they can thrive in various lighting conditions. This not only adds a natural element but also improves indoor air quality.
Incorporating lighting into your room divider can create a stunning visual impact. Use LED strip lights along the edges or behind the divider to create a soft glow. You can also attach small lamps or fairy lights to enhance the atmosphere. Lighting can dramatically change the mood of the room, making it feel cozy and inviting.
Consider displaying artwork or decorative items on your room divider. This could include framed pictures, wall art, or even hanging mirrors. These elements can serve as conversation starters and add personality to your space. Ensure that the items you choose are securely attached to avoid any accidents.
By thoughtfully incorporating these aesthetic touches, you can transform your room divider from a simple functional piece into a stunning focal point that enhances the overall look of your space. Remember to choose elements that resonate with your personal style and complement the rest of your decor for a cohesive look.
Painting and Finishing Techniques
When it comes to enhancing the aesthetic appeal of your PVC room divider, play a crucial role. Not only do they add color and style, but they also protect the material from wear and tear. This section will explore effective methods to achieve a polished look for your divider, ensuring that it complements your interior decor.
Painting your PVC divider serves multiple purposes. Firstly, it can transform the appearance of the pipes, making them look more like a part of your home rather than a simple construction material. Secondly, a good finish can provide a layer of protection against scratches and UV damage, extending the life of your divider.
Not all paints are suitable for PVC surfaces. It is essential to select a paint that adheres well to plastic. Look for acrylic latex paints or specialized plastic paints that are designed for use on PVC. These types of paints offer good coverage and durability. Additionally, consider using a primer specifically formulated for plastic, as this will enhance the paint’s adhesion and provide a more even finish.
- Preparation: Start by cleaning the surface of the PVC pipes thoroughly. Remove any dust, grease, or dirt using a mild detergent and water. Allow the pipes to dry completely before proceeding.
- Priming: Apply a thin coat of primer to the PVC surface. Use a foam roller or a brush for even application. Allow the primer to dry according to the manufacturer’s instructions.
- Painting: Once the primer is dry, apply the first coat of paint using a brush or spray paint. If using spray paint, maintain a distance of about 12 inches from the surface for an even coat. Allow this coat to dry completely before applying a second coat.
- Finishing Touches: For added durability, consider applying a clear sealant over the painted surface. This will protect the paint from scratches and fading.
To achieve a professional-looking finish, consider the following tips:
- Work in a well-ventilated area: This will help to disperse fumes and ensure a smooth application.
- Use even strokes: Whether you’re using a brush or spray, consistent strokes will prevent streaks and uneven coverage.
- Allow adequate drying time: Rushing the drying process can lead to smudging or uneven surfaces. Always follow the recommended drying times on the paint and primer labels.
Beyond traditional paint, you can also explore other finishing options for your PVC divider:
- Stencils: Use stencils to create patterns or designs on your divider, adding a unique touch.
- Decals: Vinyl decals can provide a quick and easy way to personalize your divider without the need for painting.
- Fabric Wraps: For a softer look, consider wrapping sections of the divider with fabric, which can be painted or left in its natural state.
By following these , you can effectively transform your PVC room divider into a stylish and functional piece that enhances your living space. With the right materials and methods, your DIY project will not only look great but also stand the test of time.
Incorporating Fabric or Plants
When it comes to enhancing the aesthetic appeal of your PVC room divider, can significantly elevate its style and functionality. This section will delve into various methods of integrating these elements, ensuring your divider not only serves its practical purpose but also adds a unique flair to your living space.
Fabric can transform the look of your room divider, adding warmth and texture. Here are some compelling reasons to consider fabric:
- Variety of Colors and Patterns: Fabrics come in an endless array of colors and designs, allowing you to match or contrast your divider with your existing decor.
- Softening Hard Edges: The addition of fabric can soften the rigid appearance of PVC pipes, making the divider feel more inviting.
- Easy to Change: Unlike permanent fixtures, fabric can be easily swapped out for a new look, making it a versatile choice for seasonal decor updates.
Here are some practical ways to add fabric to your PVC room divider:
- Fabric Panels: Attach fabric panels to the PVC frame using clips or Velcro. This method allows for easy removal and cleaning.
- Hanging Fabrics: Drape fabric over the divider, creating a flowing effect. This can be particularly striking with sheer fabrics that allow light to filter through.
- Patchwork Design: Combine different fabrics to create a patchwork effect, adding a playful and personalized touch to your divider.
Integrating plants into your room divider design not only enhances its visual appeal but also brings numerous benefits:
- Improved Air Quality: Plants naturally purify the air, making your space healthier.
- Connection to Nature: Incorporating greenery can create a calming atmosphere, helping to reduce stress.
- Dynamic Visuals: The vibrant colors and textures of plants can add depth and interest to your divider.
Here are some ways to seamlessly incorporate plants into your PVC room divider:
- Planter Boxes: Attach small planter boxes to the base of your divider for a practical and stylish way to display plants.
- Hanging Planters: Use macramé hangers or brackets to suspend plants from the top of your divider, adding height and dimension.
- Vertical Gardens: Create a vertical garden by attaching a trellis or shelving to your divider, allowing climbing plants to flourish.
The true beauty of your room divider can be realized by combining fabric and plants. Here are some tips to achieve a harmonious design:
- Color Coordination: Choose fabrics that complement the colors of your plants to create a cohesive look.
- Layering Textures: Mix the softness of fabric with the natural textures of plants for a rich visual experience.
- Seasonal Updates: Change the fabric and plants with the seasons to keep your space feeling fresh and inviting.
Incorporating fabric and plants into your PVC room divider design adds a layer of uniqueness and style. By carefully selecting and arranging these elements, you can create a stunning focal point that enhances your living space.
Maintenance Tips for Your PVC Room Divider
Maintaining your room divider is crucial for ensuring its longevity and aesthetic appeal. A well-cared-for PVC divider not only enhances your living space but also serves its purpose effectively over time. Here are some practical tips on how to care for and maintain your PVC divider over the years.
- Regular Cleaning: To keep your PVC room divider looking fresh, it is essential to clean it regularly. Use a soft cloth or sponge and a mixture of warm water with mild soap. Avoid harsh chemicals that can damage the surface. Wipe down the pipes and any fabric or decorative elements to remove dust and dirt.
- Inspect for Damage: Periodically check your divider for any signs of wear and tear. Look for cracks, bends, or any loose fittings. Early detection of issues can save you time and money in repairs.
- Repairing Damages: If you notice any damages, address them promptly. For minor cracks, a PVC adhesive can be used to bond the pieces back together. For larger damages, you may need to replace the affected section. Ensure you have spare PVC pipes on hand for easy replacements.
- Avoid Excessive Weight: Be mindful of what you place on or against your PVC divider. Avoid hanging heavy items or leaning excessively on it, as this can lead to bending or breaking of the pipes.
- Protect from UV Exposure: If your PVC divider is exposed to direct sunlight for extended periods, consider applying a UV protectant spray. This will help prevent discoloration and degradation of the material over time.
- Seasonal Maintenance: Depending on your location, seasonal changes can affect your PVC divider. In winter, ensure that it is not exposed to extreme cold, which can make PVC brittle. In summer, check for any warping due to heat. Adjust your maintenance routine accordingly.
- Repainting and Refinishing: If your divider has been painted, consider touching up the paint every few years to maintain its appearance. Use paint that is suitable for PVC to ensure proper adhesion and durability.
Final Thoughts: By following these maintenance tips, you can extend the life of your PVC room divider significantly. Regular care not only preserves its functionality but also enhances the overall look of your space. Remember, a little effort goes a long way in keeping your home decor in top shape.
Cleaning and Care Instructions
Maintaining the appearance and functionality of your PVC room divider is essential for ensuring it remains a stylish and effective element in your living space. Regular cleaning is not just about aesthetics; it also contributes to the longevity of the materials. Below are some practical cleaning and care instructions to help you keep your PVC pipes in optimal condition.
Over time, dust, dirt, and grime can accumulate on your PVC room divider, making it look dull and less appealing. Regular cleaning not only helps maintain its visual appeal but also prevents the buildup of mold and mildew, which can occur in damp environments. Keeping your divider clean ensures a healthier living space.
- Use Mild Detergents: Avoid harsh chemicals that can damage the surface of the PVC. A simple mixture of warm water and mild dish soap is effective for most cleaning tasks.
- Soft Cloth or Sponge: Use a soft cloth or sponge to gently wipe down the surfaces. This prevents scratches and ensures a thorough clean without damaging the material.
- Rinse Thoroughly: After cleaning, it’s important to rinse the PVC with clean water to remove any soap residue. This will help maintain the integrity of the material.
- Dry Completely: Use a dry cloth to wipe the divider after rinsing. This step is crucial to prevent water spots and potential mold growth.
For optimal maintenance, it is recommended to clean your PVC room divider every two to four weeks, depending on your environment. If you live in a dusty area or have pets, you may need to clean it more frequently. Regular upkeep will help you avoid the need for more intensive cleaning later on.
- Avoid Direct Sunlight: Prolonged exposure to direct sunlight can cause the PVC to fade. If possible, position your divider away from direct sunlight or use curtains to protect it.
- Inspect for Damage: Regularly check your divider for any signs of wear or damage. Early detection of cracks or breaks can save you from costly repairs.
- Use Protective Covers: If you anticipate not using the divider for an extended period, consider covering it with a protective cloth to prevent dust accumulation.
If your PVC room divider becomes stained, act quickly. For stubborn stains, a paste made of baking soda and water can be applied gently with a soft cloth. Let it sit for a few minutes before rinsing it off. This method is safe and effective for most stains.
By following these , you can ensure that your PVC room divider remains a beautiful and functional part of your home for years to come. Regular maintenance not only enhances the look of your divider but also contributes to a healthier living environment.
Repairing Damages
Accidents are an inevitable part of life, especially when it comes to DIY projects. Fortunately, repairing your PVC room divider is often a straightforward task. Understanding how to address common issues will help maintain the integrity and appearance of your divider. This section outlines essential repair techniques that can save you time and money.
Before diving into repairs, it’s important to identify the common problems that may arise with your PVC room divider. These can include:
- Cracks or Breaks: Physical damage can occur due to impacts or stress.
- Loose Connections: Over time, joints may become loose, causing instability.
- Discoloration: Exposure to sunlight can lead to fading or yellowing of the PVC material.
- Stains: Everyday use can result in unsightly stains that detract from the divider’s aesthetic.
If you notice cracks or breaks in your PVC pipes, don’t worry! You can easily fix them using the following steps:
- Assess the Damage: Determine the extent of the crack. If it’s small, a simple adhesive may suffice; larger breaks may require replacement sections.
- Clean the Area: Ensure the damaged area is clean and dry. Use a cloth to wipe away any dust or debris.
- Apply PVC Cement: For minor cracks, apply a small amount of PVC cement to the affected area. Hold it together firmly for a few seconds to ensure a strong bond.
- Replace If Necessary: For larger breaks, measure the damaged section and cut a new piece of PVC pipe to fit. Use connectors to secure the new piece in place.
Loose connections can lead to instability in your room divider. Here’s how to tighten them:
- Inspect the Joints: Check all joints for any signs of looseness.
- Reapply PVC Cement: If a joint is loose, apply PVC cement to the connection and press it back together.
- Use Additional Supports: If necessary, add additional brackets or supports to reinforce the structure.
Discoloration and stains can affect the appearance of your PVC room divider. To restore its look, follow these tips:
- Cleaning Solution: Mix a solution of warm water and mild detergent. Use a soft cloth or sponge to clean the surface.
- Use a Soft Brush: For stubborn stains, a soft-bristled brush can help lift the dirt without scratching the PVC.
- Consider a Protective Coating: After cleaning, applying a protective coating can help prevent future discoloration.
While many repairs can be done at home, there are instances where professional assistance may be beneficial. If you encounter extensive damage or structural issues that you are unsure how to address, it may be wise to consult a professional. They can provide expert advice and solutions that ensure the longevity of your PVC room divider.
By understanding these common issues and their solutions, you can effectively maintain your PVC room divider, ensuring it continues to serve its purpose while enhancing your living space.
Frequently Asked Questions
- What tools do I need to build a PVC room divider?
To create your PVC room divider, you’ll need measuring tools like a tape measure, cutting tools such as a hacksaw or pipe cutter, and assembly tools like a drill and connectors. Having the right tools ensures a smooth building process!
- Can I customize my PVC room divider?
Absolutely! One of the best parts about using PVC pipes is that you can easily personalize your divider. Consider adding paint, fabric, or even plants to enhance its aesthetic appeal and make it uniquely yours!
- How do I maintain my PVC room divider?
Maintaining your PVC room divider is simple. Regularly wipe it down with a damp cloth to keep it clean. If you notice any damages, repairs are usually straightforward and can be done with minimal effort!
- Is building a PVC room divider cost-effective?
Yes! PVC pipes are generally affordable, making them a budget-friendly option for creating stylish room dividers without breaking the bank. It’s a great DIY project that saves you money!
- How long does it take to build a PVC room divider?
The time it takes to build your room divider depends on your design and experience level, but most projects can be completed in a few hours. Just gather your materials, follow the steps, and enjoy the process!


