This article provides a step-by-step guide on creating an innovative room divider using recycled cardboard, emphasizing sustainability, cost-effectiveness, and creativity in home decor.
Cardboard is an eco-friendly, lightweight material that is easy to manipulate, making it an ideal choice for DIY projects like room dividers. Its versatility allows for unique designs that can fit any decor style.
Before starting your project, it's essential to gather all necessary materials. Here’s a list of what you will need:
- Recycled cardboard (corrugated and flat sheets)
- Utility knife or scissors
- Ruler or measuring tape
- Glue or tape
- Paint and brushes (optional for decoration)
Different types of cardboard offer varying durability and aesthetics. Understanding which type suits your needs can enhance the overall look of your divider.
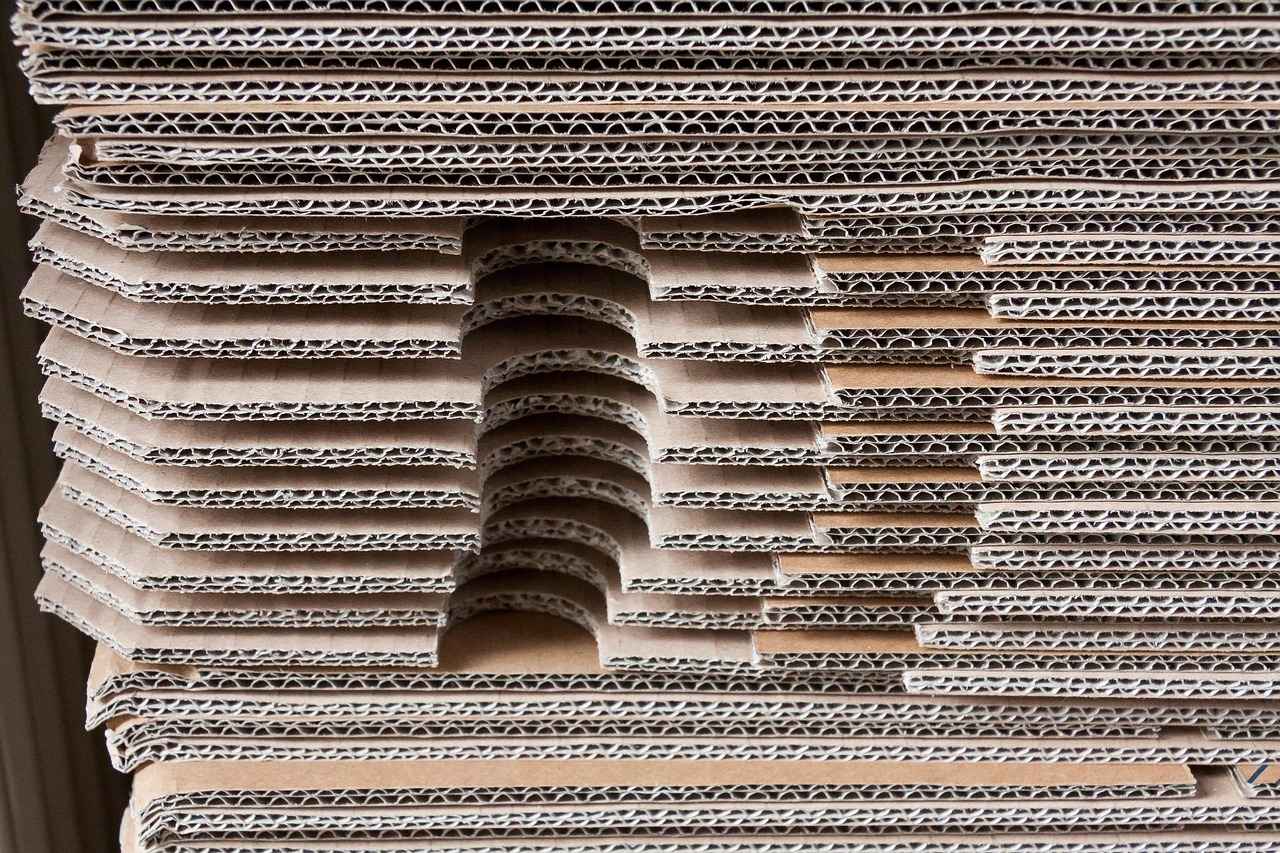
Corrugated cardboard is robust and offers excellent structural integrity, making it a preferred choice for larger dividers.
Flat cardboard sheets can be easier to work with for smaller, decorative dividers, allowing for intricate designs and patterns.
Having the right tools on hand can simplify the construction process. Essential tools include:
- Utility knife for cutting
- Ruler for measuring
- Adhesive for joining pieces
This section provides a detailed, step-by-step process for crafting your cardboard room divider, ensuring clarity and ease of understanding.
Before cutting and assembling, sketching out your design can help visualize the final product and streamline the building process. Consider the dimensions and style that best fit your space.
Proper cutting techniques are crucial for achieving clean edges and a professional look. Always use a sharp utility knife and a ruler to guide your cuts safely.
Once the pieces are cut, assembly is the next step. Here’s how to join the cardboard pieces securely for stability:
Choosing the right adhesives or fasteners can enhance the durability of your divider. Options include:
- Glue for permanent bonds
- Tape for quick fixes
Foldable sections add versatility to your divider, allowing for easy storage and repositioning. This can be achieved by scoring the cardboard before folding.
Personalizing your divider can enhance its aesthetic appeal. Here are some creative ideas:
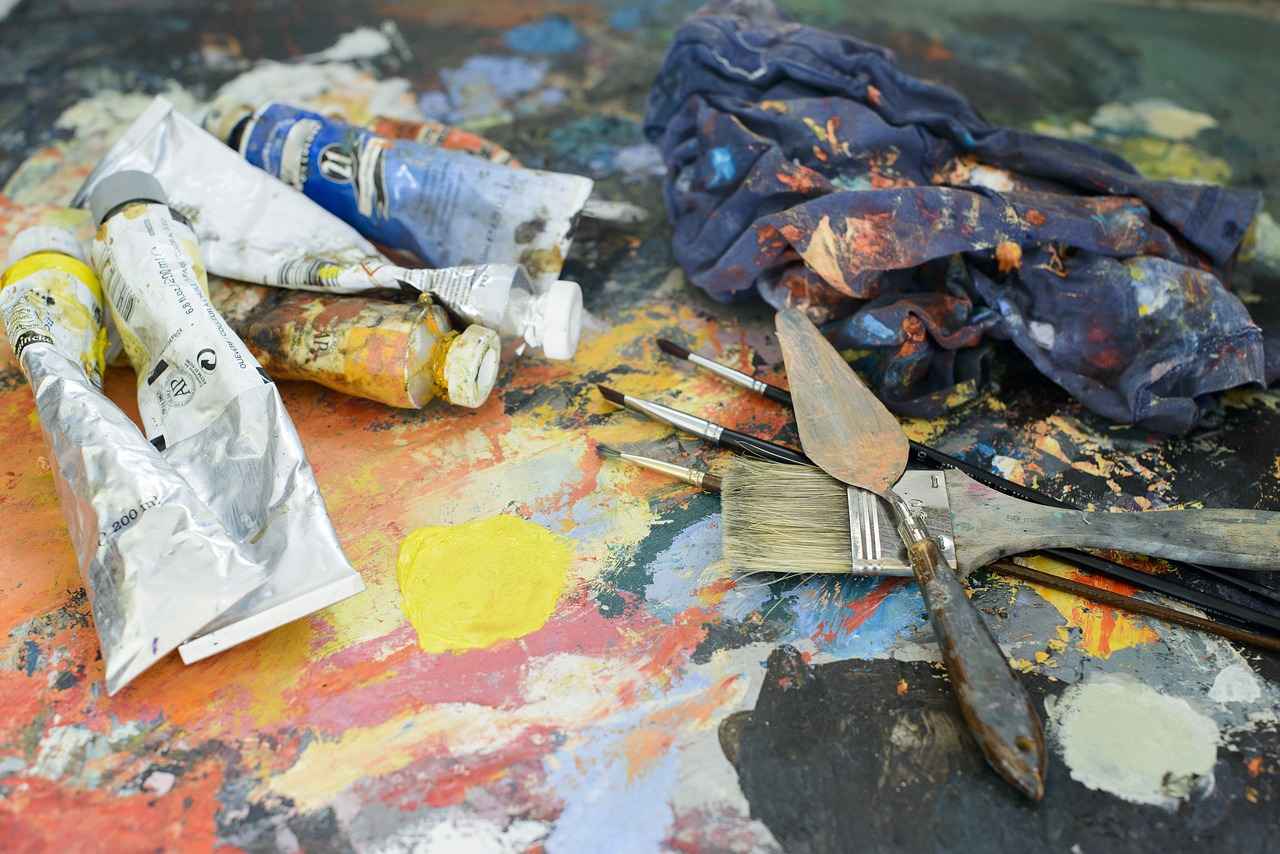
Choosing the right paint and finish can elevate the look of your divider. Use non-toxic paints for a safe home environment.
Incorporating textures and patterns can make your divider more visually interesting. Consider using fabric scraps or decorative paper to add unique designs.
Proper maintenance can prolong the life of your cardboard divider. Here are some tips:
Keeping your divider clean is essential for maintaining its appearance. Use a soft cloth and mild detergent to remove dust without damaging the cardboard.
When not in use, storing your divider properly can prevent damage. Keep it flat in a dry place to avoid bending or warping.
Why Choose Cardboard for Room Dividers?
When it comes to creating functional and aesthetically pleasing spaces, cardboard stands out as an excellent material for crafting room dividers. This versatile and eco-friendly option not only enhances the look of your home but also supports sustainable living practices. Let's explore the numerous benefits of using cardboard for your next DIY project.
- Eco-Friendly Material: Cardboard is primarily made from recycled materials, making it a sustainable choice for environmentally conscious individuals. By opting for cardboard, you contribute to reducing waste and promoting recycling initiatives.
- Lightweight and Easy to Handle: One of the most significant advantages of cardboard is its lightweight nature. This feature allows for easy manipulation and transportation, making the assembly and rearrangement of your room divider a breeze.
- Cost-Effective Solution: Using recycled cardboard can significantly lower the cost of your home decor projects. Since cardboard is often available for free or at a minimal cost, it allows you to create stylish dividers without breaking the bank.
- Customizable and Creative: Cardboard is incredibly easy to cut, shape, and decorate, enabling you to unleash your creativity. Whether you prefer a minimalist design or something more elaborate, the possibilities are endless.
- Good Insulation Properties: Surprisingly, cardboard offers decent insulation against sound and temperature changes. This can help create a more comfortable environment in your living space.
Moreover, the ease of manipulation allows you to experiment with various designs, colors, and patterns. You can paint your cardboard, add fabric, or even use decorative paper to match your home’s decor. This adaptability makes cardboard a favorite among DIY enthusiasts.
In addition to its aesthetic appeal, cardboard is also a safe option for homes with children and pets. Unlike materials such as glass or metal, cardboard is soft and poses minimal risk of injury.
In summary, choosing cardboard for room dividers combines sustainability with functionality. It not only allows you to create beautiful and unique designs but also supports eco-friendly practices. With its lightweight, cost-effective, and customizable nature, cardboard is undoubtedly a fantastic choice for your DIY home projects.
Gathering Materials: What Do You Need?
Creating a cardboard room divider is a fantastic way to enhance your living space while being environmentally conscious and budget-friendly. However, before diving into this creative project, it's crucial to ensure you have all the necessary materials at your disposal. This section will guide you through everything you need to gather for constructing a sturdy and stylish cardboard room divider.
To successfully build your room divider, you will need a variety of materials, each playing a vital role in the structural integrity and overall aesthetic of the final product. Below is a comprehensive list of the essential materials:
- Cardboard: The primary material for your project. Consider using corrugated cardboard for its strength and durability, especially for larger dividers, and flat cardboard sheets for smaller, decorative designs.
- Cutting Tools: A sharp utility knife or box cutter is crucial for clean cuts. Additionally, a pair of scissors can be useful for finer details.
- Ruler and Measuring Tape: Accurate measurements are essential for ensuring that all pieces fit together correctly.
- Adhesives: Depending on your preferences, you may use glue, double-sided tape, or even a hot glue gun to secure your cardboard pieces together.
- Fasteners: For added stability, consider using small screws or brads, especially if you are creating foldable sections.
- Decorative Materials: Paint, markers, or patterned paper can be used to personalize your divider and enhance its visual appeal.
- Protective Coating: A clear sealant or varnish can help protect your divider from wear and tear, especially if it will be used frequently.
Not all cardboard is created equal. Selecting the right type can significantly impact the durability and aesthetic of your divider. Here are some considerations:
- Corrugated Cardboard: This type features a wavy inner layer that provides strength and rigidity, making it ideal for larger dividers that need to withstand some pressure.
- Flat Cardboard Sheets: These are perfect for smaller, decorative projects where intricate designs are desired. They are easier to cut and manipulate.
Finding the materials for your project can be both fun and economical. Here are some tips:
- Recycling Centers: Check your local recycling center for discarded cardboard boxes.
- Grocery Stores: Many stores are willing to give away their used boxes, especially large ones.
- Online Marketplaces: Websites like Craigslist or Freecycle often have listings for free cardboard.
- Craft Stores: For specific decorative materials, local craft stores can provide a variety of options.
By gathering these materials before starting your project, you can streamline the construction process and ensure a more enjoyable crafting experience. Remember, the key to a successful DIY project lies in preparation, so take the time to collect everything you need!
Types of Cardboard to Use
When embarking on your DIY room divider project, understanding the types of cardboard available is crucial. Different types of cardboard not only provide varying levels of durability but also contribute distinct aesthetics to your design. Choosing the right cardboard can significantly enhance the overall look and functionality of your divider.
There are primarily two types of cardboard that you can consider for your room divider: corrugated cardboard and flat cardboard sheets. Each type has its unique characteristics, advantages, and ideal applications.
Corrugated cardboard is composed of a fluted layer sandwiched between two flat layers. This structure gives it remarkable strength and makes it a preferred choice for larger dividers. Here are some benefits:
- Durability: Corrugated cardboard can withstand more weight and pressure, making it ideal for freestanding dividers.
- Insulation: Its structure provides better insulation, which can help in sound dampening.
- Versatility: It can be easily cut and shaped into various designs, allowing for creative expressions.
Flat cardboard sheets are another excellent option, especially for smaller or decorative dividers. They are easier to work with when creating intricate designs and patterns. Here are some advantages:
- Lightweight: Flat sheets are easier to handle and transport, making them suitable for smaller projects.
- Design Flexibility: They can be painted, printed on, or decorated with various materials to achieve unique looks.
- Cost-Effective: Flat sheets are often more affordable and can be sourced from recycled materials.
Consider the following factors when selecting the type of cardboard:
- Size of the Divider: For larger dividers, corrugated cardboard is recommended for its strength.
- Design Complexity: If your project involves intricate designs, flat cardboard sheets may be more suitable.
- Intended Use: Think about whether the divider will be a permanent fixture or a temporary solution. Corrugated cardboard is better for long-term use.
Another approach is to combine both types of cardboard for enhanced functionality and aesthetics. For instance, you can use corrugated cardboard as the structural base and flat sheets for decorative elements. This combination can result in a more robust and visually appealing divider.
Understanding the different types of cardboard and their respective benefits can significantly impact the success of your DIY room divider project. By carefully considering your needs and preferences, you can select the most appropriate type of cardboard that not only meets your durability requirements but also enhances the aesthetic appeal of your space.
Corrugated Cardboard
is a highly versatile material that has gained popularity in various applications, particularly in the realm of DIY projects. Its unique structure, characterized by a fluted inner layer sandwiched between two flat outer layers, provides exceptional strength and durability. This makes it an ideal choice for constructing larger room dividers that require both stability and aesthetic appeal.
One of the primary advantages of using corrugated cardboard for room dividers is its structural integrity. Unlike traditional flat cardboard, which may bend or collapse under pressure, corrugated cardboard is designed to withstand significant weight and force. This makes it suitable for taller dividers that need to stand firm without additional support. Furthermore, the lightweight nature of corrugated cardboard allows for easy handling and repositioning, making it a practical option for those looking to create flexible living spaces.
There are several reasons why corrugated cardboard stands out as a preferred material for larger dividers:
- Cost-Effectiveness: Being a recyclable material, corrugated cardboard is often available at little to no cost, especially if sourced from packaging waste.
- Eco-Friendly: As an environmentally friendly option, using recycled corrugated cardboard helps reduce waste and promotes sustainability.
- Easy to Customize: It can be easily cut, painted, or decorated to match any interior design theme, allowing for creative expression.
- Sound Absorption: The fluted structure of corrugated cardboard can help dampen sound, providing a degree of acoustic privacy in shared spaces.
When planning your room divider project, consider the following steps:
- Design Your Divider: Sketch a layout that includes the dimensions and desired features of your divider.
- Gather Materials: In addition to corrugated cardboard, you may need adhesives, scissors, and decorative materials.
- Cutting the Cardboard: Use a sharp utility knife for clean edges, ensuring safety during the cutting process.
- Assembly: Connect the pieces using strong adhesives or tape, ensuring that the structure is stable and secure.
- Decorate: Personalize your divider with paint, fabric, or other embellishments to enhance its visual appeal.
While corrugated cardboard is an excellent choice for temporary or semi-permanent room dividers, its longevity can be affected by environmental factors. To extend the life of your cardboard divider:
- Avoid Moisture: Keep the divider in dry areas to prevent damage from humidity or spills.
- Regular Maintenance: Clean the surface with a soft, dry cloth to remove dust and dirt.
- Storage: When not in use, store the divider flat in a cool, dry place to avoid warping.
In summary, corrugated cardboard is a strong, cost-effective, and eco-friendly option for creating room dividers. Its excellent structural integrity and customizable nature make it a favorite among DIY enthusiasts. By following the outlined steps and maintenance tips, you can successfully create a unique and functional divider that enhances your living space.
Flat Cardboard Sheets
When it comes to crafting room dividers, offer a unique advantage, especially for those looking to create smaller and more decorative designs. Unlike their corrugated counterparts, flat sheets are easier to manipulate, allowing for intricate designs and detailed patterns that can transform a simple divider into an artistic statement piece.
Flat cardboard sheets are not only lightweight but also versatile, making them an excellent choice for DIY enthusiasts. Their smooth surface allows for easy application of various decorative techniques, including painting, stenciling, or even decoupage. This adaptability means you can easily customize your room divider to match your home decor or personal style.
When planning your room divider, consider the dimensions and design elements you wish to incorporate. Flat sheets can be cut into various shapes and sizes, enabling you to create a divider that fits perfectly in your space. Popular design ideas include:
- Geometric Patterns: Create a modern aesthetic with geometric cutouts.
- Nature Themes: Use leaf or floral designs for a calming effect.
- Color Blocks: Paint sections in different colors for a vibrant look.
To achieve the best results, it's crucial to use the right tools. A sharp utility knife or craft knife is recommended for clean cuts. Always ensure you work on a stable surface and use a straight edge as a guide to maintain precision. If you're creating intricate designs, consider using a cutting machine for added accuracy.
Once your pieces are cut, assembling them into a cohesive structure is the next step. For added stability, you can use strong adhesives or fasteners. Double-sided tape is an excellent option for lightweight designs, while hot glue can provide a more robust hold for larger sections. Ensure that your joints are secure to maintain the integrity of your divider.
After assembly, it’s time to personalize your divider. Here are a few ideas to enhance its appearance:
- Paint: Use acrylic paint for a bright finish or spray paint for a smooth application.
- Textiles: Attach fabric or paper to add texture and depth.
- Lighting: Incorporate LED lights to create an ambient glow through cutouts.
To ensure the longevity of your cardboard divider, proper maintenance is essential. Regularly dusting the surface and avoiding excessive moisture can help preserve its appearance. If the divider starts to show signs of wear, consider touching up paint or reinforcing weak points with additional adhesive.
When not in use, store your cardboard divider flat in a dry place to prevent bending or warping. If space is limited, consider folding it if you’ve designed it with foldable sections. This will help maintain its shape and usability for future use.
In conclusion, utilizing for your room divider project not only promotes sustainability but also allows for a high degree of creativity and personalization. With the right tools and techniques, you can create a stunning piece that enhances your living space while being mindful of your budget.
Tools Required for Construction
When embarking on the exciting journey of creating a cardboard room divider, having the right tools at your disposal is crucial. The construction process can be significantly simplified with the appropriate equipment, ensuring that your project is both efficient and enjoyable. Below, we outline the essential tools you will need for cutting, assembling, and finishing your cardboard divider.
To achieve the best results, consider investing in the following tools:
- Utility Knife: This is perhaps the most important tool for cutting cardboard. A sharp utility knife allows for clean, precise cuts, which are essential for a professional-looking finish.
- Cutting Mat: Protect your work surface and ensure clean cuts by using a cutting mat. This tool provides a stable base and prevents damage to your tables or countertops.
- Ruler or Straight Edge: For straight cuts, a ruler or straight edge is indispensable. It helps guide your utility knife and ensures accuracy in your measurements.
- Hot Glue Gun: For assembly, a hot glue gun is an excellent choice. It provides a strong bond that dries quickly, allowing you to move on to the next steps without delay.
- Scissors: While a utility knife is great for larger cuts, scissors can be handy for smaller, intricate details or when working with thinner cardboard.
- Pencil and Eraser: Always have a pencil on hand for marking measurements and designs. An eraser is useful for correcting any mistakes before making cuts.
- Paintbrushes and Sponges: If you plan to decorate your divider, having various paintbrushes and sponges will help you apply paint or other finishes smoothly.
- Measuring Tape: Accurate measurements are key to a successful project. A measuring tape ensures that your pieces fit together perfectly.
- Clamps: To hold pieces in place while the glue dries, clamps can be very helpful. They provide stability and allow you to work on other sections without worrying about pieces shifting.
Each of these tools plays a vital role in the construction process:
- The utility knife ensures clean edges for a polished look.- The cutting mat protects surfaces and prolongs the life of your blades.- A ruler or straight edge guarantees precision, which is crucial for fitting pieces together seamlessly.- Hot glue guns create strong, durable bonds that withstand the test of time.- Scissors are perfect for detailed work, allowing for creative designs.- Pencils and erasers help maintain accuracy in your planning phase.- Measuring tapes ensure every piece is cut to the right size.- Clamps stabilize your work, making assembly easier and more efficient.
With these tools, you can confidently approach your cardboard room divider project, transforming recycled materials into a functional and stylish addition to your home. Remember, the right tools not only make the work easier but also enhance the quality of your finished product. So gather your tools, unleash your creativity, and enjoy the process of crafting your very own room divider!
Step-by-Step Guide to Creating Your Divider
Creating your own room divider can be a fun and rewarding project, especially when using recycled materials like cardboard. This step-by-step guide will walk you through the process of making a stylish and functional cardboard room divider, ensuring that each stage is clear and straightforward.
Before you start cutting and assembling, it's crucial to plan your design. Consider the following:
- Size: Determine the dimensions of your divider based on the space available.
- Style: Decide whether you want a simple screen or a more intricate design with cutouts or patterns.
- Functionality: Think about whether you want it to be foldable or stationary.
Collect all the necessary materials to ensure a smooth construction process. You will need:
- Recycled cardboard (corrugated and flat sheets)
- Utility knife or box cutter
- Ruler and pencil
- Strong adhesive or tape
- Decorative materials (paint, fabric, etc.)
Once you have your design sketched out, it’s time to cut the cardboard. Follow these steps:
1. Measure and mark your cardboard according to your design.2. Use a ruler as a guide to ensure straight cuts.3. Carefully cut the cardboard with a utility knife, applying even pressure.4. Make sure to cut all pieces needed for your divider.
After cutting all your pieces, it’s time to assemble them:
- Join the Panels: Use strong adhesive or tape to attach the panels together. Ensure they are aligned properly.
- Reinforce Joints: For added stability, reinforce the joints with additional tape or adhesive.
If you want your divider to be foldable, consider these tips:
- Hinges: Use strips of cardboard as hinges to connect sections.
- Folding Mechanism: Ensure the sections can fold easily without damaging the cardboard.
Once assembled, it’s time to make your divider unique:
- Painting: Use non-toxic paint to add color to your divider.
- Texturing: Consider adding fabric or other materials for a more dynamic look.
To keep your cardboard divider looking fresh:
- Cleaning: Use a soft cloth to dust it regularly.
- Storage: Store it flat when not in use to avoid bending or damage.
By following these steps, you can successfully create a beautiful and functional cardboard room divider that not only enhances your space but also embodies sustainability and creativity. Enjoy your DIY project!
Designing Your Divider
Designing your cardboard room divider is a crucial step that can significantly impact the final result. Before you cut and assemble your materials, it's essential to invest time in sketching out your design. This practice not only helps you visualize the end product but also streamlines the building process, making it more efficient and enjoyable.
Sketching serves as a roadmap for your project. It allows you to plan dimensions, shapes, and any unique features you want to incorporate. By having a clear visual representation, you can avoid potential mistakes that may arise during the cutting and assembly phases.
- Dimensions: Measure your space accurately to determine the appropriate size for your divider. Consider both height and width to ensure it fits seamlessly within your room.
- Style: Think about the aesthetic you want to achieve. Will your divider be modern, rustic, or something entirely unique? Your design should reflect your personal style.
- Functionality: Consider how you plan to use the divider. Will it serve as a backdrop for a workspace, or do you want it to create a cozy nook? Your intended use will guide your design choices.
When sketching your divider, you can employ various techniques to bring your ideas to life:
1. Use graph paper to maintain proportions.2. Experiment with different shapes and layouts.3. Incorporate elements like cutouts or shelves.4. Visualize color schemes and patterns.
As you design, think about incorporating functional features that can enhance usability. For instance, you might want to include:
- Storage Compartments: Adding shelves or pockets can make your divider not just a visual barrier but also a practical storage solution.
- Artwork or Decor: Consider integrating spaces for artwork or plants to make your divider more visually appealing and personalized.
Once you have your sketches and ideas down, take a moment to review your design critically. Ask yourself:
- Does it meet my functional needs?
- Is it visually appealing?
- Are the dimensions accurate?
After this evaluation, you can make any necessary adjustments before moving on to the cutting and assembly phases.
In conclusion, investing time in the design phase of your cardboard room divider project will pay off significantly. A well-thought-out design not only enhances the aesthetic appeal but also ensures that your divider serves its intended purpose effectively. So grab your sketchbook, let your creativity flow, and prepare to bring your vision to life!
Cutting the Cardboard
When embarking on your DIY project to create a room divider from recycled cardboard, understanding the importance of proper cutting techniques is vital. Not only does this ensure that you achieve clean edges, but it also contributes to a more professional appearance for your finished product. This section will delve into the best practices for cutting cardboard safely and effectively, allowing you to maximize your results.
Using the right cutting techniques can significantly affect the overall quality of your cardboard divider. Clean cuts lead to better alignment during assembly, enhancing the structural integrity of the piece. Moreover, precise cuts reduce the risk of damage and waste, making your project more efficient.
- Utility Knife: A sharp utility knife is essential for making straight cuts. Ensure the blade is replaced regularly to maintain sharpness.
- Cutting Mat: Using a self-healing cutting mat protects your surfaces and prolongs the life of your blades.
- Ruler or Straight Edge: A sturdy ruler helps guide your cuts, ensuring straight lines.
- Scissors: For smaller or intricate cuts, a pair of strong scissors can be very helpful.
Safety should always come first when cutting cardboard. Here are some essential tips:
- Always cut away from your body to reduce the risk of injury.
- Use a stable surface to provide better control over your cuts.
- Keep your hands clear of the cutting path, and always be mindful of where the blade is.
To ensure you achieve the best results, follow these steps:
- Measure and Mark: Use a pencil to mark your cutting lines clearly. Double-check your measurements to avoid mistakes.
- Secure the Cardboard: Place the cardboard on a cutting mat and secure it with weights or clamps to prevent movement.
- Make Your Cuts: Using your utility knife, apply steady pressure along the marked lines. For thicker cardboard, make multiple passes with the knife rather than trying to cut through in one go.
- Check Your Edges: After cutting, inspect the edges for any rough spots. If necessary, use sandpaper to smooth them out.
Being aware of common pitfalls can save you time and frustration:
- Cutting Without a Guide: Always use a ruler or straight edge to guide your cuts for better accuracy.
- Using Dull Blades: Dull blades can lead to jagged edges and increase the risk of slips. Always ensure your blades are sharp.
- Rushing the Process: Take your time to ensure precision. Rushing can lead to mistakes that may require starting over.
By implementing these cutting techniques, you will not only enhance the quality of your room divider but also enjoy the process of creating something unique and sustainable. Remember, practice makes perfect; don't hesitate to experiment with different cutting methods to find what works best for you!
Assembling the Room Divider
Once you have cut the cardboard pieces for your room divider, the next crucial step is assembly. Proper assembly ensures that your divider is not only visually appealing but also stable and functional. In this section, we will explore effective methods for joining the cardboard pieces securely, ensuring a sturdy structure that can withstand daily use.
To begin, it is essential to consider the joining techniques you will use. Here are some popular methods:
- Adhesives: Using strong adhesives can provide a permanent bond between pieces. Options like PVA glue or hot glue work well for cardboard. Make sure to apply the glue evenly and hold the pieces together for a few moments to ensure a solid bond.
- Fasteners: If you prefer a more temporary solution, consider using fasteners like brads or staples. These can be particularly useful for securing joints that may need to be adjusted later.
- Tape: For quick fixes, duct tape or masking tape can be handy. However, keep in mind that tape may not provide the same level of durability as glue or fasteners.
Once you have chosen your preferred joining method, it’s time to align and secure the pieces. Here’s a step-by-step guide:
1. Lay out all the cut pieces on a flat surface.2. Start with the base sections of the divider. Apply your chosen adhesive or position fasteners at the joints.3. Hold the pieces together for a few seconds to allow the adhesive to set or secure the fasteners tightly.4. Move to the vertical sections, ensuring they are aligned correctly with the base.5. Repeat the process for each joint until the entire structure is assembled.
For added stability, consider reinforcing the joints with additional cardboard strips. This can be done by cutting small rectangles or triangles and gluing or fastening them over the joints. This technique not only increases strength but also adds an interesting design element to your divider.
Another innovative approach is to create foldable sections within your divider. This allows for versatility and ease of storage. To achieve this:
- Cut slits into the cardboard at desired intervals to create hinges.
- Fold along the slits, ensuring that the pieces can bend without breaking.
- Secure the folds with tape or glue to maintain the desired shape.
Finally, always test the stability of your assembled room divider by gently pushing on it to ensure it stands firm. Making adjustments at this stage will save you time and effort later on.
By following these guidelines, you can create a room divider that is not only aesthetically pleasing but also durable and practical for your space. Remember, the key to a successful assembly lies in the details—take your time, and ensure each joint is secure for the best results.
Using Adhesives and Fasteners
When it comes to constructing a room divider from recycled cardboard, using the right adhesives and fasteners is crucial for ensuring its durability and longevity. This section delves into various options available, their applications, and how they can enhance your project.
Adhesives play a vital role in securing the joints of your cardboard pieces, providing stability and support. The right adhesive can prevent wear and tear over time, making your divider not only functional but also visually appealing.
- White Glue: Commonly used for light projects, white glue is easy to apply and dries clear. However, it may not be suitable for heavy-duty applications.
- Hot Glue: This adhesive sets quickly and provides a strong bond, making it ideal for quick assembly. It is particularly useful when working with intricate designs.
- Spray Adhesive: Perfect for covering large areas, spray adhesives offer an even coat and are great for attaching decorative elements.
- Wood Glue: Although primarily designed for wood, wood glue can work well with cardboard, providing a strong, lasting bond.
In addition to adhesives, fasteners can add an extra layer of support to your cardboard divider. They are particularly useful for creating foldable sections or ensuring that larger pieces stay securely attached.
- Brads: Small metal fasteners that are easy to use and provide strong support for joints.
- Clips: Useful for temporary holds while the adhesive dries, clips can also be used for decorative purposes.
- Tape: Double-sided tape can be a quick solution for attaching lightweight sections, while masking tape can be used for temporary holds.
For optimal results, consider using a combination of both adhesives and fasteners. For example, you can use hot glue to secure the main joints while reinforcing them with brads for added strength. This combination ensures that your divider remains stable and durable over time.
- Surface Preparation: Ensure that the surfaces you're bonding are clean and dry to achieve the best adhesion.
- Apply Evenly: When using adhesives, apply them evenly to avoid weak spots that could compromise the integrity of your divider.
- Allow Proper Drying Time: Always allow adhesives to cure fully before putting any stress on the joints.
By carefully selecting the right adhesives and fasteners, you can significantly enhance the durability and functionality of your cardboard room divider. This attention to detail not only improves the structural integrity but also ensures that your creative project stands the test of time.
Creating Foldable Sections
Creating foldable sections in your cardboard room divider is not just a practical feature; it also adds a touch of versatility that enhances the overall functionality of your design. With foldable sections, you can easily adjust the size and shape of your divider to fit various spaces, making it an ideal solution for dynamic living environments.
Incorporating foldable sections into your cardboard room divider offers several advantages:
- Easy Storage: When not in use, foldable sections allow the divider to be compactly stored, saving valuable space in your home.
- Flexibility: You can easily reposition the divider to create different layouts, adapting to your needs as they change.
- Customizable Sizes: Foldable sections enable you to modify the height and width of your divider, allowing for a more personalized aesthetic.
Creating functional folds in your cardboard divider is a straightforward process. Follow these steps to ensure that your folds are both practical and visually appealing:
Before cutting any cardboard, take a moment to plan your design. Consider how many folds you want and where they will be placed. Sketching your ideas can help you visualize the final product.
Use a ruler to measure the sections where you want the folds. Mark these areas clearly with a pencil, ensuring that your lines are straight and precise.
When cutting the cardboard, use a sharp utility knife for clean edges. Make sure to cut along the marked lines, but do not cut all the way through; leave a small portion intact to create a hinge for the fold.
Example of cut line:-----------------------| || || ||---------------------| <- Cut here, but leave a small hinge| || || |-----------------------
To ensure durability, reinforce the folds by applying a strip of tape along the hinge. This will help maintain the structure and prevent tearing during use.
Once you have completed the folds, test them by gently bending the sections. Ensure that they move smoothly without any resistance. Adjust the hinges if necessary.
To make your foldable sections even more effective, consider the following tips:
- Use Lightweight Cardboard: Opt for lighter cardboard materials that are easier to manipulate.
- Decorate the Hinges: Add decorative tape or paint to the hinges to make them visually appealing.
- Experiment with Patterns: Create unique patterns on the cardboard to enhance the aesthetic of your divider.
By following these steps and tips, you can create foldable sections that not only serve a practical purpose but also contribute to the overall design of your cardboard room divider. This innovative approach to DIY home decor combines sustainability with creativity, allowing you to enjoy a functional and stylish space.
Decorating Your Cardboard Divider
When it comes to enhancing the visual appeal of your living space, can be a game-changer. A well-decorated divider not only serves its functional purpose but also adds a unique touch to your home decor. In this section, we will explore various creative ideas to personalize your cardboard room divider, making it a centerpiece in your room.
Personalizing your divider can significantly enhance its aesthetic appeal. By adding your personal touch, you can transform a simple cardboard structure into a stunning decorative element. Here are some compelling reasons to consider:
- Express Your Style: Your divider can reflect your personality and style, making your space feel more like home.
- Enhance Visual Interest: A decorated divider can break up monotony and add depth to your interior design.
- Functional Art: Combining functionality with art can create a unique atmosphere in your living space.
Here are some innovative ways to personalize your cardboard divider:
One of the easiest ways to enhance the look of your cardboard divider is through painting. Consider the following techniques:
- Solid Colors: A fresh coat of paint in a bold color can make your divider pop.
- Ombre Effects: Gradually blending colors can create a stunning visual effect.
- Stenciling: Use stencils to add intricate designs or patterns that resonate with your decor theme.
Textures can significantly enhance the tactile and visual appeal of your divider. Here are some ideas:
- Fabric Panels: Attach fabric to sections of your divider for a soft, inviting look.
- Washi Tape: Use decorative washi tape to create patterns or borders that add a playful touch.
- Natural Elements: Incorporate elements like twine, burlap, or dried flowers for a rustic feel.
Transform your divider into a canvas for your creativity:
- Personal Photos: Attach framed photos or prints that hold sentimental value.
- Art Prints: Use art prints or posters to create a gallery-style display.
- DIY Art: Get crafty and paint or draw directly on the cardboard for a truly unique piece.
Changing decorations according to the season can keep your space feeling fresh:
- Festive Themes: Use holiday-themed decorations to celebrate different seasons.
- Nature-Inspired: Incorporate seasonal flowers or leaves to bring a touch of nature indoors.
Consider adding lighting to your divider for an enchanting effect:
- Fairy Lights: String lights can create a cozy atmosphere when wrapped around your divider.
- LED Strips: Use LED strips to highlight specific areas or designs on your divider.
By implementing these creative ideas, you can transform your cardboard divider into a stunning element of your home decor. Whether you choose to paint, add textures, incorporate artwork, or play with lighting, the possibilities are endless. Let your imagination guide you, and enjoy the process of personalizing your space!
Painting and Finishing Techniques
When it comes to enhancing the aesthetic appeal of your cardboard room divider, the choice of paint and finish is crucial. Not only does it contribute to the overall look, but it also helps protect the cardboard from wear and tear. In this section, we will explore various materials and methods that can help you achieve a polished and professional finish.
Choosing the right paint is essential for achieving a smooth finish on your cardboard divider. Here are some popular options:
- Acrylic Paint: This water-based paint is easy to work with and dries quickly. It provides a vibrant finish and is safe for indoor use.
- Spray Paint: Ideal for achieving an even coat, spray paint can cover large areas quickly. However, ensure you work in a well-ventilated space and use a primer for better adhesion.
- Tempera Paint: A non-toxic option, tempera paint is great for children’s projects. It’s easy to clean up but may require a sealant for durability.
Before applying any paint, proper preparation is key to achieving a lasting finish. Follow these steps:
- Clean the Surface: Dust and dirt can affect paint adhesion. Wipe the cardboard with a damp cloth and let it dry completely.
- Apply a Primer: Using a primer can help the paint adhere better and provide a smooth base. Look for a water-based primer suitable for cardboard.
- Choose Your Colors: Decide on a color scheme that complements your room decor. Consider using multiple colors for a more dynamic look.
Once your cardboard is prepared, it's time to paint. Here are some techniques to consider:
- Brush Technique: For detailed work or smaller areas, using a brush allows for precision. Use soft brushes for smooth strokes.
- Sponge Technique: A sponge can create interesting textures and patterns. Simply dab the sponge in paint and apply it to the cardboard.
- Stenciling: Create unique designs by using stencils. Secure the stencil on the cardboard and paint over it for a crisp design.
Once the paint has dried, sealing your divider is important for longevity. Here are a few options:
- Clear Acrylic Sealer: This spray provides a protective coat that enhances color and adds a glossy finish.
- Mod Podge: A versatile craft medium that can serve as both an adhesive and a sealant, Mod Podge is perfect for adding a layer of protection.
- Varnish: A water-based varnish can provide a durable finish that is resistant to scratches and moisture.
Incorporating these painting and finishing techniques can significantly elevate the look of your cardboard room divider. With careful selection of materials and methods, you can achieve a stunning, polished finish that not only beautifies your space but also showcases your creativity.
Adding Texture and Patterns
to your cardboard room divider can significantly enhance its visual appeal and make it a standout feature in your space. By exploring different techniques, you can create a unique design that reflects your personal style and elevates your home decor.
Textures and patterns can transform a simple cardboard divider into a work of art. Here are some methods to consider:
- Layering Techniques: By layering different materials such as fabric, paper, or even paint, you can create depth and interest. For example, applying a textured fabric over the cardboard can add a touch of elegance.
- Stencils and Cutouts: Using stencils to create patterns or cutouts can give your divider a distinctive look. You can use various shapes and designs that resonate with your decor theme. This technique also allows light to filter through, creating beautiful shadow patterns.
- Textured Paints: Consider using textured paints or adding mediums to your paint to create a tactile surface. This can range from a subtle grainy finish to a bold, raised texture, making your divider more engaging to the touch and sight.
- Natural Elements: Incorporating natural materials like twine, dried flowers, or leaves can bring an organic feel to your divider. These elements can be glued or attached to the surface, adding a rustic charm.
- Color Blocking: Experimenting with color blocking can create a striking visual impact. Choose complementary or contrasting colors to divide sections of the divider, making it a vibrant focal point.
- Paper Mache Techniques: For a more artistic approach, consider using paper mache to create 3D patterns. This technique allows you to mold shapes and designs that can add significant character to your divider.
When implementing these techniques, it’s essential to consider the overall theme of your room. Ask yourself:
- What mood do I want to create?
- How will the textures and patterns complement my existing decor?
- Are there any specific materials I want to incorporate for sustainability?
Moreover, don't hesitate to experiment. Combining different textures and patterns can lead to unexpected and delightful results. For instance, a combination of smooth and rough surfaces can create a dynamic visual contrast that draws the eye.
Incorporating textures and patterns into your cardboard divider not only enhances its aesthetic appeal but also allows you to express your creativity. This project can be a fun and rewarding way to personalize your space while staying eco-friendly. Remember, the key is to enjoy the process and let your imagination guide you!

Maintaining Your Cardboard Divider
Proper maintenance can significantly prolong the life of your cardboard divider. By following a few simple tips, you can keep your creation looking fresh and functional for years to come. This section offers valuable insights on cleaning, protecting, and storing your cardboard divider to prevent wear and tear.
Why Is Maintenance Important for Cardboard Dividers?
Cardboard, while versatile and eco-friendly, is susceptible to damage from moisture, dirt, and physical stress. Regular maintenance not only enhances its aesthetic appeal but also ensures that it remains structurally sound. Here are some effective maintenance tips:
- Regular Cleaning: Dust and dirt can accumulate on your cardboard divider, making it look worn out. Use a soft, dry cloth or a feather duster to gently remove dust. For stains, lightly dampen a cloth with water and wipe the affected area. Avoid using harsh chemicals that can damage the cardboard.
- Avoid Moisture: Cardboard is not water-resistant. Keep your divider away from damp areas and avoid exposing it to liquids. If it does get wet, dry it immediately with a towel and allow it to air dry completely.
- Check for Wear and Tear: Regularly inspect your divider for any signs of damage, such as creases, tears, or sagging. Addressing these issues promptly can prevent further deterioration.
How Can You Protect Your Divider from Damage?
Protecting your cardboard divider from potential damage is crucial for its longevity. Here are some strategies:
- Use a Protective Coating: Consider applying a clear acrylic spray or a sealant designed for cardboard to create a protective barrier against moisture and dirt. Ensure that the coating is suitable for cardboard and follow the manufacturer’s instructions.
- Limit Direct Sunlight Exposure: Prolonged exposure to sunlight can cause fading and weakening of the cardboard material. Position your divider in a way that minimizes direct sunlight, or use curtains or shades to protect it.
- Reinforce Weak Areas: If you notice any weak points, reinforce them with additional layers of cardboard or tape. This can help maintain the structural integrity of your divider.
What Are the Best Storage Solutions for Longevity?
When not in use, proper storage is essential for maintaining your cardboard divider’s condition. Here are some best practices:
- Store in a Dry Place: Always store your divider in a dry, cool area to prevent moisture damage. Avoid basements or attics that may have fluctuating temperatures and humidity levels.
- Disassemble if Possible: If your divider is modular, disassemble it for storage. This will prevent unnecessary stress on the joints and allow for easier storage.
- Use Protective Covers: If you have to stack your divider or store it with other items, consider using a protective cover to shield it from dust and potential scratches.
By following these maintenance tips, you can ensure that your cardboard divider remains a functional and attractive element of your home decor. Regular care will not only enhance its lifespan but also keep it looking as good as new, allowing you to enjoy its benefits for years to come.
Cleaning Tips
Keeping your divider clean is essential for maintaining its appearance and longevity. A well-maintained room divider not only enhances the aesthetic of your space but also ensures that it remains functional over time. In this section, we will explore effective cleaning methods that are safe for cardboard, helping you preserve your DIY creation.
Regular cleaning of your cardboard room divider is crucial for several reasons:
- Prevents Dust Accumulation: Dust can settle on the surface, making your divider look dull and uninviting.
- Minimizes Allergens: Keeping surfaces clean helps reduce allergens that can affect air quality in your home.
- Extends Lifespan: Proper maintenance can prolong the life of your cardboard divider, ensuring it remains sturdy and visually appealing.
When it comes to cleaning cardboard, it's essential to use methods that won't damage the material. Here are some safe and effective cleaning techniques:
Start by using a soft, dry cloth or a microfiber duster to gently remove dust from the surface of your divider. This method is non-invasive and helps maintain the integrity of the cardboard.
If you encounter stains, use a damp cloth with a mild soap solution. Always test the solution on a small, inconspicuous area first to ensure it doesn't cause discoloration or damage. Gently dab the stained area without soaking the cardboard.
For a deeper clean, consider using a vacuum cleaner with a brush attachment. This method effectively removes dust and debris without the risk of tearing the cardboard. Make sure to use a low suction setting to avoid any damage.
It's crucial to keep moisture to a minimum when cleaning cardboard. Excessive water can weaken the material, leading to warping or structural damage. Always use a damp cloth rather than soaking the surface.
In addition to regular cleaning, taking preventive measures can help protect your cardboard divider:
- Keep Away from Direct Sunlight: Prolonged exposure to sunlight can cause fading and weakening of the cardboard.
- Avoid High Humidity Areas: Store your divider in a dry environment to prevent mold and mildew growth.
- Use Protective Coatings: Consider applying a clear sealant designed for cardboard to provide an extra layer of protection against spills and stains.
By following these cleaning tips and maintenance practices, you can keep your cardboard room divider looking fresh and vibrant. Regular attention to cleaning not only enhances its visual appeal but also contributes to a healthier living environment. With a little effort, your DIY divider can continue to be a stunning focal point in your home for years to come.
Storage Solutions for Longevity
When it comes to maintaining the integrity of your cardboard dividers, proper storage is essential. Storing your divider correctly not only protects it from physical damage but also helps maintain its appearance and functionality over time. This section outlines the best practices for storing cardboard dividers, ensuring they remain in excellent condition for future use.
Cardboard dividers are often lightweight and can be easily damaged if not stored correctly. Improper storage can lead to bending, tearing, or even complete destruction of the material. By following appropriate storage techniques, you can extend the lifespan of your dividers and keep them looking their best.
- Choose the Right Location: Store your dividers in a cool, dry place away from direct sunlight. Excessive heat and moisture can weaken the cardboard structure.
- Flat Storage: If possible, lay the dividers flat rather than stacking them. This prevents warping and ensures that they retain their shape.
- Use Protective Covers: Consider covering your dividers with a protective sheet or placing them in a storage box to shield them from dust and potential damage.
- Avoid Heavy Loads: Ensure that nothing heavy is placed on top of the stored dividers to prevent crushing or bending.
Organization is key when it comes to storing cardboard dividers. Here are some tips to keep your storage area neat and functional:
- Labeling: Clearly label each divider or storage box to quickly identify its purpose or design.
- Use Vertical Space: If you have limited floor space, consider using vertical storage solutions like shelves to keep your dividers accessible and organized.
- Regular Checks: Periodically inspect your stored dividers for any signs of damage or wear. Address any issues promptly to prevent further deterioration.
To further enhance the longevity of your cardboard dividers, consider the following:
- Climate Control: If possible, keep your dividers in a climate-controlled environment to mitigate the effects of temperature and humidity fluctuations.
- Rotate Usage: If you have multiple dividers, rotate their use to ensure that no single piece is subjected to excessive wear.
- Repair Minor Damage: If you notice small tears or bends, address them immediately with tape or adhesive to prevent further damage.
By implementing these storage solutions and maintenance tips, you can significantly enhance the longevity of your cardboard dividers. With careful handling and proper storage, your creative room dividers will continue to serve their purpose effectively, adding style and functionality to your space for years to come.
Frequently Asked Questions
- Can I really make a room divider from recycled cardboard?
Absolutely! Using recycled cardboard is not only eco-friendly, but it's also a fun and creative way to repurpose materials you already have at home. Plus, it's a zero-cost idea!
- What tools do I need to create a cardboard room divider?
You'll need some basic tools like a craft knife or scissors for cutting, a ruler for measuring, and glue or tape for assembly. Having a cutting mat can also help protect your surfaces!
- How can I decorate my cardboard divider?
The sky's the limit! You can paint it, add fabric, or even use wallpaper scraps. Think of it like dressing up a blank canvas—let your creativity flow!
- Is cardboard durable enough for a room divider?
Yes, especially if you use corrugated cardboard, which is quite sturdy. Just remember to handle it with care, and it can last for a long time if maintained properly.
- How do I clean my cardboard divider?
To keep it looking fresh, use a soft, dry cloth to dust it off. If it gets a bit dirty, a slightly damp cloth can work wonders, but avoid soaking it!