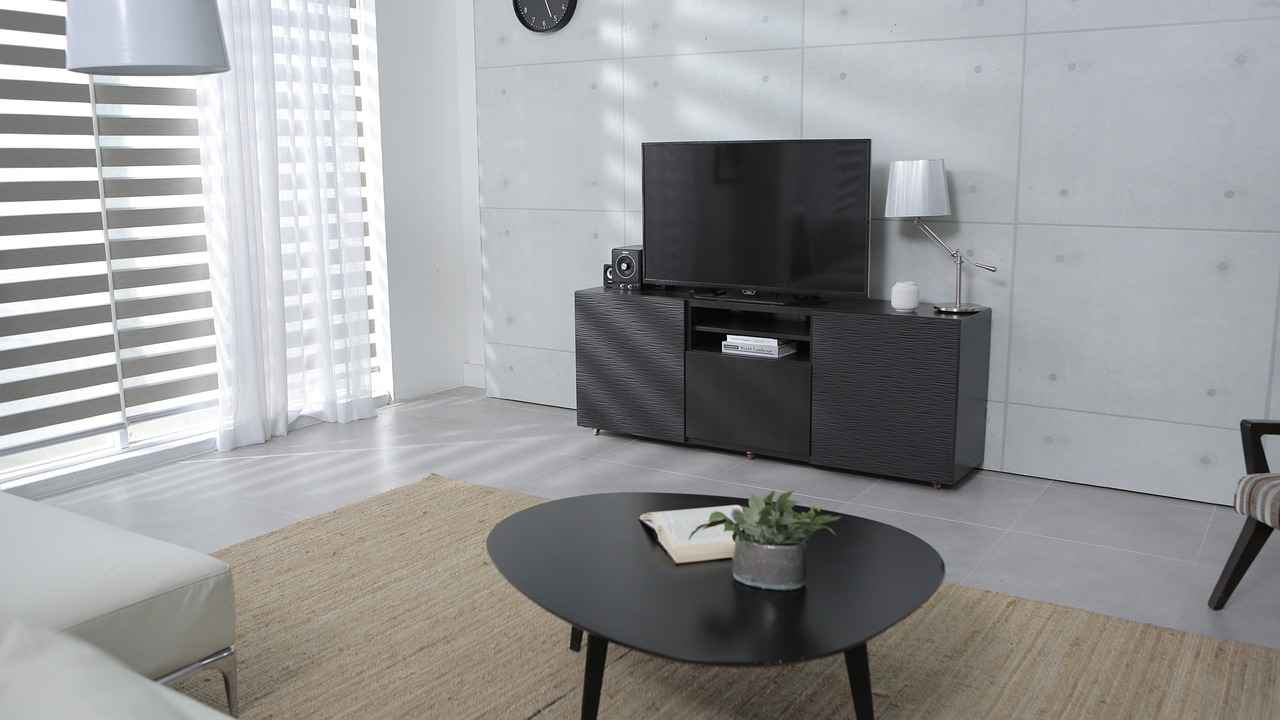
Creating a sliding room divider can significantly enhance your living space by offering both privacy and functionality. This article will guide you through the process of crafting a sliding room divider, providing practical tips and insights to transform your area into a more versatile environment.
A sliding room divider is a movable partition designed to create separate areas within a room. This innovative solution allows you to enhance your space without the need for permanent construction, making it an ideal choice for both small apartments and larger homes.
Sliding room dividers offer incredible flexibility in managing your space. They enable easy reconfiguration for various purposes, such as establishing a quiet workspace, creating a guest area, or simply adding a touch of style to your decor. With a sliding divider, you can adjust your environment according to your needs.
Choosing the right materials is crucial for both durability and aesthetic appeal. Common options include:
- Wood: Offers a warm, natural look and can be painted or stained.
- Fabric: Provides softness and can be easily changed to match decor.
- Metal: Adds a modern touch and is highly durable.
Follow this detailed guide to construct your sliding room divider:
1. Measure your space accurately to determine the dimensions of your divider.2. Select the appropriate track system for smooth operation.3. Choose your design and materials.4. Assemble the divider according to your design.5. Install the track system and mount your divider.
Exploring various design styles can help you find the perfect match for your decor. Consider:
- Minimalist: Simple lines and neutral colors.
- Bohemian: Vibrant fabrics and eclectic patterns.
- Industrial: Raw materials and bold designs.
Proper installation is key to ensuring your sliding room divider operates smoothly. Here are some essential tips:
- Tools You Will Need: A drill, level, measuring tape, and a saw.
- Common Mistakes to Avoid: Failing to measure accurately or not securing the track properly can lead to operational issues.
Regular maintenance will prolong the life of your sliding room divider. Here are some tips:
- Cleaning Tips for Different Materials: Use a damp cloth for wood, vacuum fabric, and use metal polish for metal dividers.
- Repairing Common Issues: Learn how to troubleshoot and fix issues like sticking tracks or loose panels.
With careful planning and execution, a sliding room divider can be a valuable addition to your home, offering both style and practicality. Whether you choose to create a workspace, a guest area, or simply enhance your room’s aesthetics, this guide provides all the necessary insights to embark on your DIY project.
What is a Sliding Room Divider?
A sliding room divider is an innovative solution for those looking to maximize their living space while enhancing privacy and functionality. These movable partitions allow you to create distinct areas within a room without the need for permanent construction, making them an ideal choice for renters or those who frequently change their living arrangements. By utilizing a sliding room divider, you can transform a single open space into multiple functional zones, catering to various activities such as work, relaxation, or entertaining guests.
Sliding room dividers offer numerous advantages:
- Flexibility: Easily reconfigure your space to suit your needs, whether you require a temporary office or a cozy reading nook.
- Enhanced Privacy: Create secluded areas for personal activities, ensuring a sense of tranquility even in shared spaces.
- Design Versatility: Available in various materials and styles, sliding dividers can complement any decor, from modern to rustic.
Choosing the right materials is crucial for both aesthetics and durability. Here are some popular options:
- Wood: Offers a warm and natural look, ideal for traditional or rustic designs.
- Fabric: Provides a soft texture and can be customized with patterns and colors, perfect for a cozy atmosphere.
- Metal: Gives a sleek, modern appearance and is often used in industrial-style interiors.
Constructing your sliding room divider involves several key steps:
1. Measure Your Space: Accurate measurements ensure a perfect fit.2. Select the Right Track System: Choose a sliding mechanism that suits your design.3. Design Your Divider: Consider colors, textures, and artwork to personalize your divider.4. Install: Follow proper installation techniques for smooth operation.
When it comes to design, the possibilities are endless. Here are some ideas to inspire your creativity:
- Minimalist: A simple, sleek design can create an open feel while still providing separation.
- Artistic: Incorporate artwork or decorative panels to make your divider a focal point.
- Nature-Inspired: Use natural materials or botanical prints to bring a touch of the outdoors inside.
Proper installation is essential for functionality. Here are some tips to ensure a hassle-free setup:
- Gather Tools: Have all necessary tools ready before starting your project.
- Avoid Common Mistakes: Double-check measurements and ensure the track is level for smooth operation.
To prolong the life of your sliding room divider, regular maintenance is key:
- Cleaning: Use appropriate cleaning methods for different materials to keep your divider looking great.
- Repairs: Learn how to troubleshoot common issues, ensuring your divider remains functional.
In summary, a sliding room divider is a versatile and practical addition to any space, offering both functionality and style. By understanding its benefits, materials, and installation process, you can create a customized solution that enhances your living environment.

Why Use a Sliding Room Divider?
Sliding room dividers have become increasingly popular in modern interior design due to their versatility and functionality. They serve as an effective solution for individuals seeking to maximize their space while maintaining privacy and aesthetic appeal. In this section, we will explore the various reasons why sliding room dividers are an excellent addition to any home or office environment.
One of the primary advantages of sliding room dividers is their ability to create flexible spaces. Unlike traditional walls, these dividers can be easily moved or adjusted, allowing for quick reconfiguration of areas. This flexibility is particularly beneficial in:
- Home Offices: As remote work becomes more prevalent, many individuals find themselves needing a dedicated workspace within their homes. A sliding room divider can transform a living area into a functional office space, providing the necessary separation without the permanence of a wall.
- Guest Accommodations: If you frequently host guests, a sliding room divider can create a private sleeping area in a larger room, ensuring comfort and privacy for your visitors.
- Multi-Functional Rooms: In smaller homes or apartments, spaces often serve multiple purposes. A sliding divider allows you to easily transition between a living room, dining area, and workspace, adapting to your needs throughout the day.
Beyond their functional benefits, sliding room dividers can significantly enhance the visual appeal of a space. With a wide range of materials, colors, and designs available, you can customize your divider to complement your decor. Options include:
- Wood: Provides a warm, natural look that adds character to any room.
- Fabric: Offers a soft, inviting touch and can feature patterns or colors that tie the room together.
- Glass: Creates an illusion of openness while still providing separation, ideal for modern and minimalist designs.
Investing in a sliding room divider can be a cost-effective solution for enhancing your living space. Compared to major renovations, installing a divider is typically less expensive and less disruptive. Additionally, the ability to reconfigure your space can lead to long-term savings, as you won’t need to undertake costly remodeling projects every time your needs change.
Privacy is a significant concern in shared living spaces. Sliding room dividers effectively address this issue by providing a barrier that reduces noise and visual distractions. Whether you’re working from home, studying, or simply seeking a moment of solitude, a well-placed divider can help create a more peaceful environment.
When considering a sliding room divider, it’s essential to evaluate the installation process. Most dividers come with user-friendly track systems that simplify the setup. However, it’s important to ensure that you have adequate wall space and structural support to accommodate the divider’s weight and movement. Consulting with a professional for installation can ensure optimal functionality and safety.
In summary, sliding room dividers offer a myriad of benefits, from flexibility and aesthetic enhancement to privacy and cost-effectiveness. As more people seek innovative solutions for their living and working environments, these dividers stand out as a practical and stylish choice.
Materials Needed for Your Sliding Room Divider
When it comes to creating a sliding room divider, choosing the right materials is essential for both durability and aesthetics. The materials you select will not only determine the longevity of your divider but also influence the overall look and feel of your space.
The materials you choose can significantly affect the functionality and visual appeal of your sliding room divider. Different materials offer unique benefits and challenges, making it crucial to understand your options:
- Wood: A classic choice that brings warmth and elegance to any room. Wood dividers can be customized with various finishes and stains, allowing you to match them with your existing decor. However, they may require regular maintenance to prevent warping or damage.
- Fabric: Ideal for those seeking a softer, more inviting look. Fabric dividers can be easily changed to suit different themes or seasons. They offer excellent sound absorption, enhancing privacy. However, they may be less durable and require regular cleaning.
- Metal: A modern and sleek option that provides a contemporary feel. Metal dividers are incredibly durable and can withstand wear and tear. They can also be paired with glass or other materials for a unique design. However, metal can be prone to scratches and may require polishing to maintain its shine.
When selecting a material for your sliding room divider, consider the following factors:
- Purpose: What will the divider be used for? If you need a space for work or study, consider materials that offer sound insulation, like fabric.
- Style: Ensure the material complements your existing decor. A rustic wooden divider may not suit a modern minimalist space.
- Durability: Consider the wear and tear the divider will experience. High-traffic areas may benefit from more robust materials like metal.
- Maintenance: Some materials require more upkeep than others. Wood may need regular sealing, while fabric might need frequent washing.
Don’t hesitate to mix materials for a unique look. For instance, a wooden frame with a fabric insert can provide the best of both worlds, offering stability while maintaining a soft appearance. Similarly, combining metal with glass can create an airy feel while ensuring durability.
In conclusion, the materials you select for your sliding room divider play a pivotal role in its functionality and aesthetic appeal. By understanding the benefits and drawbacks of wood, fabric, and metal, you can make an informed decision that suits your style and needs.

Step-by-Step Guide to Building a Sliding Room Divider
Creating a sliding room divider can significantly enhance your living space by providing both privacy and functionality. This detailed guide will walk you through the essential steps to construct your own sliding room divider, ensuring you have the right tools and techniques for a successful project.
Building a sliding room divider requires careful planning and execution. Here’s how to get started:
- Gather Your Materials: Before you begin, ensure you have all necessary materials, including wood, fabric, or metal, depending on your design preference. You will also need a track system, screws, and brackets.
- Tools Required: Make sure to have the following tools on hand:
- Measuring tape
- Drill
- Screwdriver
- Level
- Saw (if cutting wood)
- Measure Your Space: Accurate measurements are crucial. Measure the width and height of the area where you plan to install the divider. This will ensure a perfect fit.
- Select a Track System: Choose a sliding track system that suits your design. There are various types available, including ceiling-mounted and wall-mounted options. Ensure it can support the weight of your chosen materials.
- Cut Your Materials: If you are using wood or other solid materials, cut them to the desired size based on your measurements. Always double-check your measurements before cutting.
- Assemble the Divider: Begin assembling your divider by attaching the chosen materials to the track system. Use brackets to secure the divider and ensure it hangs straight.
- Install the Track: Follow the manufacturer’s instructions to install the track securely. Use a level to ensure it is straight, as this will affect how smoothly the divider operates.
- Test the Sliding Mechanism: Once everything is installed, test the sliding mechanism to ensure it operates smoothly. Make any necessary adjustments.
By following these steps, you can create a functional and aesthetically pleasing sliding room divider that enhances your space. Remember to take your time and ensure each step is completed accurately for the best results.
Measuring Your Space
When it comes to creating a sliding room divider, accurate measurements are crucial for achieving a perfect fit. This process not only ensures that your divider functions as intended but also enhances the overall aesthetic of your space. In this section, we will explore how to measure your space effectively, providing you with the necessary tools and techniques to ensure a successful project.
Having the right dimensions is vital for several reasons:
- Functionality: A well-measured divider will operate smoothly, allowing you to open and close it with ease.
- Aesthetics: Proper measurements ensure that your divider fits seamlessly into your room’s design, enhancing its visual appeal.
- Space Optimization: Accurate measurements help utilize your space efficiently, preventing overcrowding or wasted areas.
Before you begin measuring, gather the following tools:
- Measuring Tape: A flexible measuring tape is essential for capturing both length and height accurately.
- Level: This tool ensures that your divider will be straight and even once installed.
- Pencil and Paper: Use these for jotting down measurements and making notes as you work.
Follow these steps to ensure that you get accurate measurements for your sliding room divider:
1. **Identify the Area:** Determine where you want to install the divider. Clear any furniture or obstacles in the way.2. **Measure Width:** Use the measuring tape to find the width of the space where the divider will be placed. Measure at least twice to confirm accuracy.3. **Measure Height:** Determine the height from the floor to the ceiling. Again, measure more than once to ensure precision.4. **Check for Level:** Use a level to see if the floor is even. If there are any dips or rises, note them down as they may affect the installation.5. **Consider Clearances:** Account for any necessary clearances for the sliding mechanism. This includes space for the track and any additional hardware.
While measuring, it’s easy to make mistakes that can lead to issues during installation. Here are some common pitfalls to avoid:
- Rushing the Process: Take your time to ensure that every measurement is accurate.
- Ignoring Obstacles: Be mindful of any fixtures or furniture that might interfere with the divider’s operation.
- Not Double-Checking: Always double-check your measurements before making any purchases. A small error can lead to significant problems.
To enhance your measuring process, consider the following tips:
- Use a Helper: Having someone assist you can make measuring easier, especially for larger spaces.
- Take Multiple Measurements: For the best accuracy, measure the same dimensions multiple times and take the average.
- Record Everything: Keep a detailed record of all measurements and notes, as this will be helpful when selecting materials and planning your design.
By following these guidelines, you can ensure that your sliding room divider will fit perfectly within your space, providing both functionality and style. Remember, taking the time to measure accurately is the foundation of a successful project.
Selecting the Right Track System
When it comes to creating a sliding room divider, one of the most critical components is the track system. This system not only facilitates the movement of the divider but also ensures that it operates smoothly and efficiently. In this section, we will explore the various options available for track systems, helping you find the best sliding mechanism that suits your specific needs.
The track system serves as the backbone of your sliding room divider. It is essential for ensuring that the divider can glide effortlessly along its path, providing both functionality and ease of use. A well-designed track system minimizes friction, reduces wear and tear, and enhances the overall user experience.
- Ceiling-Mounted Tracks: These tracks are attached to the ceiling and offer a sleek, unobtrusive look. They are ideal for spaces with limited wall space and provide a clean aesthetic.
- Wall-Mounted Tracks: Fixed to the wall, these tracks are easier to install and can support heavier dividers. They are a great option for traditional or rustic designs.
- Floor-Mounted Tracks: While less common, floor-mounted systems can provide added stability. However, they may require more maintenance to keep them clear of debris.
When selecting a track system, consider the materials used. Common options include:
- Aluminum: Lightweight and durable, aluminum tracks are resistant to corrosion and can handle heavy loads.
- Steel: Known for its strength, steel tracks are ideal for larger dividers but may require additional support during installation.
- Plastic: While not as durable as metal options, plastic tracks can be a cost-effective solution for lighter dividers.
Accurate measurements are crucial to ensure the track system fits perfectly. Here’s how to measure:
1. Measure the width of the opening where the divider will be installed.2. Determine the height from the ceiling to the floor.3. Account for any obstructions, such as light fixtures or furniture.
Proper installation is key to ensuring your sliding room divider operates smoothly. Here are some tips:
- Follow Manufacturer Instructions: Always refer to the installation guide provided by the manufacturer for specific details.
- Use the Right Tools: Ensure you have the necessary tools, such as a level, drill, and measuring tape, to facilitate a seamless installation.
- Check for Level: Before securing the track, double-check that it is level to avoid operational issues.
Even with the best planning, issues may arise. Here are some common problems and their solutions:
- Sticking or Jamming: This can occur due to debris in the track. Regular cleaning can help maintain smooth operation.
- Misalignment: If the divider isn’t sliding properly, check that the track is level and securely attached.
- Wear and Tear: Over time, the track may wear out. Regular inspections can help identify when it’s time for a replacement.
In summary, selecting the right track system is essential for the functionality and aesthetics of your sliding room divider. By understanding the different types, materials, and installation techniques, you can ensure a smooth and effective operation that enhances your space.

Design Options for Your Sliding Room Divider
When it comes to enhancing your living space, can make a significant difference. Not only do these dividers serve a functional purpose, but they also add to the overall aesthetic of your home. In this section, we will delve into various design styles, ensuring you find the perfect match for your decor.
For those who appreciate a sleek and modern look, minimalist designs are an excellent choice. These dividers often feature:
- Neutral colors such as white, gray, or beige.
- Simple lines and geometric shapes.
- Materials like glass or light wood that allow light to flow through.
Minimalist sliding room dividers not only create separation but also maintain an open and airy feel in your space.
If you prefer a cozier atmosphere, consider a rustic design. These dividers often incorporate:
- Reclaimed wood for a natural look.
- Earthy tones like browns and greens.
- Textured fabrics that add warmth and depth.
Rustic dividers work beautifully in country homes or spaces aiming for a homey vibe.
For those who want their divider to be a focal point, elaborate designs can transform your space. These may include:
- Intricate patterns or carvings.
- Bold colors that draw attention.
- Artistic elements like murals or prints.
Such dividers not only serve a practical function but also express your unique style.
Contemporary sliding room dividers are ideal for modern homes. They often feature:
- Mixed materials, such as metal and glass.
- Unique shapes that challenge traditional designs.
- Bold patterns or colors that reflect current trends.
These dividers can enhance a modern aesthetic while providing the necessary separation in your space.
Sometimes, the best design is one that combines aesthetics with functionality. Consider dividers that:
- Include shelving for added storage.
- Feature foldable or retractable elements for versatility.
- Incorporate lighting to enhance ambiance.
Functional designs allow you to maximize your space while keeping it stylish.
In conclusion, when selecting a design for your sliding room divider, consider your personal style and how the divider will fit into your existing decor. Whether you lean towards a minimalist approach or prefer something more elaborate, there is a perfect option out there for you. By carefully choosing the right design elements, you can create a space that is both functional and visually appealing.
Choosing Colors and Textures
is a pivotal aspect of designing your sliding room divider. The right hues and materials not only enhance the aesthetic appeal of your space but also contribute to the overall ambiance and functionality. This section will delve into how to select the perfect colors and textures for your divider, ensuring it complements your interior while providing the necessary privacy.
Colors can evoke emotions and set the mood of a room. For instance, warm colors like reds and yellows can create an inviting atmosphere, while cool colors such as blues and greens can promote calmness and relaxation. When choosing colors for your sliding room divider, consider how they will interact with the existing color palette of your room. A cohesive color scheme can enhance the overall look and feel of your space.
Texture adds depth and interest to any design. A sliding room divider can be crafted from a variety of materials, each offering different textures. For example:
- Wood: Provides a warm, natural feel and can be stained or painted for a custom look.
- Fabric: Softens the space and can be used in various patterns and colors, making it versatile for different styles.
- Metal: Offers a sleek, modern appearance and can be finished in various ways to suit your decor.
When selecting textures, think about how they will feel in the space. A rough texture can create a rustic feel, while smooth surfaces may lend a more contemporary vibe.
The combination of colors and textures can create a stunning visual impact. For example, pairing a soft beige fabric with a dark wood frame can create a beautiful contrast that adds interest without overwhelming the space. Consider using a monochromatic color scheme for a sophisticated look, or a complementary color scheme for a more vibrant and dynamic feel. Experimenting with different combinations can lead to unique and personalized designs.
When choosing colors and textures for your sliding room divider, keep the following tips in mind:
- Consider Lighting: Natural and artificial lighting can significantly affect how colors are perceived. Test samples in different lighting conditions to see how they appear throughout the day.
- Think About the Room’s Purpose: The function of the space should guide your choices. A home office might benefit from calming colors, while a playroom could incorporate brighter, more energetic hues.
- Use Samples: Always obtain samples of materials and colors before making a final decision. This allows you to see how they work together in your space.
While aesthetic appeal is important, remember that the primary function of a sliding room divider is to provide privacy. Darker colors and heavier textures can help block light and sound, enhancing the sense of seclusion. For instance, a thick, patterned fabric can serve as an effective visual barrier while adding visual interest to the room.
In summary, choosing the right colors and textures for your sliding room divider is essential for creating a harmonious and functional space. By considering the emotional impact of colors, the tactile qualities of textures, and how they can work together, you can design a divider that not only enhances your decor but also fulfills its purpose of providing privacy.
Incorporating Artwork into Your Design
Transforming your sliding room divider into a statement piece is an exciting way to blend functionality with creativity. By incorporating artwork, you can personalize your space while enhancing its aesthetic appeal. This section will explore how to effectively integrate art into your divider design, ensuring it serves both practical and decorative purposes.
Why Choose Artwork for Your Divider?
- Enhances Aesthetic Appeal: Artwork can instantly elevate the look of your room, adding character and style.
- Personal Expression: Incorporating pieces that reflect your personality or interests creates a unique atmosphere.
- Conversation Starter: A beautifully designed divider can serve as a focal point, sparking conversations among guests.
Selecting the Right Artwork
When choosing artwork for your sliding room divider, consider the following:
- Size: Ensure the dimensions of the artwork complement the scale of the divider. Oversized pieces can make a bold statement, while smaller works can create a gallery effect.
- Theme: Choose artwork that aligns with your overall interior design theme, whether it be modern, rustic, or eclectic.
- Material: Depending on your divider’s material, consider artwork that can withstand wear and tear, especially in high-traffic areas.
Creative Ways to Incorporate Artwork
- Framed Art: Use frames to showcase prints or original pieces. This method allows for easy swapping if you wish to refresh your decor.
- Gallery Wall: Create a mini gallery on your divider by arranging multiple pieces in a cohesive layout.
- Wall Decals: For a more temporary solution, consider wall decals or removable stickers that can be easily changed.
- Fabric Art: If your divider is made of fabric, consider printing or painting designs directly onto the material for a seamless look.
Combining Functionality with Art
While integrating artwork, it’s essential to maintain the divider’s primary function. Here are some tips:
- Accessibility: Ensure that the artwork does not obstruct the sliding mechanism, allowing for smooth operation.
- Lighting: Consider the lighting in the area. Proper illumination can enhance the visual impact of the artwork.
- Balance: Maintain a balance between decorative elements and practical use. Avoid overcrowding the divider with too many pieces.
Conclusion
Incorporating artwork into your sliding room divider not only enhances its visual appeal but also allows you to express your personal style. By carefully selecting pieces that resonate with your decor and ensuring they complement the divider’s functionality, you can create a unique and inviting space. Embrace creativity and let your divider become a true reflection of your personality!

Installation Tips for Your Sliding Room Divider
When it comes to enhancing your living space with a sliding room divider, proper installation is essential for ensuring that it operates smoothly and efficiently. A well-installed divider not only improves functionality but also adds to the aesthetic appeal of your home. Below are some important tips to help you achieve a hassle-free setup.
Before starting the installation, it’s crucial to take accurate measurements of your space. This ensures that your sliding room divider fits perfectly. Use a tape measure to record the width and height of the area where you plan to install the divider. Always measure twice to avoid mistakes that could lead to costly adjustments later.
The track system is the backbone of your sliding room divider. It determines how smoothly the divider will operate. There are various options available, including ceiling-mounted and wall-mounted tracks. Consider your room’s layout and choose a system that complements your design while ensuring easy movement of the divider.
Having the right tools on hand can make the installation process much smoother. Here’s a list of essential tools you will need:
- Drill
- Screwdriver
- Level
- Stud finder
- Measuring tape
- Safety goggles
Before installation, ensure that the area is clean and free of any obstructions. This not only makes the process easier but also ensures safety during installation. If you are mounting the track on the ceiling, check for any electrical wires or plumbing that may be in the way.
Follow these steps for a successful installation:
- Mark the Track Position: Use a pencil to mark where the track will be installed, ensuring it is level.
- Drill Holes: Using the appropriate drill bit, create holes in the marked spots for the screws.
- Install the Track: Secure the track to the wall or ceiling using screws, making sure it is firmly in place.
- Attach the Divider: Hang the room divider on the track according to the manufacturer’s instructions.
- Test the Movement: Slide the divider back and forth to ensure smooth operation.
Being aware of common mistakes can save you time and frustration. Here are a few pitfalls to avoid:
- Not double-checking measurements before cutting materials.
- Failing to use a level, which can result in a crooked installation.
- Over-tightening screws, which can damage the track or divider.
By following these installation tips, you can ensure that your sliding room divider is set up correctly, providing you with the privacy and functionality you desire. Remember, a well-installed divider not only enhances your space but also adds value to your home.
Tools You Will Need
When embarking on the exciting journey of creating your own sliding room divider, it is essential to gather the right tools beforehand. Having the appropriate tools not only streamlines the installation process but also minimizes frustration and errors. Below is a comprehensive list of essential tools that will ensure a smooth and efficient installation.
Using the correct tools can significantly impact the outcome of your project. It allows for greater precision, enhances safety, and ultimately leads to a more professional finish. Whether you’re a seasoned DIYer or a beginner, being well-prepared is key.
- Measuring Tape: Accurate measurements are crucial for a perfect fit. A reliable measuring tape ensures you get the dimensions right.
- Level: To ensure your divider hangs straight, a level is indispensable. This tool helps you avoid any unsightly tilts.
- Drill: A power drill will be necessary for creating holes in your walls or ceiling, allowing you to install the track system securely.
- Screwdriver: Both flathead and Phillips screwdrivers will be needed to secure the screws in place, ensuring everything is tightly fastened.
- Stud Finder: This tool helps locate wall studs, providing a solid anchor point for your track system and ensuring stability.
- Hacksaw: If you need to cut the track or any wooden components to size, a hacksaw will be essential for achieving clean cuts.
- Safety Gear: Don’t forget safety glasses and gloves to protect yourself during the installation process.
- Clamps: Useful for holding materials in place while you work, clamps can help ensure precision during assembly.
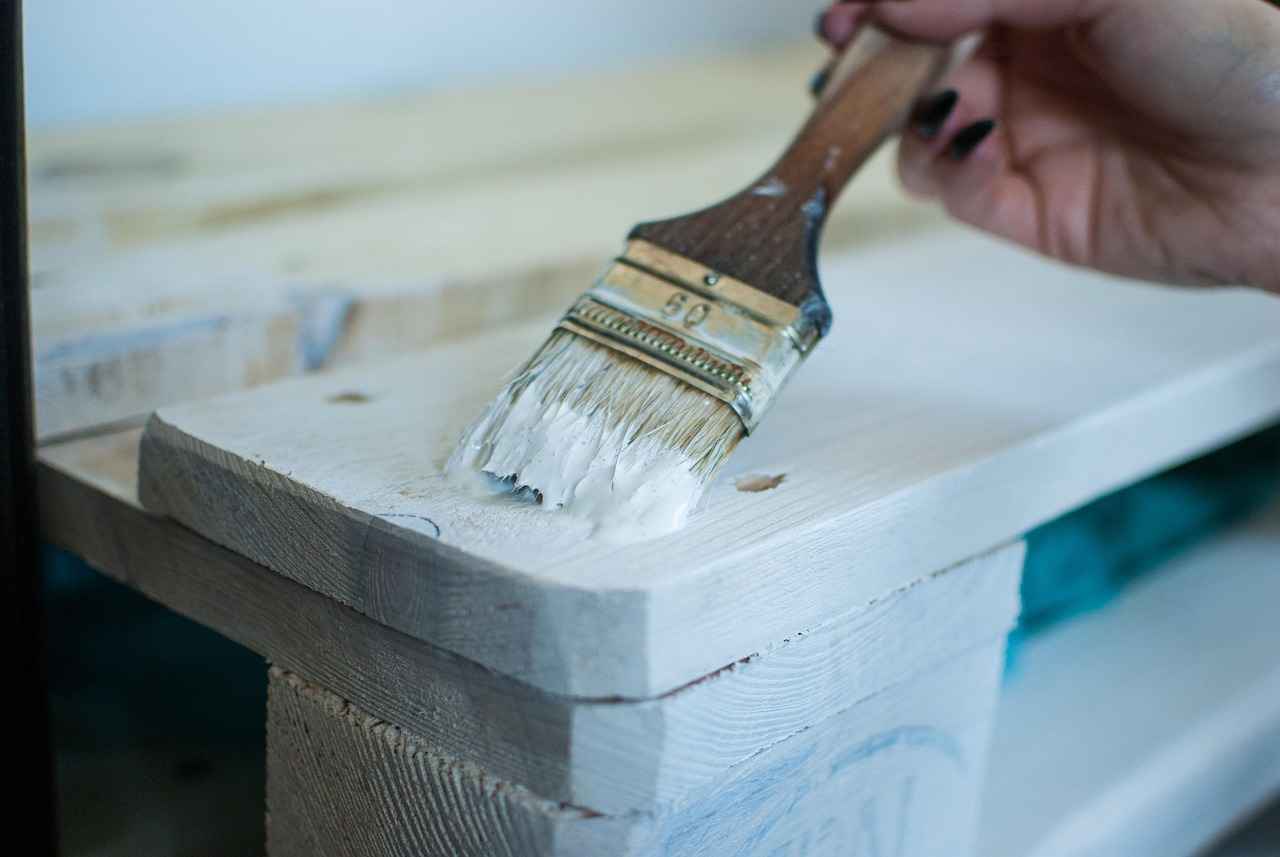
- Paintbrush or Roller: If you plan to paint or finish your divider, having these tools on hand will make the process much easier.
- Utility Knife: This tool is handy for trimming fabric or other materials to the desired size.
Before you start your project, take a moment to familiarize yourself with each tool. Understanding how to use them properly will help you work more efficiently and safely. Additionally, always ensure that your tools are in good condition; dull blades or worn-out bits can lead to mistakes and accidents.
By gathering these essential tools, you’ll set yourself up for success in creating a functional and aesthetically pleasing sliding room divider. Remember, preparation is key, and having the right equipment at your disposal will make the installation process enjoyable and rewarding.
Common Mistakes to Avoid
When embarking on the journey of installing a sliding room divider, it is crucial to recognize that understanding potential pitfalls can significantly enhance your installation experience. By being aware of common mistakes, you can ensure a seamless and efficient process, ultimately achieving the privacy and functionality you desire.
Many individuals underestimate the complexity involved in installing a sliding room divider. This oversight can lead to errors that not only affect the divider’s performance but also compromise the overall aesthetic of your space. Familiarizing yourself with these mistakes is the first step towards a successful installation.
One of the most prevalent mistakes is taking inaccurate measurements. Failing to measure your space correctly can result in a divider that is either too large or too small. Always double-check your dimensions and consider using a laser measuring tool for precision.
The track system is vital for the smooth operation of your sliding room divider. Selecting an inappropriate system can lead to sticking or jamming. Research different track options and ensure you choose one that suits the weight and design of your divider.
Another common mistake is neglecting proper weight distribution. If your divider is unevenly weighted, it may not slide smoothly. Ensure that the materials you choose are appropriate for the height and width of your divider, and consider using a counterweight if necessary.
Before starting your installation, it is essential to have a comprehensive pre-installation checklist. Skipping this step can lead to missing tools or materials, resulting in delays and frustration. Make sure to gather everything you need, including screws, brackets, and tools, before you begin.
While functionality is important, aesthetics should not be overlooked. Many people focus solely on the installation aspect and forget to consider how the divider will fit into their existing decor. Choose colors and textures that complement your space to enhance its overall look.
After installation, it is crucial to test the sliding mechanism thoroughly. Some individuals skip this step, leading to frustration later on. Make sure to slide the divider multiple times to ensure it operates smoothly and make any necessary adjustments immediately.
Finally, many people fail to consider the long-term maintenance of their sliding room dividers. Regular upkeep is essential for ensuring the longevity of the divider. Familiarize yourself with the specific care requirements for the materials used in your divider to keep it looking great.
By avoiding these common mistakes, you can ensure a smooth installation process for your sliding room divider. Remember, preparation and attention to detail are key to achieving the privacy and functionality you desire in your space.
Maintenance and Care for Your Sliding Room Divider
Regular maintenance is essential to prolong the life of your sliding room divider. By caring for different materials effectively, you can keep your divider looking great and functioning smoothly. Here are some detailed tips on how to maintain your sliding room divider based on its material type.
Maintaining your sliding room divider not only enhances its aesthetic appeal but also ensures its functionality. Regular upkeep can prevent wear and tear, saving you money on repairs or replacements in the long run.
- Cleaning: Use a soft, damp cloth to wipe down the surface. Avoid harsh chemicals that can damage the finish.
- Polishing: Apply a wood polish every few months to maintain its shine and protect the surface from scratches.
- Humidity Control: Keep the room at a consistent humidity level to prevent warping or cracking.
- Vacuuming: Regularly vacuum fabric dividers to remove dust and debris.
- Spot Cleaning: For stains, use a mild detergent and a soft cloth. Test in an inconspicuous area first.
- Sun Protection: If placed in direct sunlight, consider using UV-protective sprays to prevent fading.
- Cleaning: Wipe down with a damp cloth and mild soap. Avoid abrasive cleaners that could scratch the surface.
- Rust Prevention: Apply a rust-inhibiting spray if the divider is exposed to moisture.
- Lubrication: Regularly lubricate the track system to ensure smooth operation.
Over time, sliding room dividers may encounter issues such as misalignment or difficulty sliding. Here are some tips for troubleshooting:
- Misalignment: Check the track for debris and ensure that the divider is properly seated in the track.
- Sticking: If the divider sticks, apply a silicone lubricant to the track.
- Wear and Tear: Inspect for any damaged parts and replace them as needed to maintain functionality.
It’s recommended to perform a thorough maintenance check at least once every season. However, a quick visual inspection should be done monthly to catch any potential issues early.
By following these maintenance tips, you can ensure that your sliding room divider remains a beautiful and functional addition to your space for years to come. Remember, the key to longevity is consistent care and attention to detail.
Cleaning Tips for Different Materials
Maintaining the appearance and functionality of your sliding room divider is essential for enhancing your space. Different materials require specific cleaning methods to ensure longevity and aesthetic appeal. In this section, we will explore effective cleaning tips for wood, fabric, and metal dividers.
Wood dividers are not only functional but also add a touch of elegance to your space. However, they require special care to avoid damage:
- Dust Regularly: Use a soft, dry cloth to dust wood surfaces weekly. This prevents dirt buildup and scratches.
- Use Mild Cleaners: For deeper cleaning, mix a few drops of mild dish soap with warm water. Dampen a cloth with the solution and wipe the surface, followed by a clean damp cloth to remove soap residue.
- Avoid Excess Moisture: Never soak wood dividers; excessive moisture can lead to warping. Always dry the surface immediately after cleaning.
- Polish Occasionally: Use a wood polish or conditioner every few months to maintain shine and protect the finish.
Fabric dividers can add warmth and texture, but they also attract dust and stains. Here’s how to keep them looking fresh:
- Vacuum Regularly: Use a vacuum with a brush attachment to remove dust and debris. This should be done at least once a month.
- Spot Clean Stains: For stains, blot the area with a clean cloth and a solution of water and mild detergent. Avoid rubbing, as this can spread the stain.
- Wash Removable Covers: If your fabric divider has removable covers, check the care label and machine wash or hand wash as recommended.
- Steam Cleaning: For deep cleaning, consider using a steam cleaner to refresh the fabric without harsh chemicals.
Metal dividers are durable and easy to maintain. Follow these steps to keep them in top condition:
- Wipe Down Regularly: Use a microfiber cloth to wipe the surface and remove fingerprints and dust.
- Use Non-Abrasive Cleaners: For stubborn spots, a mixture of vinegar and water can effectively clean without scratching the surface.
- Dry Thoroughly: After cleaning, ensure the metal is dried completely to prevent rust or corrosion, especially if it is not stainless steel.
- Check for Scratches: Regularly inspect for scratches or dents. Use a metal polish to buff out minor imperfections.
By following these tailored cleaning tips for wood, fabric, and metal dividers, you can ensure that your sliding room divider remains a beautiful and functional element of your home. Regular maintenance will not only enhance its lifespan but also keep your space looking its best.
Repairing Common Issues
Over time, your sliding room divider may encounter various issues that can hinder its functionality and aesthetic appeal. Understanding how to troubleshoot and repair these common problems is essential for ensuring the longevity of your divider. Below are some frequent issues and practical solutions to help you maintain your sliding room divider in top condition.
- Sticking or Jamming: This is one of the most common issues. It can occur due to dirt buildup, misalignment, or damaged tracks.
- Uneven Sliding: If your divider is not sliding smoothly, it may be due to uneven installation or wear and tear on the track.
- Noise During Operation: Creaking or grinding noises can indicate that the rollers or track need lubrication or replacement.
- Cosmetic Damage: Scratches, dents, or stains can mar the appearance of your divider, especially if it is made of wood or fabric.
Before diving into repairs, it’s essential to identify the root of the problem. Here are some steps you can take:
- Inspect the Track System: Check for any debris or obstructions in the track. Clean it thoroughly using a damp cloth and a mild detergent.
- Check the Rollers: Examine the rollers for wear. If they appear damaged, consider replacing them to restore smooth functionality.
- Align the Divider: Ensure the divider is properly aligned with the track. Adjust it if necessary to prevent sticking.
- Lubricate Moving Parts: Use a silicone-based lubricant on the track and rollers to minimize noise and ensure smooth operation.
If you encounter specific problems, here are some targeted repair tips:
- For Sticking Dividers: After cleaning the track, check the alignment. If misaligned, gently adjust the mounting brackets or the divider itself.
- For Noisy Operation: Apply lubricant to the rollers and track. If noise persists, inspect the rollers for damage and replace if necessary.
- For Cosmetic Damage: Use wood filler for scratches on wooden dividers or fabric cleaner for stains on fabric dividers. For deeper scratches, consider sanding and refinishing.
To avoid future issues, regular maintenance is key:
- Regular Cleaning: Clean the track and rollers every few months to prevent dirt buildup.
- Periodic Inspections: Check the alignment and condition of the rollers and track regularly.
- Lubrication: Lubricate the moving parts at least twice a year to ensure smooth operation.
By following these troubleshooting and repair tips, you can keep your sliding room divider functioning smoothly and looking great for years to come. Regular maintenance not only enhances the longevity of your divider but also contributes to the overall aesthetic of your space.
Frequently Asked Questions
- What materials are best for a sliding room divider?
Choosing the right materials can make all the difference! Popular options include wood for a warm, natural look, fabric for a soft touch, and metal for a modern vibe. Each material has its own benefits, so consider your style and needs.
- How do I measure my space for the divider?
Measuring your space accurately is crucial! Start by determining the area where you want the divider. Use a tape measure to check the height and width, and don’t forget to account for any furniture that might obstruct movement. This way, your divider will fit perfectly!
- What are the common mistakes to avoid during installation?
Ah, the classic installation blunders! One common mistake is not checking the level of the track system. If it’s uneven, your divider won’t slide smoothly. Another pitfall is skipping the pre-drilling of holes, which can lead to splintering. Take your time, and you’ll avoid these headaches!
- How can I maintain my sliding room divider?
Regular maintenance is key to longevity! For wood dividers, dust them often and use a wood polish occasionally. Fabric dividers may need vacuuming or spot cleaning, while metal ones can be wiped down with a damp cloth. Each material has its own care routine, so check those specifics!

