This article delves into various methods for creating a temporary DIY room divider, offering practical tips and insights to enhance privacy for guests in any living space. Whether you’re hosting a gathering or simply need to create a more intimate setting, a room divider can be a versatile solution.
Understanding the right materials is essential for building a sturdy and effective room divider. Common options include:
- Fabric: Lightweight and available in various designs, fabric can easily blend with your decor.
- Wood: Offers durability and a rustic charm, perfect for a more permanent setup.
- Lightweight Screens: Portable and easy to set up, these are ideal for temporary use.
Selecting an appropriate design for your room divider can significantly impact your interior decor. Consider factors like:
- Room Size: A large divider may overwhelm a small space, while a small one may not provide enough privacy.
- Style: Ensure the divider complements your existing decor for a cohesive look.
- Functionality: Think about how often you’ll need to move or adjust the divider.
Creating a fabric room divider is a popular choice due to its versatility. Here’s a detailed guide:
Before starting your project, ensure you have all necessary tools and materials. This includes:
- Fabric: Choose a fabric that matches your style.
- Tension Rod: Essential for hanging the fabric.
- Scissors: For cutting the fabric to size.
- Sewing Machine or Fabric Glue: For assembly.
Accurate measurements are crucial for a well-fitting room divider. Follow these steps:
1. Measure the height and width of the area where you want the divider.2. Cut the fabric to the desired size, allowing extra for hems.3. Hem the edges to prevent fraying.
Folding screens are a practical and stylish option for temporary room dividers. They offer:
- Portability: Easy to move and store when not in use.
- Ease of Setup: Quick to unfold and position.
- Variety: Available in numerous designs and materials.
Folding screens come in various styles and materials, such as:
- Wood: Provides a classic look.
- Metal: Offers a modern touch.
- Fabric: Softens the space and adds color.
Adding personal touches to your folding screen can enhance its visual appeal. Consider:
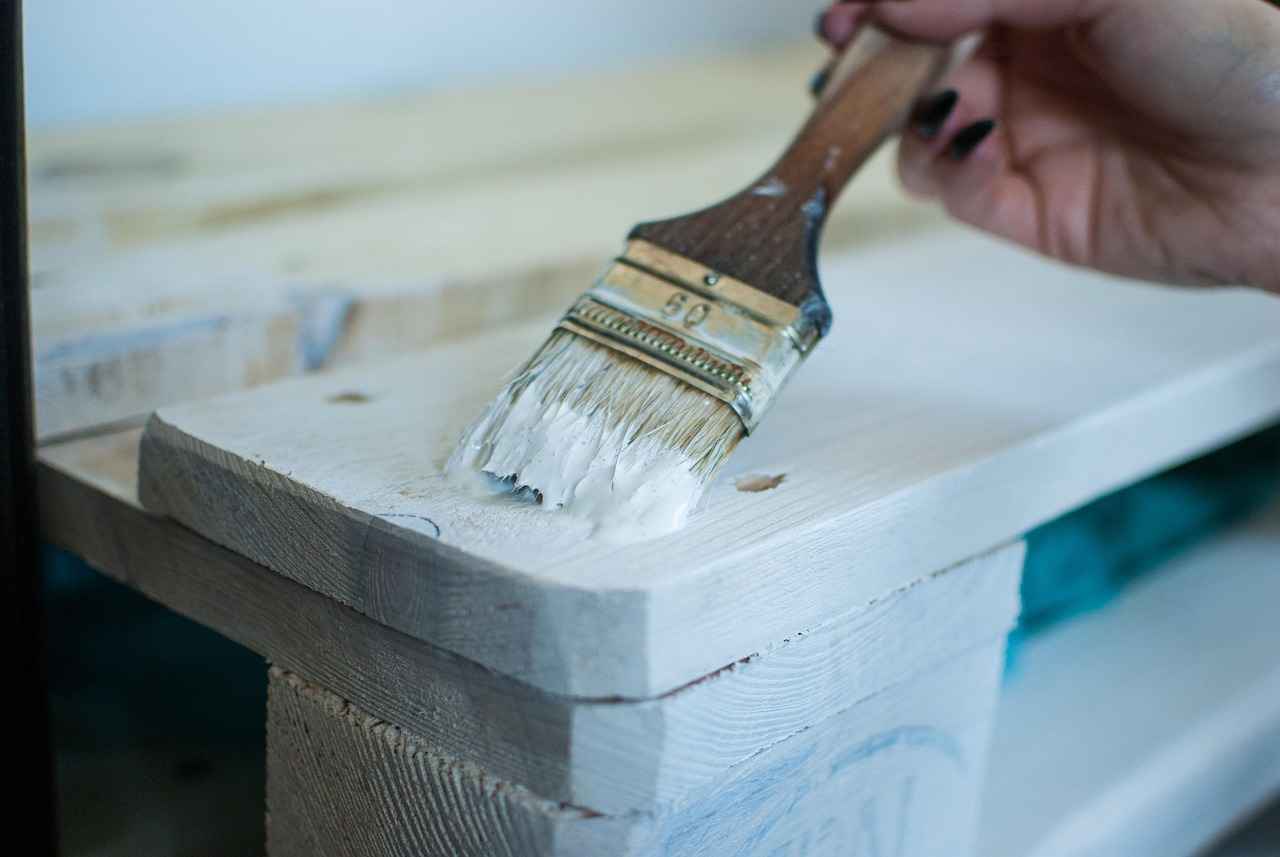
- Painting: A fresh coat of paint can rejuvenate an old screen.
- Fabric Panels: Attach different fabrics for a unique look.
- Artwork: Hang small pieces of art or photographs.
Bookshelves offer a dual purpose as both storage and room dividers. They can help create distinct areas while maintaining functionality. Here’s how:
The style of bookshelf you choose can greatly influence the overall look of your room. Options include:
- Open Shelving: Provides visibility and a light feel.
- Closed Cabinets: Offers a more contained look.
Strategic placement of bookshelves can enhance privacy. Consider:
- Positioning bookshelves perpendicular to the main sightlines.
- Using taller bookshelves to create a visual barrier.
If traditional dividers aren’t your style, there are numerous creative alternatives available. Explore options like:
Curtains provide a flexible solution for creating temporary dividers. They can be easily hung and adjusted for privacy. Consider:
- Using a curtain rod or tension wire for easy installation.
- Choosing fabrics that match your decor.
Using plants as natural dividers can enhance your decor while providing privacy. Select and arrange plants for a serene atmosphere.
- Tall Plants: Use floor plants for height.
- Hanging Plants: Create layers and depth.

What Materials Do You Need for a DIY Room Divider?
Creating a temporary room divider can be a practical solution for enhancing privacy in your living space. Understanding the right materials is essential for building a sturdy and effective room divider. This article will delve into various materials you can use, highlighting their unique features and benefits.
When it comes to constructing a DIY room divider, the choice of materials can significantly influence both the functionality and aesthetics of the divider. Below are some common options:
- Fabric: Fabric is a versatile option that can provide a soft and inviting look. It comes in various colors, patterns, and textures, allowing you to customize your divider to match your decor. Lightweight fabrics, such as cotton or linen, are ideal for creating a flowing, airy feel, while heavier fabrics like velvet can add a touch of elegance.
- Wood: Wood is a classic material that offers durability and a natural aesthetic. It can be used to create solid dividers or slatted designs that allow light to filter through. Depending on your preference, you can choose from various types of wood, such as pine for a rustic look or oak for a more refined appearance.
- Lightweight Screens: Folding screens made from materials like bamboo, metal, or plastic are excellent for temporary dividers. They are easy to set up and can be moved around as needed. These screens often come in decorative designs that can enhance the visual appeal of your space.
- Cardboard: For a budget-friendly option, cardboard can be used to create a simple and lightweight divider. It can be painted or covered with fabric for a more polished look. While not as durable as other materials, it is an excellent choice for temporary solutions.
- Plants: Incorporating plants as dividers not only creates privacy but also adds a natural element to your space. Tall plants or a series of smaller plants can effectively separate areas while enhancing your decor.
Each of these materials serves different aesthetic and functional purposes, making it important to consider your specific needs when selecting a material for your DIY room divider. For instance, if you’re looking for something portable, lightweight screens or fabric might be the best choice. On the other hand, if you want a more permanent solution, wood could be the ideal option.
Additionally, consider the dimensions of your space and the desired level of privacy. A fabric divider can offer a soft separation, while a wooden or screen divider can provide a more defined boundary. By understanding the characteristics of each material, you can make an informed decision that enhances both the functionality and style of your living area.
Ultimately, the right material for your DIY room divider will depend on your personal style, the functionality you require, and your budget. By exploring these options, you can create a beautiful and practical solution to enhance privacy for guests in your home.

How to Choose the Best Design for Your Space?
When it comes to enhancing your home’s interior, selecting the right design for your room divider plays a crucial role. A well-chosen divider not only serves its intended purpose but also complements your overall decor. In this section, we will explore essential factors to consider when choosing the best design for your space.
- Room Size: The dimensions of your room are fundamental in determining the type of divider you should choose. A large, spacious room may benefit from a bold and elaborate divider, while a smaller space might require something more streamlined to avoid feeling cramped.
- Style: Your room’s existing decor should guide your choice. Whether your style is modern, traditional, or eclectic, the divider should harmonize with your current aesthetic. For instance, a sleek glass divider can enhance a contemporary space, while a rustic wooden screen might be perfect for a farmhouse setting.
- Functionality: Consider how you intend to use the divider. Will it provide privacy, create distinct areas, or serve as a decorative element? Understanding its purpose will help you choose a design that meets your specific needs.
- Material: The material of the divider can significantly affect both its look and functionality. Options include fabric, wood, metal, or even plants. Each material brings its own unique character and can influence the room’s ambiance.
- Flexibility: If you anticipate needing to adjust your space frequently, opt for a divider that is lightweight and easy to move. Folding screens or curtains can offer the flexibility you need.
Once you have determined the basic design, think about ways to enhance its aesthetic appeal. Here are some ideas:
- Color Coordination: Choose colors that complement or contrast with your existing decor. A vibrant divider can act as a focal point, while neutral tones can blend seamlessly into the background.
- Texture: Incorporating different textures can add depth to your space. For example, a fabric divider might contrast beautifully with a sleek wooden floor.
- Artistic Elements: Consider adding artwork or decorative elements to your divider. This could include paintings, photographs, or even hanging plants that enhance its visual interest.
Customizing your room divider allows you to create a unique piece that reflects your personality and style. Here are some benefits:
- Personalization: A customized divider can incorporate your favorite colors, patterns, and materials, making it a true reflection of your taste.
- Functionality: Tailoring the design to your specific needs ensures that the divider not only looks good but also serves its intended purpose effectively.
- Value Addition: A well-designed room divider can enhance the value of your home by improving its aesthetic appeal and functionality.
In summary, selecting an appropriate design for your room divider is a multifaceted decision that requires careful consideration of various factors, including room size, style, functionality, and material. By taking the time to assess these elements, you can find the perfect match that not only enhances your interior decor but also meets your practical needs.
Step-by-Step Guide: How to Build a Fabric Room Divider
Creating a fabric room divider is a popular choice due to its versatility and aesthetic appeal. This guide will provide you with a comprehensive, step-by-step process to craft a beautiful and functional fabric divider that can enhance privacy and style in any room.
Fabric room dividers are not only practical but also add a touch of elegance to your space. They are lightweight, easy to install, and can be customized to match your decor. Whether you need to create a cozy nook for guests or separate workspaces, a fabric room divider can be the perfect solution.
- Fabric: Choose a fabric that complements your decor. Options include cotton, linen, or even sheer materials for a light and airy feel.
- Tension Rod: This will hold your fabric in place. Make sure it is adjustable to fit your space.
- Scissors: For cutting your fabric to the desired length.
- Sewing Machine or Fabric Glue: Depending on whether you want a permanent or temporary solution.
- Measuring Tape: To ensure accurate measurements.
Accurate measurements are crucial for a well-fitting room divider. Start by measuring the height and width of the area where the divider will be placed. Add a few extra inches to the height for a finished look. Once you have your measurements, lay the fabric flat and use scissors to cut it to size.
Once your fabric is cut, it’s time to assemble your divider. If you’re using a tension rod, simply slide the fabric onto the rod and adjust it to your desired height. If you prefer a more permanent solution, you can sew a pocket at the top of the fabric to hold the rod securely. For those using fabric glue, apply it along the edge where you want to create a pocket and allow it to dry completely before hanging.
Now that your divider is assembled, consider adding some decorative elements. You can:
- Paint or dye: Customize the color to match your interior.
- Add embellishments: Consider lace, tassels, or even stencils to enhance the visual appeal.
- Layer fabrics: Use multiple fabrics for a textured look.
To keep your fabric room divider looking fresh, regular maintenance is essential. Vacuum it periodically to remove dust, and if necessary, wash the fabric according to the care instructions. This will ensure that your divider remains a beautiful and functional part of your home.
In summary, creating a fabric room divider is a straightforward project that can significantly enhance your living space. With the right materials and a bit of creativity, you can craft a divider that not only provides privacy but also adds a unique touch to your decor.
Gathering Your Tools and Materials
Creating a temporary DIY room divider can be an exciting project that enhances privacy and aesthetics in your living space. To embark on this creative journey, it is crucial to start with the right tools and materials. This section will guide you through the essential items needed to ensure your project runs smoothly and efficiently.
Before diving into your DIY room divider project, it is important to assemble all necessary tools and materials. This preparation will not only save you time but also help you avoid frustration during the assembly process. Below is a comprehensive list of items you will need:
- Fabric: Choose a fabric that complements your decor. Options include cotton, linen, or sheer materials, depending on the level of privacy you desire.
- Tension Rod: A tension rod is essential for hanging your fabric. Ensure it is adjustable to fit the width of your space.
- Scissors: A sharp pair of scissors is necessary for cutting the fabric to your desired size. Precision is key for a clean finish.
- Sewing Machine or Fabric Glue: Depending on your skills and preference, you can either sew the edges of the fabric or use fabric glue for a no-sew option.
- Measuring Tape: Accurate measurements are crucial for ensuring your divider fits perfectly in the designated space.
- Clips or Pins: These can help hold the fabric in place while you are working on it, ensuring a neat appearance.
- Iron: An iron will help remove wrinkles from your fabric, giving it a polished look.
Once you have gathered all the necessary tools and materials, you can move on to the next steps of measuring and cutting your fabric. This preparation phase is vital for achieving a successful and aesthetically pleasing room divider.
In addition to the basic tools listed above, consider any additional decorative elements you may want to incorporate into your divider. For example, you might want to use decorative trims or embellishments to personalize your fabric. These can add a unique touch and enhance the overall design of your room divider.
By ensuring you have everything you need before you start, you can focus on the creative aspects of your project, resulting in a beautiful and functional room divider that meets your needs.
Measuring and Cutting the Fabric
Creating a temporary DIY room divider can greatly enhance privacy and functionality in your living space. One of the most critical steps in this process is accurately. This ensures that your room divider fits perfectly and looks aesthetically pleasing. Below, we will explore the essential steps to achieve optimal results.
Accurate measurements are crucial for a well-fitting room divider. A poorly measured divider can lead to gaps or an unbalanced look, detracting from your overall decor. It can also affect the functionality of the divider, making it less effective in providing the privacy you desire. Here are some key reasons why precise measurements are essential:
- Optimal Coverage: Ensures that the divider covers the intended area without leaving spaces.
- Aesthetic Appeal: A well-fitted divider enhances the visual harmony of your space.
- Ease of Installation: Accurate dimensions simplify the installation process, saving you time and effort.
To begin, you will need a few basic tools: a measuring tape, a pencil, and paper for notes. Follow these steps to ensure accurate measurements:
- Identify the Area: Decide where you want to place your room divider. Consider the dimensions of the space and any furniture that may obstruct the divider.
- Measure Height: Use the measuring tape to measure the height from the floor to the ceiling or the desired height of your divider.
- Measure Width: Measure the width of the area you want to cover. Be sure to account for any irregularities in the wall or floor.
- Account for Fabric Overlap: If you want the fabric to overlap slightly on the sides for a finished look, add a few extra inches to your width measurements.
Once you have your measurements, it’s time to cut the fabric. Here’s how to do it effectively:
- Choose the Right Fabric: Select a fabric that suits your style and purpose. Consider weight, texture, and color.
- Lay Out the Fabric: Spread the fabric on a flat surface to avoid any creases or folds that could affect your measurements.
- Mark Your Cuts: Use a fabric marker or chalk to mark the dimensions on the fabric. Double-check your measurements before cutting.
- Cut with Precision: Use sharp fabric scissors to ensure clean edges. Take your time to avoid jagged cuts.
To ensure your room divider looks polished and professional, consider the following tips:
- Hem the Edges: Sewing or gluing the edges of the fabric prevents fraying and gives a neat look.
- Use a Tension Rod: For easy installation, consider using a tension rod that can be adjusted to fit your space.
- Decorate as Desired: Add embellishments, such as tassels or fabric paint, to personalize your divider.
By following these steps and tips, you can create a stunning and functional room divider that enhances your space while providing the privacy you need. Remember, taking the time to measure accurately and cut precisely will pay off in the final look and effectiveness of your DIY project.

What Are the Benefits of Using a Folding Screen?
Folding screens are a versatile and stylish solution for creating temporary room dividers, making them increasingly popular in modern homes. They not only serve the practical purpose of dividing spaces but also add an element of design to any room. Below, we explore the numerous advantages of using folding screens in your living space.
- Portability: One of the standout features of folding screens is their lightweight design. This makes them incredibly easy to move from one location to another, allowing you to reconfigure your space as needed. Whether you want to create a cozy nook for guests or separate a workspace, folding screens can be effortlessly relocated.
- Ease of Setup: Unlike traditional room dividers that may require installation, folding screens can be set up in seconds. Simply unfold the screen and position it where you need it. This user-friendly aspect makes them ideal for temporary arrangements, such as during gatherings or when hosting overnight guests.
- Variety of Designs: Folding screens come in a wide range of styles, materials, and colors, allowing you to choose one that complements your existing decor. From elegant wooden screens to vibrant fabric options, there is a folding screen to suit every taste and aesthetic.
- Space Optimization: In smaller living spaces, folding screens can help delineate areas without the need for permanent walls. They allow for efficient use of space, creating distinct zones for different activities, such as work and relaxation, while maintaining an open feel.
- Privacy Enhancement: Folding screens provide a sense of privacy without completely closing off a space. This is particularly beneficial in shared living environments, where individuals may need their own space for various activities.
- Cost-Effective Solution: Compared to building permanent walls or investing in heavy furniture, folding screens are a budget-friendly option. They provide the same benefits of separation and privacy at a fraction of the cost.
In addition to these practical benefits, folding screens can also serve as a decorative element. You can personalize them with artwork, fabric, or even fairy lights to enhance their visual appeal. This flexibility allows you to change the look of your space without significant investment or effort.
Overall, folding screens are an excellent choice for anyone looking to enhance their living space with style and functionality. Whether you need a temporary solution for privacy or simply want to add a decorative touch to your home, folding screens offer a myriad of benefits that make them a must-have item in modern interior design.
Types of Folding Screens Available
Folding screens have become increasingly popular as versatile room dividers that can enhance both functionality and aesthetics in various living spaces. With a plethora of styles and materials available, choosing the right folding screen can significantly impact your room’s ambiance. This article delves into the different types of folding screens, helping you identify which option best aligns with your design preferences and practical needs.
Folding screens come in an array of styles, each offering unique characteristics to suit different interior designs. Here are some popular styles:
- Traditional Wooden Screens: These screens often feature intricate carvings and designs that add a touch of elegance to any room. They are perfect for creating a warm and inviting atmosphere.
- Modern Metal Screens: Sleek and minimalist, metal folding screens provide a contemporary look. They are often used in industrial-style interiors and can be easily moved or adjusted.
- Fabric Folding Screens: Available in various colors and patterns, fabric screens offer versatility and can be customized to match your decor. They provide a softer look and can also help with sound absorption.
- Eco-Friendly Bamboo Screens: Bamboo folding screens are not only sustainable but also bring a natural element to your space. They are lightweight and can easily be relocated as needed.
The choice of material for your folding screen can greatly influence its functionality. Here’s how:
- Wood: Offers durability and stability, making it ideal for long-term use. However, it can be heavier and less portable than other materials.
- Metal: Lightweight and easy to set up, metal screens are perfect for temporary arrangements but may lack the warmth of wooden options.
- Fabric: Provides flexibility in design and can be easily cleaned or replaced. However, fabric screens may not be as sturdy and could require more maintenance.
- Bamboo: Lightweight and eco-friendly, bamboo screens are easy to transport, making them great for temporary setups. They also add a natural aesthetic to your space.
When selecting a folding screen, consider the following factors:
- Size: Ensure the screen fits well within your space without overwhelming it. Measure the area before making a purchase.
- Style: Choose a style that complements your existing decor. Whether you prefer modern, traditional, or eclectic, there’s a folding screen for you.
- Functionality: Think about how you plan to use the screen. Do you need it for privacy, decoration, or to define different areas within a room?
- Portability: If you plan to move the screen frequently, opt for lighter materials that are easy to handle.
Folding screens can be utilized in various settings, including:
- Living Rooms: Create a cozy reading nook or separate entertainment areas.
- Bedrooms: Enhance privacy, especially in shared spaces.
- Offices: Define workspaces in open-plan environments.
- Event Spaces: Use screens to create distinct areas for different activities.
In conclusion, folding screens are a practical and stylish solution for enhancing privacy and defining spaces within your home or office. By understanding the various types and materials available, you can select the perfect folding screen that not only meets your functional needs but also complements your overall design aesthetic.
How to Decorate Your Folding Screen
Decorating your folding screen can transform it from a simple room divider into a stunning focal point in your space. By adding personal touches, you can enhance its visual appeal while also reflecting your unique style. Here are some creative ideas to consider:
Personalizing your folding screen not only improves its aesthetic value but also allows you to create a sense of cohesion in your decor. A well-decorated screen can tie together various elements in your room, making it feel more harmonious. Additionally, a customized folding screen can serve as a conversation starter and showcase your creativity.
- Painting: One of the simplest ways to personalize your folding screen is by painting it. Choose colors that complement your existing decor or opt for bold hues to create a statement piece. You can also use stencils or sponges to add patterns and textures.
- Adding Fabric Panels: Attach fabric panels to your folding screen for a soft and inviting look. Choose fabrics that match your color scheme or incorporate different textures for added interest. You can use fabric glue or a staple gun to secure the panels in place.
- Incorporating Artwork: Frame small pieces of art or photographs and attach them to the screen. This not only personalizes the divider but also allows you to showcase your favorite pieces in an unexpected way.
- Using Decals and Stickers: If you prefer a temporary option, consider using removable decals or stickers. These can be easily applied and removed, allowing you to change the look of your folding screen whenever you desire.
- Adding Natural Elements: Incorporate natural elements like dried flowers, twigs, or leaves into your design. You can glue these items directly onto the screen or use them to create a decorative garland that drapes across it.
When decorating your folding screen, it’s essential to ensure that all elements are securely attached. Use strong adhesives or fasteners to prevent any decorations from falling off. Regularly check the integrity of your decorations, especially if you move the screen frequently.
Consider using materials that are lightweight yet durable for decorating your folding screen. Fabrics like cotton or linen are great choices, while acrylic paints offer vibrant colors that are easy to work with. Additionally, ensure that any adhesives used are appropriate for the materials you are combining to avoid damage.
To keep your decorated folding screen looking its best, perform regular maintenance. Dust off any surfaces gently and avoid using harsh chemicals that could damage your decorations. If you’ve used fabric, consider washing or spot-cleaning it as needed to maintain its appearance.
By following these creative ideas and tips, you can transform your folding screen into a beautiful and functional piece of art that enhances your living space. Whether you choose to paint, add fabric, or incorporate artwork, the possibilities for personalization are truly endless.
Can You Use Bookshelves as Room Dividers?
Bookshelves are not just for storing your favorite novels and decor; they can also serve as functional room dividers that enhance both the aesthetics and utility of your living space. In this article, we will explore how to effectively utilize bookshelves to create distinct areas within your home, while maintaining their primary purpose of storage.
Using bookshelves as room dividers offers a unique way to define spaces without the need for permanent walls. They provide flexibility in design, allowing you to rearrange your space according to your needs. Additionally, they can enhance your decor while offering privacy and separation in open-concept living areas.
The style of bookshelf you select can greatly influence the overall ambiance of your room. Here are some popular styles:
- Open Shelving: Ideal for displaying books and decorative items, open shelves create an airy feel while allowing light to pass through.
- Closed Cabinets: These provide a more streamlined look and can hide clutter, making them perfect for a tidy space.
- Modular Units: These versatile options can be customized to fit your space, allowing you to create unique configurations.
Strategic placement of bookshelves can significantly enhance privacy in shared living spaces. Consider the following tips:
- Positioning: Place the bookshelf at an angle or in a corner to create a more defined separation between areas.
- Height Matters: Opt for taller bookshelves to block sightlines effectively, especially in studio apartments.
- Layering: Use smaller shelves or decorative items on top of larger units to create a layered look that adds depth.
To enhance the visual appeal of your bookshelf divider, consider these decorative ideas:
- Incorporate Plants: Adding greenery can soften the look and bring life to your space.
- Mix and Match: Combine books with art pieces, photos, and decorative boxes to create an eclectic display.
- Lighting: Use LED strips or small lamps on shelves to highlight your decor and create a warm atmosphere.
Bookshelves offer more than just separation; they come with several benefits:
- Storage Solutions: They provide ample space for books, decor, and other items, helping to keep your area organized.
- Sound Absorption: A well-placed bookshelf can help reduce noise levels, creating a more peaceful environment.
- Personalization: You can customize your bookshelf to reflect your style, making it a unique feature in your home.
While bookshelves can be an excellent choice for room division, there are some considerations to keep in mind:
- Weight Distribution: Ensure that the bookshelf is stable and well-anchored, especially if it is tall.
- Accessibility: Arrange the shelves in a way that allows easy access to the items stored.
- Color Coordination: Choose a color that complements the existing decor to create a cohesive look.
In conclusion, using bookshelves as room dividers is a practical and stylish solution for enhancing privacy and organization in your living space. With the right style, arrangement, and decorative touches, you can create a beautiful and functional division that works for your needs.
Choosing the Right Bookshelf Style
When it comes to interior design, the style of bookshelf you choose can greatly influence the overall look of your room. Bookshelves are not just functional; they serve as a key element of decorative style and can help in effectively dividing spaces. In this article, we will explore various bookshelf styles, their aesthetic impacts, and how they can transform your living environment.
Bookshelves come in various styles, each offering unique characteristics that can complement your room’s design:
- Open Shelving: This style provides a minimalist and airy feel, allowing for easy access to books and decorative items. It works well in contemporary and modern spaces, promoting a sense of openness.
- Closed Cabinets: These bookshelves feature doors that conceal the contents, making them ideal for a more organized and tidy appearance. They are perfect for traditional or formal settings, where a polished look is desired.
- Corner Bookshelves: Designed to fit snugly into corners, these bookshelves maximize space while adding visual interest. They are particularly useful in smaller rooms.
- Floating Shelves: These shelves are mounted directly to the wall, creating a sleek and modern look. They are excellent for showcasing decorative items and can be arranged in various configurations.
The choice of bookshelf style can significantly impact the visual aesthetics of a room. For instance:
- Color and Material: The material and color of the bookshelf can either blend seamlessly with existing decor or serve as a bold statement piece. Wooden bookshelves bring warmth, while metal options can add a contemporary edge.
- Height and Scale: A tall bookshelf can draw the eye upward, making a room feel more spacious, while a low bookshelf can create a cozy, intimate atmosphere.
- Arrangement: How books and decor are arranged on the shelves can also influence the overall look. A curated display can enhance the room’s style and reflect personal taste.
Yes, bookshelves can effectively function as room dividers, providing both privacy and storage. Here are some tips for using bookshelves as dividers:
- Strategic Placement: Position bookshelves to create distinct areas within an open floor plan. This can help in delineating spaces without the need for permanent walls.
- Layering: Use bookshelves in conjunction with other elements like curtains or plants to enhance the division while maintaining an inviting atmosphere.
- Decorative Accents: Incorporate decorative items on the shelves to soften the look and make the divider more visually appealing.
When selecting a bookshelf style, consider the following factors:
- Room Size: The bookshelf should complement the size of the room. A large bookshelf can overwhelm a small space, while a small shelf may not provide enough storage in a large room.
- Functional Needs: Assess what you plan to store. If you have many books, an open shelving unit may be ideal, whereas closed cabinets might be better for displaying collectibles.
- Personal Style: Ultimately, the bookshelf should reflect your personal style and fit seamlessly into your existing decor.
In summary, selecting the right bookshelf style is crucial for enhancing both functionality and aesthetics in your home. By understanding the different styles available and their impacts on space division, you can make an informed choice that elevates your interior design.
Arranging Bookshelves for Maximum Privacy
When it comes to enhancing privacy in shared spaces, the strategic placement of bookshelves can serve as an effective solution. Not only do they provide storage and display opportunities, but they can also create a sense of separation between different areas of a room. Here are some insights and tips on how to arrange your bookshelves for optimal privacy while ensuring your space remains inviting and accessible.
Bookshelves can act as both functional storage and stylish room dividers. They can help delineate spaces without the need for permanent walls, making them perfect for studio apartments or multi-functional rooms. By placing bookshelves strategically, you can create cozy nooks for reading or working while maintaining an open feel.
Before arranging your bookshelves, consider the style that best fits your decor. Options include:
- Open Shelving: Ideal for displaying decorative items and books, promoting a light and airy feel.
- Closed Cabinets: Great for concealing clutter, providing a more streamlined look.
- Modular Units: Flexible and customizable, allowing you to create unique configurations that suit your space.
To maximize privacy, consider the following placement strategies:
- Back-to-Back Arrangement: Position two bookshelves back-to-back in the center of the room. This creates a natural barrier while allowing light to flow around.
- Corner Placement: Placing a bookshelf in a corner can help define the space and create a cozy reading nook.
- Partial Dividers: Use shorter bookshelves to create partial divisions. This maintains an open feel while providing some level of separation.
While focusing on privacy, it’s essential to keep the space inviting and accessible. Here are some tips:
- Keep Pathways Clear: Ensure there is enough space between the bookshelves and other furniture for easy movement.
- Layered Lighting: Add lighting to the bookshelves to highlight the books and decor, creating a warm and welcoming atmosphere.
- Decorate with Purpose: Use decorative items, plants, or personal photos on the shelves to maintain an inviting look while enhancing privacy.
For added privacy, consider integrating other elements with your bookshelves:
- Curtains: Hanging curtains in front of or around the bookshelves can provide additional privacy when needed.
- Plants: Incorporating tall plants on top of or around the bookshelves can create a natural barrier, enhancing both privacy and decor.
In conclusion, arranging bookshelves for maximum privacy is a practical and stylish approach to enhancing your living space. By selecting the right style, optimizing placement, and incorporating decorative elements, you can create a private yet inviting atmosphere that suits your lifestyle.

What Are Some Creative Alternatives for Temporary Dividers?
When it comes to creating privacy in shared spaces, traditional dividers may not always fit your aesthetic or functional needs. Fortunately, there are numerous creative alternatives that can add both style and separation to your environment. This section explores unique options such as curtains, plants, and repurposed furniture that can help maintain privacy without compromising on design.
Opting for creative alternatives allows you to express your personal style while effectively dividing your space. Unlike conventional room dividers, these options can be easily customized and rearranged, offering flexibility to adapt to changing needs. Below are some innovative ideas to consider:
Curtains are a popular choice for temporary dividers due to their versatility. They come in various colors, patterns, and materials, allowing you to match them with your existing decor. To achieve the desired level of privacy:
- Choose heavier fabrics for more opacity.
- Consider sheer curtains for a lighter, airy feel.
- Use a tension rod for easy installation and removal.
By hanging curtains from the ceiling or a wall-mounted rod, you can create a stylish barrier that can be drawn open or closed as needed.
Plants not only enhance the aesthetic of your space but also serve as effective natural dividers. They can create a sense of separation while adding life to your environment. Here are some tips for using plants as dividers:
- Choose tall, leafy plants like fiddle leaf figs or snake plants for maximum coverage.
- Arrange smaller plants on shelves or stands to create layers.
- Consider using plant stands or hanging planters to elevate your greenery.
By strategically placing plants, you can create a serene and inviting atmosphere that fosters privacy without feeling closed off.
Another creative approach is to repurpose furniture you already own. Items like bookshelves, dressers, or even large art pieces can serve dual purposes. Here’s how:
- Bookshelves: Use open or closed bookshelves to create distinct areas. They can be filled with books, decorative items, or plants to enhance the look.
- Dressers: A tall dresser can act as a privacy screen while providing additional storage.
- Art Panels: Consider using large art pieces or framed mirrors to create visual interest and separation.
Repurposing furniture not only saves money but also allows you to maintain a cohesive design throughout your space.
If you enjoy a hands-on project, consider creating a DIY folding screen. This can be made from wood, fabric, or even old doors. Here’s a simple guide:
1. Gather materials: wood panels, hinges, and fabric.2. Assemble the frame by attaching the panels with hinges.3. Cover the panels with fabric for a personalized touch.4. Decorate with paint or stencils for added flair.
A folding screen can be easily moved and stored, making it a practical option for temporary dividers.
In conclusion, there are many creative alternatives to traditional room dividers that can enhance both privacy and style in your living space. By exploring options like curtains, plants, repurposed furniture, and DIY projects, you can create a personalized environment that meets your needs while reflecting your unique taste.
Using Curtains for Flexibility and Style
Curtains are an excellent choice for creating temporary dividers in your living space. They offer a unique blend of flexibility and style, allowing you to customize your environment according to your needs. Whether you’re looking to enhance privacy or simply want to add a decorative touch, hanging curtains can transform any room.
Using curtains as dividers is a popular method due to their versatility and affordability. Unlike permanent structures, curtains can be easily installed and removed, making them ideal for renters or those who frequently change their decor. Here are some key benefits:
- Easy Installation: Most curtains can be hung using tension rods or curtain tracks, requiring minimal tools and effort.
- Variety of Styles: Available in countless fabrics, colors, and patterns, curtains can complement any decor theme.
- Adjustable Privacy: You can easily open or close curtains to control the level of privacy you desire.
To achieve the desired level of privacy and style, follow these steps:
- Choose the Right Fabric: Select a fabric that suits your needs. For maximum privacy, opt for thicker materials like blackout curtains or heavier drapes.
- Measure Your Space: Measure the area where you plan to hang the curtains. This ensures a perfect fit and prevents any awkward gaps.
- Install the Rod or Track: Depending on your choice, install a tension rod or track system. Ensure it is securely mounted to support the weight of the curtains.
- Hang the Curtains: Carefully attach your curtains to the rod or track. Make sure they hang evenly for a polished look.
When selecting curtains, consider the following styles that work well as room dividers:
- Sheer Curtains: Perfect for creating a light, airy feel while still offering some privacy.
- Panel Curtains: These can be drawn open or closed, providing flexibility in how much space you want to divide.
- Bi-fold or Accordion Curtains: These can be easily pushed aside when not in use, making them a practical choice for smaller spaces.
Enhance the aesthetic appeal of your curtains by incorporating decorative elements:
- Add Tiebacks: Use decorative tiebacks to pull the curtains to the side, creating a more open feel.
- Layer with Other Fabrics: Combine different fabric types for a more textured look.
- Use Curtain Clips: Clips can be used to create pleats or add embellishments, giving your curtains a personalized touch.
In summary, curtains are a flexible and stylish solution for creating temporary dividers in your home. By choosing the right fabric, hanging them effectively, and adding decorative elements, you can achieve a beautiful and functional space that meets your privacy needs.
Incorporating Plants as Natural Dividers
In today’s world, where urban living often comes with limited space, using plants as natural dividers is an innovative way to enhance your decor while providing an element of privacy. Not only do plants bring a touch of nature indoors, but they also help to create a serene and inviting atmosphere in your home. This article will guide you through the selection and arrangement of plants to achieve the perfect balance of beauty and functionality.
Plants serve as natural dividers for several reasons:
- Aesthetic Appeal: They add color, texture, and life to your space.
- Air Quality Improvement: Many plants purify the air, making your environment healthier.
- Noise Reduction: Plants can help absorb sound, creating a more peaceful atmosphere.
When choosing plants as dividers, consider the following factors:
- Light Conditions: Assess the lighting in your space. Some plants thrive in bright light, while others prefer low light.
- Size and Growth Habit: Choose plants that will grow to the desired height and width for effective division.
- Maintenance Level: Consider how much time you can dedicate to plant care. Some plants require more attention than others.
Here are some popular choices for plants that work well as dividers:
- Fiddle Leaf Fig: Known for its large, glossy leaves, it can reach impressive heights, making it an excellent choice for taller dividers.
- Snake Plant: This hardy plant is perfect for low light and requires minimal maintenance, making it ideal for busy lifestyles.
- Areca Palm: With its feathery fronds, this plant adds a tropical feel to your decor while effectively blocking sight lines.
- Boston Fern: Its lush foliage not only acts as a natural screen but also improves humidity levels in your home.
Arranging your plants thoughtfully can enhance both privacy and aesthetics. Here are some tips:
- Layering: Use plants of varying heights to create depth. Place taller plants at the back and shorter ones in front.
- Grouping: Cluster plants together in groups of odd numbers for a more natural look.
- Containers: Use decorative pots or planters that match your decor style to enhance the overall appearance.
To achieve a truly serene environment, consider incorporating elements like:
- Soft Lighting: Use warm, soft lighting to highlight your plants and create a cozy atmosphere.
- Water Features: A small indoor fountain can complement your plants and add soothing sounds to your space.
- Textiles: Introduce soft textiles, such as rugs or cushions, to create a comfortable area around your plant divider.
Incorporating plants as natural dividers not only enhances your home decor but also contributes to a healthier and more inviting living space. With careful selection and arrangement, you can transform any area into a tranquil oasis that provides both beauty and privacy.
Frequently Asked Questions
- What materials are best for a DIY room divider?
When it comes to crafting your own room divider, you can choose from a variety of materials. Fabric is popular for its versatility, while wood offers sturdiness and a classic look. Lightweight screens are also a great option for easy setup and mobility.
- How do I choose the right design for my space?
Selecting the perfect design for your room divider can transform your space. Consider the size of your room, your personal style, and what functionality you need. A well-chosen design can enhance your decor and provide the privacy you desire.
- Can I use a bookshelf as a room divider?
Absolutely! Bookshelves can serve a dual purpose, acting as both storage and a divider. Just be sure to choose a style that complements your room and arrange them strategically to maximize privacy while keeping the space inviting.
- What are some creative alternatives for temporary dividers?
If you’re looking for something different, consider using curtains for flexibility or plants for a natural touch. These options can provide both style and privacy without the permanence of traditional dividers.
