This article delves into the exciting journey of crafting a DIY room divider that not only serves a functional purpose but also elevates your home’s aesthetic appeal. Whether you are looking to create a cozy nook or simply divide a large space, a well-designed room divider can be a stunning addition to your decor. In this guide, we will explore the steps and techniques to paint and decorate your room divider, ensuring it reflects your personal style.
Before embarking on your project, it’s essential to gather the right materials. Here’s a list of items you may need:
- Wood or MDF panels - the main structure of your divider.
- Paint - choose between latex, chalk, or spray paint.
- Fabric - for a softer look, consider using fabric panels.
- Tools - such as a saw, drill, and paintbrushes.
- Decorative accessories - like stencils, decals, or lighting fixtures.
Selecting a design that complements your existing decor is crucial. Consider styles such as:
- Modern - sleek lines and minimalistic features.
- Rustic - natural wood finishes and earthy tones.
- Bohemian - vibrant colors and eclectic patterns.
Think about the overall theme of your space to find the perfect fit.
There are several styles of room dividers to choose from:
- Folding screens - versatile and easy to move.
- Bookcase dividers - functional and stylish.
- Fabric panels - soft and inviting.
Each style offers unique benefits, so consider your needs and preferences when making a selection.
Accurate measurements are vital for ensuring your room divider fits perfectly. Start by:
- Measuring the width and height of the area where you plan to place the divider.
- Considering the flow of movement and ensuring it does not obstruct pathways.
Choosing the right paint is essential for durability and aesthetics. Here are some options:
- Latex paint - easy to clean and quick-drying.
- Chalk paint - provides a matte finish and can be distressed for a vintage look.
- Spray paint - great for intricate designs and quick application.
Surface preparation is crucial for achieving a smooth finish. Follow these steps:
- Clean the surface to remove dust and grease.
- Sand the wood to create a smooth texture.
- Prime the surface if using latex paint for better adhesion.
Utilizing various painting techniques can elevate your project. Consider:
- Sponge painting - for a textured effect.
- Stenciling - to add intricate designs.
- Ombre effects - for a gradient look.
Once painted, it’s time to personalize your room divider. Here are some creative ideas:
- Adding decals - for a fun and whimsical touch.
- Incorporating fabric - to soften the look.
- Using lighting - to highlight your divider as a focal point.
Incorporating accessories like:
- Mirrors - to create an illusion of space.
- Plants - for a fresh and lively feel.
- Artwork - to express your personality.
These elements can transform your room divider into a statement piece.
Regular maintenance is essential for preserving the look of your room divider. Consider:
- Cleaning it regularly to remove dust.
- Applying a protective coat to prevent wear and tear.
By following these steps, you can ensure your DIY room divider remains a beautiful and functional part of your home for years to come.
What Materials Do You Need for a DIY Room Divider?
Creating a DIY room divider can be an exciting project that not only enhances your living space but also showcases your creativity. To embark on this journey, it is essential to gather the right materials to ensure a smooth crafting experience. Understanding the various components involved will set the foundation for a successful outcome.
When planning your DIY room divider, consider the following essential materials:
- Wood: This is often the primary material for constructing a sturdy frame. Choose plywood, MDF, or reclaimed wood based on your style preference and budget.
- Fabric: If you wish to create a softer look, fabric panels can be used. Opt for durable materials like canvas or upholstery fabric that can withstand wear and tear.
- Paint: A fresh coat of paint can transform your room divider. Use high-quality latex or chalk paint for a lasting finish. Don't forget primer to prepare the surface!
- Tools: Essential tools include a saw (hand saw or power saw), drill, screws, measuring tape, and a paintbrush or roller. Having the right tools will streamline your crafting process.
- Decorative Elements: Accessories such as stencils, decals, or embellishments can add a personal touch to your divider. Consider lights or mirrors for added functionality and style.
Before you start, make sure to gather all the necessary items. This preparation will not only save you time but also help minimize interruptions during the crafting process. Each material plays a vital role in the overall design and functionality of your room divider.
For example, if you choose wood as the main material, consider its finish. A well-sanded and painted wood divider can serve as a beautiful focal point in any room. Alternatively, if you prefer a fabric divider, think about how the colors and patterns will harmonize with your existing decor.
Additionally, remember to plan for any additional accessories that may enhance your room divider's functionality. For instance, if you want to incorporate storage, consider using a bookcase design that allows for both separation and organization.
In conclusion, gathering the right materials is crucial for a successful DIY room divider project. By selecting high-quality items and planning carefully, you can create a stunning piece that not only divides your space but also adds to its aesthetic appeal. Embrace your creativity and enjoy the crafting process!
How to Choose the Right Design for Your Room Divider?
When it comes to enhancing your living space, selecting the right design for your room divider is essential. A well-chosen divider not only serves a functional purpose but also acts as a stylish element within your decor. The key is to find a design that complements your existing aesthetic while fulfilling your practical needs. Here are some important considerations to keep in mind.
- Assess Your Current Decor: Before diving into design options, take a moment to evaluate your current decor. Are your furnishings and colors more modern, rustic, or bohemian? Understanding the overall theme of your space will guide you in selecting a room divider that enhances rather than clashes with your environment.
- Consider Your Space: The size and layout of the room play a significant role in determining the style of your divider. For smaller spaces, a lightweight folding screen may be ideal, while larger areas might benefit from a more substantial bookcase divider that can also serve as storage.
- Explore Different Styles: There are numerous styles to choose from, each offering unique characteristics. For example, a modern divider might feature clean lines and minimalistic designs, while a rustic option could incorporate reclaimed wood and earthy tones. The bohemian style often includes vibrant colors and intricate patterns, adding a touch of artistic flair.
- Functionality Matters: Think about how you plan to use the divider. Will it primarily serve as a visual barrier, or do you want it to offer additional functionality, such as storage or display space? For instance, a bookcase divider not only separates areas but also provides a place to showcase your favorite books and decorations.
- Customization Options: Don't hesitate to customize your divider to better fit your style. This could involve painting it in a color that matches your decor, adding fabric panels for a softer look, or even incorporating artwork to make it a focal point.
In summary, finding the right design for your room divider involves a careful balance of aesthetics and functionality. By considering your existing decor style, the size of your space, and how you intend to use the divider, you can make an informed decision that enhances your home. Remember, the goal is to create a cohesive look that reflects your personal taste while providing the necessary separation of space.
What Are the Popular Styles of Room Dividers?
When it comes to designing your living space, room dividers can play a pivotal role in enhancing both aesthetics and functionality. They not only serve as physical barriers that create distinct areas but also add a decorative touch to your home. In this section, we will explore popular styles of room dividers, including folding screens, bookcases, and fabric panels, to help you choose the best option that aligns with your vision and needs.
Folding screens are a favorite among homeowners due to their versatility and ease of use. Typically made from wood or metal, these screens can be easily moved or stored when not in use. Their unique designs can range from intricate patterns to minimalist styles, allowing you to select one that complements your existing decor. Additionally, folding screens can be used to create temporary divisions in large spaces, making them ideal for apartments or studios.
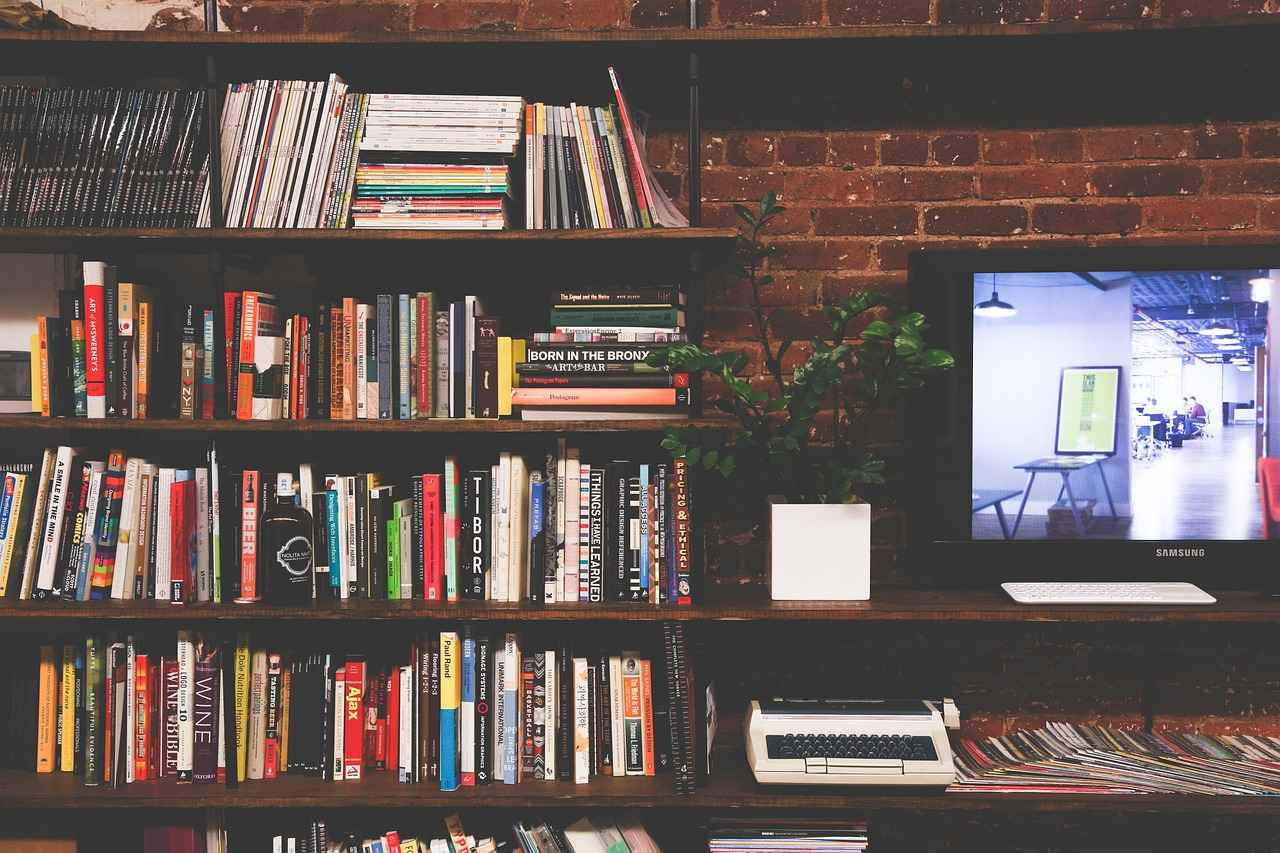
Bookcase dividers serve a dual purpose: they separate spaces while providing storage and display options. This style is particularly beneficial for smaller homes where maximizing space is essential. By incorporating books, plants, or decorative items, you can create a visually appealing focal point that enhances your room's overall aesthetic. Furthermore, bookcases can be customized in various sizes and styles, making them a versatile addition to any home.
Fabric panels offer a soft, inviting look that can add warmth to your space. Available in a variety of colors and patterns, these panels can be hung from the ceiling or mounted on walls to create a cozy atmosphere. They are especially popular in bedrooms or living areas where a touch of elegance is desired. Fabric dividers can also be easily changed or updated, allowing you to refresh your decor without significant investment.
Glass dividers provide a contemporary look that can make any space feel larger and more open. They allow light to flow freely while still offering a sense of separation. Frosted or etched glass options can add privacy without sacrificing style. This type of divider is perfect for offices or modern homes where a sleek aesthetic is desired.
Wooden screens are a classic choice that brings warmth and texture to any room. Available in various designs, from traditional to modern, wooden dividers can be both decorative and functional. They can be painted or stained to match your decor, making them a customizable option. Additionally, wooden screens can be used to create a rustic charm in your home, making them ideal for country or farmhouse-style interiors.
Metal dividers can offer an industrial touch to your space. They are durable and can withstand wear and tear, making them suitable for high-traffic areas. Available in various finishes, such as matte or polished, metal dividers can be used to create an edgy look that aligns with modern design trends. They can also be combined with other materials for a mixed-media approach.
When selecting a room divider, consider both functionality and aesthetics. Think about how you plan to use the space and what style resonates with your personal taste. Whether you prefer the flexibility of folding screens, the practicality of bookcases, or the elegance of fabric panels, there’s a room divider that can enhance your living environment.
Why Choose a Folding Screen Design?
Folding screens are increasingly popular in modern interior design due to their versatility and ability to enhance the aesthetic appeal of any space. These multifunctional dividers can be easily relocated or stored, making them a practical choice for individuals who value flexibility in their living environments. By incorporating a folding screen into your home, you can effortlessly manage your space while adding a touch of decorative charm.
One of the primary advantages of folding screens is their ability to create temporary divisions within a room. Whether you need to separate a workspace from a living area or create a cozy nook for relaxation, folding screens can adapt to your needs. Their lightweight design allows for easy repositioning, enabling you to change the layout of your room without the hassle of heavy furniture.
Folding screens come in various styles, materials, and colors, making them an ideal choice for any decor theme. You can find options ranging from traditional wooden screens to modern fabric-covered designs. This variety allows you to choose a screen that complements your existing decor, adding a personalized touch to your space.
In comparison to permanent room dividers, folding screens offer a more affordable solution for space management. They provide an economical way to enhance your home without the need for extensive renovations. Additionally, their ability to be folded and stored means that you won’t have to sacrifice valuable floor space when not in use.
- Space Management: Folding screens allow for efficient use of space, making them ideal for small apartments or studios.
- Temporary Solutions: They can be easily set up and taken down, providing a flexible solution for changing needs.
- Privacy: Folding screens offer a degree of privacy without the permanence of walls, making them suitable for shared living situations.
Another appealing aspect of folding screens is the potential for customization. You can paint them, add fabric, or even apply decals to create a unique look that reflects your style. This ability to personalize your screen not only enhances its visual impact but also makes it a statement piece in your home.
While folding screens offer numerous advantages, it's important to consider potential downsides. For example, they may not provide the same level of sound insulation as solid walls, which might be a concern in noisy environments. Additionally, depending on the material, some screens may be less durable than traditional dividers.
To maximize the benefits of a folding screen, consider its placement carefully. Position it in a way that creates a natural flow in the room while also serving its intended purpose. Whether you use it to define a workspace, create a reading corner, or simply add a decorative element, thoughtful placement can significantly enhance your space.
In conclusion, folding screens are a fantastic addition to any home, offering both functional and decorative benefits. Their versatility, affordability, and customization options make them a popular choice for anyone looking to enhance their living environment.
What Benefits Do Bookcase Dividers Offer?
Bookcase dividers have emerged as a popular choice for maximizing space in modern homes. They serve a dual purpose: not only do they separate areas, creating distinct zones within a room, but they also offer valuable storage and display options. This makes them particularly advantageous in smaller living spaces where every square foot counts.
In small apartments or studios, traditional room dividers can be bulky and impractical. Bookcase dividers, on the other hand, provide a functional solution that enhances the utility of the space. With their vertical design, they occupy minimal floor space while offering ample shelving for books, decorative items, and plants. This allows homeowners to maintain an organized environment while adding a touch of style.
One of the standout features of bookcase dividers is their ability to serve as a decorative element. They can be painted or stained to match existing decor, allowing for seamless integration into any room. Whether you prefer a modern look with clean lines or a rustic charm with distressed wood, bookcase dividers can be customized to reflect your personal style. Additionally, they can be adorned with artwork, photos, or plants, further enhancing their visual appeal.
Absolutely! Bookcase dividers not only provide a way to separate spaces but also help in maintaining organization. By designating specific shelves for different items, such as books on one side and decorative vases on the other, you can create a more structured environment. This organization can lead to reduced clutter, making it easier to find what you need when you need it.
Yes, the versatility of bookcase dividers is another significant advantage. They can be used in various settings, from living rooms to home offices. In a home office, for instance, a bookcase divider can separate your work area from your leisure space, helping to maintain focus. In a living room, it can create a cozy reading nook while still allowing light to flow through the room.
In addition to their organizational benefits, bookcase dividers can also contribute to acoustic privacy. While they may not completely block sound, they can help reduce noise levels between different areas of a room. This is particularly beneficial in open-concept spaces where sounds from one area can easily travel to another. By strategically placing a bookcase divider, you can create a more peaceful environment.
Compared to traditional room dividers, bookcase dividers can be a more cost-effective solution. They often combine the functions of a divider and storage unit, eliminating the need for additional furniture. This can save you money while maximizing the functionality of your space. Furthermore, DIY enthusiasts can easily create their own bookcase dividers, further reducing costs.
In conclusion, bookcase dividers offer a multitude of benefits that make them an ideal choice for anyone looking to enhance their living space. They not only separate areas effectively but also provide storage, improve organization, and add aesthetic value. With their versatility and cost-effectiveness, bookcase dividers are a practical solution for maximizing space in any home.
How to Measure Your Space for a Room Divider?
When planning to install a room divider, accurate measurements are essential to ensure a perfect fit within your space. A well-measured room divider not only enhances the aesthetic appeal of your area but also maximizes functionality. This guide will provide you with effective techniques to measure your space accurately, helping you avoid common sizing issues.
Before diving into the measurement process, it’s important to understand why precision is crucial. A room divider that doesn’t fit correctly can lead to a variety of problems, including:
- Wasted materials: Incorrect sizes may require re-purchasing materials, increasing costs.
- Compromised aesthetics: An ill-fitting divider can disrupt the flow of your space.
- Functional issues: A poorly sized divider may not effectively create the desired separation.
Before you start measuring, gather the following tools:
- Measuring tape: A flexible measuring tape is ideal for capturing both straight and curved spaces.
- Pencil and paper: To jot down measurements and sketch your layout.
- Level: Ensures that your divider will be straight when installed.
Follow these steps to ensure your measurements are accurate:
- Identify the Area: Determine where you want to place the room divider. Consider the flow of traffic and the purpose of the space.
- Measure Width: Use your measuring tape to measure the width of the area where the divider will stand. Take note of any obstacles, such as furniture or fixtures.
- Measure Height: Measure from the floor to the ceiling or the desired height of the divider. This is crucial for ensuring the divider will not obstruct light or airflow.
- Check for Level: Ensure that the floor is level. If the floor has any slopes, it may affect the height of your divider.
- Double-Check Measurements: Always recheck your measurements to confirm accuracy. It's better to measure twice than to make costly mistakes.
If you’re working with an irregularly shaped area, consider the following:
- Use a laser level: This tool can help you get precise measurements in tricky spaces.
- Sketch the layout: Create a simple sketch of the area to visualize the placement of the divider.
- Consult with a professional: If you're unsure, seeking advice from an interior designer can provide valuable insights.
Measuring your space accurately is a fundamental step in the process of selecting and installing a room divider. By following the steps outlined above and paying close attention to detail, you can ensure that your divider fits perfectly, enhancing both the functionality and aesthetic of your space. Remember, taking the time to measure correctly will save you time and money in the long run.
What Type of Paint Should You Use for Your Room Divider?
When it comes to enhancing the aesthetic appeal and durability of your DIY room divider, choosing the right paint is crucial. The paint you select not only affects the overall look of the divider but also its longevity. In this section, we will explore various types of paint, their characteristics, and how to choose the best option for your project.
There are several types of paint you can consider for your room divider, each offering unique benefits:
- Latex Paint: This water-based paint is popular due to its ease of use and quick drying time. It is ideal for indoor projects and is available in a wide range of colors. Latex paint is also easy to clean up with soap and water.
- Chalk Paint: Known for its matte finish and vintage appeal, chalk paint adheres well to various surfaces without the need for extensive prep work. It is perfect for achieving a rustic or shabby chic look.
- Spray Paint: If you're looking for a smooth, even finish, spray paint is an excellent choice. It is ideal for intricate designs and can cover hard-to-reach areas effectively. However, proper ventilation is essential when using spray paint.
- Oil-Based Paint: While less common for DIY projects, oil-based paint provides a durable and glossy finish. It is suitable for high-traffic areas but requires mineral spirits for cleanup and has a longer drying time.
When selecting paint, consider the following factors:
- Purpose: Determine if the divider will be purely decorative or if it will also serve functional purposes, such as storage.
- Finish: The finish of the paint can greatly affect the look of your divider. Options range from matte to glossy, with each providing a different aesthetic.
- Durability: For high-use areas, opt for paints that can withstand wear and tear. Latex and oil-based paints are typically more durable.
- Color: Choose a color that complements your existing decor. Consider using samples to see how different shades look in your lighting.
In recent years, eco-friendly paint options have gained popularity. These paints are low in volatile organic compounds (VOCs), making them safer for both the environment and your health. Using eco-friendly paint can help improve indoor air quality, which is especially important in enclosed spaces.
Before making a final decision, it’s wise to test paint samples on your room divider. Apply a small amount of paint to a discreet area and observe how it looks in different lighting conditions throughout the day. This will help you ensure that you’re happy with your choice before applying it to the entire piece.
Ultimately, choosing the right paint for your room divider can significantly impact its functionality and aesthetic appeal. By understanding the different types of paint available and considering your specific needs, you can create a stunning and durable piece that enhances your space.
How to Prepare the Surface Before Painting?
Preparing the surface of your DIY room divider is a critical step that can significantly impact the final look of your project. A well-prepared surface ensures that the paint adheres properly, resulting in a smooth and professional finish. Below, we outline the essential steps for cleaning, sanding, and priming your room divider before you start painting.
Before diving into painting, it’s important to thoroughly clean the surface of your room divider. Dust, dirt, and grease can interfere with paint adhesion. Use a damp cloth to wipe down the entire surface, ensuring that any residue is removed. If your divider has been previously painted or has accumulated grime, consider using a mild detergent solution to scrub the surface gently. Rinse with clean water and let it dry completely.
Next, you will want to sand the surface to create a smooth base for the paint. Use a medium-grit sandpaper (around 120-grit) to sand down any rough spots and imperfections. This process not only helps to smooth the surface but also creates tiny grooves that allow the paint to adhere better. After sanding, wipe away any dust with a clean, dry cloth or a tack cloth to ensure a clean surface.
Priming is an essential step that many DIY enthusiasts overlook. Applying a primer prepares the surface for paint, especially if you’re using a lighter color over a darker base. Choose a primer that suits the material of your room divider—whether it’s wood, metal, or MDF. Apply the primer evenly with a brush or roller, and allow it to dry completely according to the manufacturer’s instructions.
Investing time in proper surface preparation can save you from future headaches. A well-prepared surface minimizes the risk of peeling, chipping, and uneven color application. Additionally, it enhances the durability of your paint job, ensuring that your room divider looks great for years to come.
Once the primer is dry, inspect the surface again. If you notice any imperfections, lightly sand the primed surface with fine-grit sandpaper (around 220-grit) and clean off the dust. This final step will ensure that your paint adheres beautifully and results in a flawless finish.
By following these steps—cleaning, sanding, and priming—you will create an ideal foundation for your painting project. With a little effort upfront, you can achieve a stunning and long-lasting look for your DIY room divider.
What Techniques Can Enhance Your Painting Skills?
When it comes to painting, utilizing various techniques can significantly enhance your project and transform your space. Whether you are a novice or a seasoned DIY enthusiast, understanding different methods can add a unique flair to your creations. In this section, we will explore several popular painting techniques, including sponge painting, stenciling, and ombre effects, each offering distinct ways to elevate your artistic expression.
Sponge painting is a technique that involves using a sponge to apply paint, creating a textured finish that can add depth to any surface. This method is ideal for achieving a soft, mottled effect, perfect for backgrounds or accent walls. To get started, choose two or more complementary colors. Dip the sponge into the paint, dab off the excess, and gently press it onto the surface. Layering different colors can produce a stunning visual effect, making your room divider truly stand out.
Stenciling is another effective technique that allows you to create intricate designs with ease. By using pre-made or custom stencils, you can apply patterns that align with your personal style. First, secure the stencil onto the surface using painter's tape. Then, using a brush or sponge, apply paint over the stencil, ensuring even coverage. Once removed, the stencil reveals a crisp design that can be enhanced further with additional colors or embellishments. This method is particularly beneficial for those looking to add a touch of elegance or whimsy to their divider.
The ombre effect is a popular painting technique that creates a gradient of color, transitioning smoothly from one shade to another. This method can add a modern and sophisticated look to your room divider. To achieve this effect, start with a base coat of paint and allow it to dry. Next, mix two shades of the same color—one lighter and one darker. Using a brush or roller, apply the darker shade at the bottom and gradually blend it with the lighter shade as you move upward. The key to a successful ombre effect is to blend the colors seamlessly for a professional finish.
Experimenting with various painting techniques not only enhances your skills but also encourages creativity. By trying out different methods, you can discover new styles and effects that resonate with your aesthetic vision. Additionally, combining techniques can yield unique results; for instance, you might use stenciling over a sponge-painted background for added complexity. Embrace the process and allow yourself the freedom to explore, as this can lead to unexpected and beautiful outcomes.
Incorporating these techniques into your DIY room divider project requires careful planning. Start by selecting the techniques that best suit your design vision. Consider creating a small test panel to practice before applying directly to your divider. This will help you gain confidence and refine your approach. Once you feel comfortable, proceed with the full project, layering your chosen techniques for maximum impact. The end result will be a personalized, eye-catching piece that reflects your style.
In conclusion, mastering various painting techniques can significantly elevate your DIY projects. By exploring methods like sponge painting, stenciling, and ombre effects, you can create stunning visual impacts that enhance your space. Remember, practice makes perfect, so don't hesitate to experiment and discover what works best for you!
How to Decorate Your Room Divider After Painting?
Decorating your room divider after painting is a fantastic way to add a personal touch and enhance its overall aesthetic. A room divider serves not only a functional purpose but can also be a striking focal point in your space. By incorporating creative elements, you can transform a simple painted divider into a unique piece of art that reflects your style. Here are some innovative ideas to inspire your decorating journey.
Once you have achieved the perfect paint finish, consider the following methods to elevate your room divider:
- Decals: Adding vinyl decals can introduce intricate designs or motivational quotes to your divider. These are easy to apply and can be removed without damaging the paint.
- Fabric Panels: Attaching fabric can soften the divider and add texture. Choose fabrics that complement your room's color scheme, such as sheer curtains for a light, airy feel or bold prints for a statement look.
- Lighting: Incorporating LED strip lights or fairy lights can create a warm ambiance. Position them along the edges or behind the divider to create a glowing effect that highlights your design.
- Artwork: Hanging small frames or canvases can personalize your divider. This allows you to display your favorite art pieces or photographs, making the divider a gallery wall.
In addition to the above ideas, consider using accessories to further enhance your room divider:
- Mirrors: Attaching a mirror to your divider can create an illusion of more space and reflect light, making your room feel larger and brighter.
- Plants: Incorporating small potted plants or hanging planters can add a touch of nature. Choose low-maintenance plants like succulents or ferns to keep upkeep easy.
- Storage Solutions: Adding shelves or hooks can make your divider functional. Use these spaces to display decorative items or store everyday essentials.
To achieve a truly unique appearance, consider these techniques:
- Layering: Layer different materials, such as wood and fabric, to create depth. For instance, a wooden frame can be adorned with fabric panels for a stunning contrast.
- Color Blocking: Use different colors or patterns in sections to create a visually appealing design. This technique adds interest and can be tailored to fit your decor.
- Stenciling: If you want to add intricate designs, consider stenciling. This allows you to create detailed patterns that can be customized to your taste.
Once your room divider is beautifully decorated, maintaining its look is essential:
- Regular Cleaning: Dust your divider regularly to keep it looking fresh. Use a soft cloth to avoid scratching the surface.
- Protective Coatings: If your divider is exposed to sunlight or moisture, consider applying a protective sealant to preserve the paint and decorations.
- Seasonal Refresh: Change up the decorations seasonally to keep the look fresh. Swap out fabrics or artwork to match the changing seasons.
By implementing these creative ideas and techniques, you can transform your room divider into a personalized masterpiece that enhances your living space. Whether you prefer a minimalist approach or a bold statement, the possibilities are endless. Enjoy the process of decorating, and let your creativity shine!
What Accessories Can You Use for Decoration?
When it comes to decorating a DIY room divider, the right accessories can make a significant impact. Not only do they enhance the visual appeal, but they also serve functional purposes, adding depth and character to your space. Below, we explore various accessories that can transform your room divider into a stunning statement piece.
Mirrors are a fantastic choice for room dividers, as they can create an illusion of space and light. Placing a well-placed mirror on your divider can reflect natural light, making your room feel larger and more open. Additionally, mirrors come in various shapes and sizes, allowing you to customize your divider's look according to your style.
Incorporating plants into your room divider design brings a touch of nature indoors. Plants not only add color and texture but also improve air quality. Consider using hanging planters or small potted plants on shelves of your divider. This approach can create a lively and inviting atmosphere, making your space feel more vibrant and welcoming.
Artwork is another powerful accessory that can elevate your room divider's aesthetic. Whether you choose framed prints, canvas art, or even DIY pieces, artwork adds a personal touch to your space. Consider creating a gallery wall effect by arranging multiple pieces on your divider, or opt for a single large statement piece that draws attention.
Incorporating lighting into your room divider can enhance its functionality and ambiance. Use string lights, LED strips, or small lamps to illuminate your divider. This not only highlights the accessories you’ve added but also creates a warm and inviting atmosphere during the evening. Lighting can also serve as a practical solution, providing additional illumination in darker areas of your room.
When decorating your room divider, it’s essential to strike a balance between functionality and aesthetics. Ensure that the accessories you choose do not obstruct the divider's primary purpose of dividing space. For instance, if you use shelves for plants or books, make sure they are not overly crowded. A well-thought-out arrangement will ensure that your divider remains functional while also looking stylish.
- Fabric Panels: Consider draping fabric over sections of the divider for a soft, textured look.
- Photo Frames: Display personal photos or art in frames attached to the divider.
- Decorative Boxes: Use decorative boxes for storage that also serve as stylish decor.
- Seasonal Decor: Change accessories seasonally to keep your space fresh and interesting.
In summary, the right accessories can transform your DIY room divider from a simple partition into a visually stunning focal point. By thoughtfully incorporating mirrors, plants, artwork, lighting, and other creative elements, you can achieve a harmonious blend of functionality and aesthetics that enhances your overall space.
How to Maintain Your DIY Room Divider?
Maintaining your DIY room divider is crucial for ensuring it remains a beautiful and functional feature in your space. With the right care, you can preserve its appearance and extend its lifespan. Here are some practical tips and techniques to keep your room divider looking its best.
Dust and dirt can accumulate on your room divider, dulling its finish and making it look worn. Regular cleaning is essential to maintain its aesthetic appeal. Use a soft, dry cloth to gently wipe down surfaces. For deeper cleaning:
- Wood Dividers: Use a damp cloth with a mild soap solution, then dry immediately to prevent water damage.
- Fabric Panels: Vacuum regularly to remove dust. For stains, spot clean with a fabric-safe cleaner.
- Painted Surfaces: Wipe with a damp cloth and a gentle cleaner to avoid damaging the paint.
To ensure your room divider stays in top shape, consider the following protective measures:
- Placement: Position your divider away from direct sunlight to prevent fading and warping.
- Humidity Control: Maintain a stable humidity level in the room to protect wooden dividers from swelling or cracking.
- Use Coasters: If placing items on the divider, use coasters to prevent scratches and water rings.
Performing routine inspections can help you catch any potential issues before they become major problems. Check for:
- Loose Hinges: If your divider has moving parts, ensure that hinges are secure and functioning properly.
- Paint Chips: Address any chips or scratches in the paint promptly to prevent further damage.
- Fabric Wear: Look for fraying or discoloration in fabric panels and take action as needed.
Over time, even the best-maintained dividers may need a refresh. Consider repainting or refinishing your room divider to restore its original beauty. Here are some tips:
- Choose Quality Paint: Opt for durable, high-quality paint that can withstand wear and tear.
- Proper Preparation: Sand and clean the surface thoroughly before applying new paint for the best results.
- Test Colors: Always test paint colors on a small, inconspicuous area before committing to a full repaint.
If you need to store your room divider, follow these tips to keep it safe:
- Clean Before Storing: Ensure the divider is clean and dry to prevent mold or mildew.
- Wrap for Protection: Use bubble wrap or blankets to protect surfaces from scratches during storage.
- Store Upright: If possible, store the divider upright to maintain its shape and prevent warping.
By following these maintenance tips, you can ensure that your DIY room divider remains a stunning and functional part of your home for years to come. Regular care and attention will not only preserve its appearance but also enhance your living space overall.
Frequently Asked Questions
- What materials do I need for a DIY room divider?
For a successful DIY room divider, you'll need essential materials like wood, fabric, paint, and various tools. Having these items on hand ensures a smooth crafting experience!
- How do I choose the right design for my room divider?
Selecting a design that complements your existing decor is key. Think about styles such as modern, rustic, or bohemian to find the perfect fit for your space!
- What are the popular styles of room dividers?
Popular styles include folding screens, bookcases, and fabric panels. Each style has its own unique charm and functionality, so choose one that aligns with your vision!
- Why should I choose a folding screen design?
Folding screens are super versatile! You can easily move or store them, giving you flexibility in managing your space while adding a decorative touch.
- What type of paint should I use for my room divider?
Choosing the right paint is essential for durability and aesthetics. Explore options like latex, chalk, or spray paint to find the best match for your project!
- How can I maintain my DIY room divider?
Regular maintenance is crucial for keeping your room divider looking fresh. Simple cleaning and protection tips can help ensure its longevity and beauty!