This article provides a step-by-step guide to creating a no-sew fabric room divider, ideal for beginners looking to enhance their living spaces without complex sewing techniques. Room dividers are a fantastic way to create privacy, define spaces, and add a decorative touch to your home. With this guide, you will learn how to make a stylish and functional divider without the need for a sewing machine.
Before diving into your project, it’s essential to gather the right materials. Here’s a list of items you will need:
- Fabric: Choose a fabric that suits your style and purpose.
- Curtain Rods: These will support your fabric divider.
- Adhesive Tape: For securing hems and edges without sewing.
- Scissors: For cutting fabric to size.
- Measuring Tape: To ensure accurate measurements.
Selecting the appropriate fabric is crucial for both aesthetics and functionality. Consider the following:
- Light-Filtering Fabrics: Ideal for creating a soft, ambient light.
- Heavy Fabrics: Provide better privacy and sound absorption.
Understanding the difference between lightweight and heavy fabrics can impact the look and feel of your divider. Lightweight fabrics are easier to handle and can create a breezy atmosphere, while heavy fabrics provide better insulation and sound dampening.
Choosing the right patterns and colors can greatly enhance your room’s decor. Consider fabrics that complement your existing furniture and color scheme. Stripes, florals, or solid colors can all work beautifully, depending on the vibe you wish to create.
A successful no-sew project requires specific tools. Here’s what you need:
- Fabric Adhesives: Various types are available, including fabric glue and double-sided tape.
- Cutting Tools: Scissors or rotary cutters will ensure clean edges.
Follow these detailed steps to construct your fabric room divider:
Accurate measurements are vital. Measure the height and width of the area where you plan to hang your divider to ensure a perfect fit.
Once you have your measurements, cut your fabric accordingly. Make sure to leave extra fabric for hems if needed. Use adhesive tape to secure the edges and prevent fraying.
Hanging your divider properly is crucial for both stability and aesthetics. Here are some methods:
Curtain rods provide a sturdy support system. Install the rod securely, and then slide your fabric onto the rod for easy adjustments.
Consider using adhesive hooks or tension rods for a no-drill solution. These methods offer flexibility and can be adjusted as needed.
To keep your room divider looking fresh, consider these maintenance tips:
Use a gentle fabric cleaner or a damp cloth to remove dust and stains. Always check the care instructions for your specific fabric type.
Minor damages such as small tears can be easily fixed with fabric glue or adhesive tape. This ensures your divider remains in great shape without the need for sewing.
What Materials Do You Need for a No-Sew Fabric Room Divider?
Creating a no-sew fabric room divider can be a rewarding project, especially for those looking to add a touch of style and functionality to their living spaces. Before diving into the crafting process, it is essential to gather all the necessary materials to ensure a smooth and successful DIY experience. This guide will help you identify everything you need to get started on your fabric room divider.
To create a stunning no-sew fabric room divider, you will need the following materials:
- Fabric: Choose your fabric wisely. Depending on your desired aesthetic and functionality, you can opt for lightweight fabrics like cotton or heavier options like canvas. Consider the color and pattern that best complements your space.
- Curtain Rods: These will serve as the framework for your divider. Select rods that are sturdy enough to support the weight of your fabric. Adjustable rods are a great choice for flexibility in sizing.
- Adhesive Tape: A strong fabric adhesive tape is crucial for securing the edges of your fabric without sewing. Look for double-sided or fabric-specific tape to ensure a lasting hold.
- Scissors: A good pair of fabric scissors is essential for clean cuts. Ensure they are sharp to avoid fraying the edges of your fabric.
- Measuring Tape: Accurate measurements are key to a well-fitted divider. Use a measuring tape to determine the size of your space and the length of fabric needed.
- Level: To ensure that your curtain rods are hung straight, a level tool is indispensable. This will help maintain the aesthetic appeal of your divider.
- Optional Decorative Elements: Consider adding embellishments such as tassels, ribbons, or even stencils to personalize your divider and make it uniquely yours.
Gathering these materials beforehand will not only save you time during the project but also help you visualize how your finished room divider will look. Remember to choose fabrics and colors that harmonize with your existing decor to create a cohesive look.
Now that you know what materials you need, you’re one step closer to transforming your space with a beautiful no-sew fabric room divider. With the right tools and a bit of creativity, you can create a stunning focal point that enhances both the functionality and aesthetic of your room.
How to Choose the Right Fabric for Your Divider?
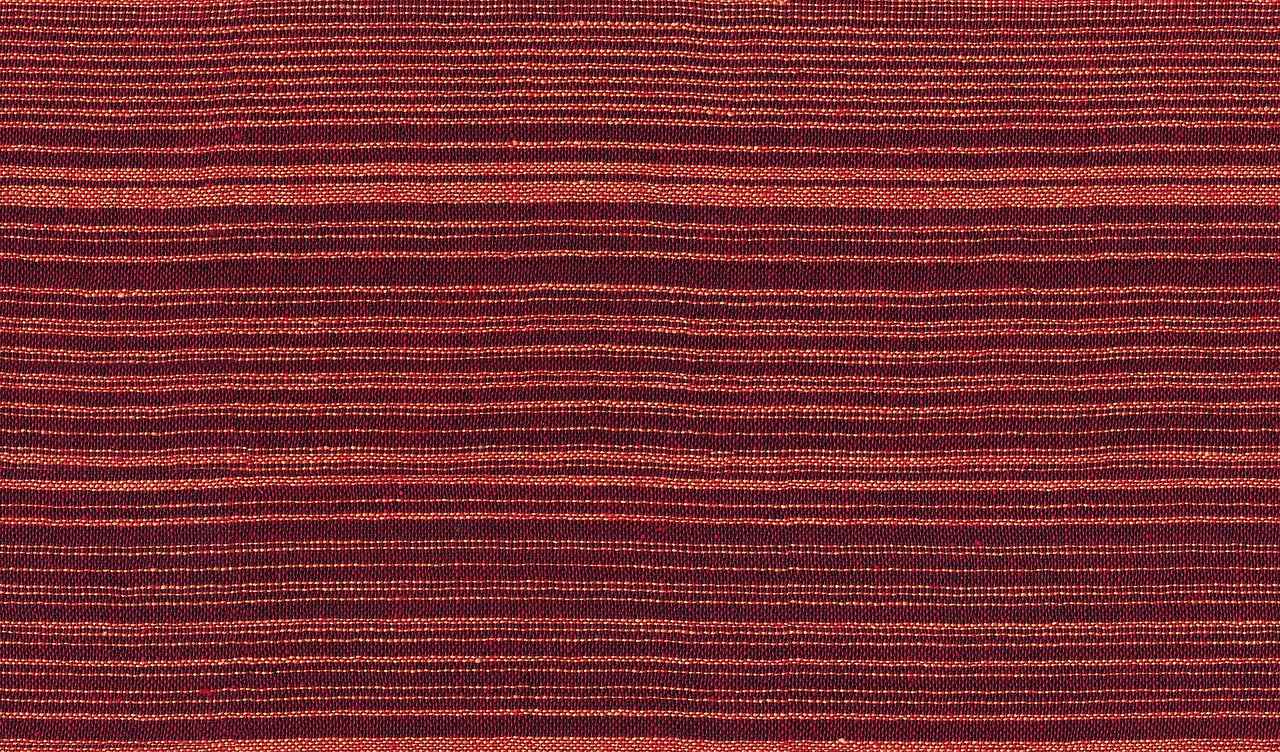
When embarking on a DIY fabric room divider project, selecting the appropriate fabric is crucial for both aesthetics and functionality. The right fabric can transform your space, providing not only visual appeal but also practical benefits such as light control and privacy. This guide explores various fabric types and their suitability for room dividers, ensuring you make an informed choice.
Understanding the different types of fabrics available can help you choose the best option for your needs. Here are some popular fabric categories:
- Sheer Fabrics: These lightweight materials allow natural light to filter through while maintaining a degree of privacy. Ideal for creating an airy atmosphere.
- Blackout Fabrics: Perfect for complete privacy and light blockage, these heavy materials are great for bedrooms or home theaters.
- Canvas and Denim: Durable and sturdy, these fabrics provide excellent sound absorption and are suitable for high-traffic areas.
- Quilted Fabrics: Offering both insulation and soundproofing, quilted options are perfect for creating a cozy and quiet space.
The fabric you choose can significantly impact both the look and function of your room divider. For instance:
- Light-Filtering Options: Fabrics like chiffon or organza can create a soft, diffused light effect, enhancing the ambiance of your room.
- Privacy Considerations: If privacy is a priority, heavier fabrics like velvet or polyester blends are ideal, as they block views effectively.
Color and pattern play a vital role in integrating your room divider into your existing decor. Here are some tips:
- Complementary Colors: Choose colors that enhance your current color scheme to create a cohesive look.
- Patterns: Bold patterns can serve as statement pieces, while subtle designs can add texture without overwhelming the space.
While aesthetics are important, it’s essential to consider how the fabric will perform in your space. Ask yourself:
- How often will the divider be used? If it needs to be moved frequently, lightweight fabrics are preferable.
- What is the intended use of the space? For areas requiring sound absorption, opt for heavier materials.
Choosing the right fabric for your room divider involves a blend of style and function. By considering the types of fabrics available, how they affect aesthetics, and the practical needs of your space, you can create a divider that not only looks great but also serves its purpose effectively. With the right fabric in hand, you’re well on your way to enhancing your living space with a beautiful and functional DIY room divider.
Lightweight Fabrics vs. Heavy Fabrics
When embarking on the journey of creating a DIY fabric room divider, understanding the nuances between lightweight and heavy fabrics is essential. The choice of fabric not only influences the aesthetic appeal but also affects the functionality of your divider. This section delves into the advantages and disadvantages of each fabric type, helping you make an informed decision.
Lightweight fabrics are typically made from materials such as cotton, linen, or polyester blends. These fabrics are easy to handle and manipulate, making them ideal for beginners. Here are some key benefits:
- Easy to Work With: Their light nature allows for effortless cutting and draping.
- Airy and Breezy: They create a relaxed atmosphere, perfect for spaces where you want to maintain a sense of openness.
- Variety of Patterns: Lightweight fabrics are often available in a wide range of colors and designs, allowing for creative expression.
On the other hand, heavy fabrics include materials like canvas, denim, or upholstery fabric. These fabrics are denser and provide a different set of advantages:
- Sound Absorption: Heavy fabrics are excellent for reducing noise, making them suitable for shared spaces.
- Privacy: They offer better coverage, ensuring that your space remains private.
- Durability: Heavy fabrics are generally more robust and can withstand wear and tear over time.
The decision between lightweight and heavy fabrics largely depends on your specific needs and preferences. If you aim for a light and airy feel, lightweight fabrics might be your best bet. However, if you prioritize privacy and sound insulation, heavy fabrics would serve you better.
When selecting the right fabric, consider your room’s existing decor and the functionality you desire. For instance, a sunlit room may benefit from light-filtering lightweight fabrics, while a home office might require the noise-canceling benefits of heavy fabrics.
Ultimately, the choice between lightweight and heavy fabrics should align with your personal style and the intended use of your room divider. By weighing the pros and cons of each type, you can create a space that is not only visually appealing but also functional.
Benefits of Lightweight Fabrics
When embarking on a DIY project, the choice of fabric can significantly influence the outcome. One of the most popular options for various applications, including room dividers, is lightweight fabrics. These materials not only offer ease of handling but also contribute to a breezy atmosphere that can transform any space. In this section, we will explore the numerous benefits of lightweight fabrics and why they might be the ideal choice for your next project.
Lightweight fabrics are materials that are thin and airy, making them easy to manipulate and work with. Common examples include cotton voiles, sheer linens, and chiffons. These fabrics are often favored for their ability to allow light to filter through while providing a level of privacy.
- Easy to Handle: Lightweight fabrics are generally easier to cut and sew, making them perfect for beginners. They require less effort to manipulate, allowing for more creative freedom.
- Versatile Use: These fabrics can be used for various applications, from room dividers to curtains and even tablecloths. Their versatility makes them a staple in DIY projects.
- Creates a Breezy Atmosphere: The airy nature of lightweight fabrics can enhance the ambiance of a room, making it feel more open and inviting.
- Cost-Effective: Lightweight fabrics are often more affordable than their heavier counterparts, making them a budget-friendly option for DIY enthusiasts.
- Variety of Patterns and Colors: Lightweight fabrics come in an extensive range of colors and patterns, allowing you to choose options that perfectly complement your decor.
In addition to their practical benefits, lightweight fabrics can significantly impact the aesthetic appeal of your space. The way light interacts with these materials can create stunning visual effects. For instance, using a sheer fabric can soften harsh light, creating a warm, inviting glow in your room. This effect is especially desirable in spaces where you want to promote relaxation and tranquility.
When using lightweight fabrics, consider layering them for added texture and depth. For example, combining a sheer fabric with a more opaque one can create a beautiful contrast while still allowing light to filter through. Additionally, pairing different patterns can introduce an element of fun and creativity to your decor.
While lightweight fabrics are easy to work with, they can also require special care to maintain their appearance. Regular gentle washing and avoiding harsh chemicals will help preserve the integrity of the fabric. Always check the care instructions specific to the fabric you choose to ensure longevity.
In summary, lightweight fabrics offer a plethora of benefits that make them an excellent choice for DIY projects. Their ease of handling, versatility, and aesthetic appeal can enhance any space, providing both function and style. Whether you’re creating a room divider or refreshing your home decor, lightweight fabrics can help you achieve the look you desire with minimal effort.
Advantages of Heavy Fabrics
When it comes to creating a DIY room divider, the choice of fabric can significantly impact both functionality and aesthetics. One of the key considerations is whether to use heavy fabrics or lighter alternatives. In this section, we will explore the numerous and when they are the ideal choice for your project.
Heavy fabrics are often favored in interior design due to their superior sound absorption and ability to create a sense of privacy. This makes them particularly suitable for spaces where noise reduction and seclusion are priorities.
One of the most significant benefits of using heavy fabrics is their ability to absorb sound. Unlike lightweight materials that may allow sound to pass through, heavy fabrics can help to reduce noise levels in a room. This is especially beneficial in shared living spaces, home offices, or areas where concentration is essential. By minimizing sound transmission, heavy fabrics create a more peaceful environment.
In addition to sound absorption, heavy fabrics offer improved privacy. They can effectively block the view from one side of the divider to the other, allowing you to create distinct areas in a room without sacrificing personal space. This feature is particularly valuable in open-concept homes or studio apartments where privacy is often compromised.
Heavy fabrics tend to be more durable than their lightweight counterparts. Materials like canvas, denim, or upholstery fabrics can withstand wear and tear over time, making them an excellent choice for frequently used areas. Investing in heavy fabrics means you won’t have to replace your divider as often, saving you both time and money in the long run.
Heavy fabrics also provide a rich visual texture that can enhance the overall aesthetic of your space. The weight and drape of these materials can add depth and sophistication to your decor. Whether you choose bold colors or intricate patterns, heavy fabrics can serve as a stunning focal point in your room.
While heavy fabrics offer many advantages, they are not always the best choice for every situation. Consider using them when:
- You need to reduce noise in a busy area.
- Privacy is a primary concern.
- You want a durable solution for high-traffic spaces.
- You aim to make a strong design statement with your room divider.
In summary, heavy fabrics provide a multitude of benefits, including enhanced sound absorption, increased privacy, durability, and aesthetic appeal. By understanding when to choose these materials, you can create a functional and stylish DIY room divider that meets your specific needs. Whether you are looking to define spaces or reduce noise, heavy fabrics are a reliable option that can elevate your home decor.
Fabric Patterns and Colors: How to Make the Right Choice?
When it comes to decorating your space, fabric patterns and colors play a pivotal role in shaping the overall ambiance. Choosing the right fabrics can significantly enhance your room’s decor, making it feel more cohesive and inviting. In this section, we will explore some essential tips to help you select fabrics that not only complement your existing space but also reflect your personal style.
Patterns and colors are fundamental elements of interior design. They can influence mood, create focal points, and even affect how spacious a room feels. For instance, light colors can make a room appear larger, while dark hues can create a cozy, intimate atmosphere. Understanding the psychological effects of colors can aid in making informed decisions that align with your desired aesthetic.
- Consider the Color Wheel: Use the color wheel as a guide to find complementary and analogous colors. This tool can help you create a harmonious color palette.
- Take Inspiration from Existing Decor: Look at your current furniture, wall colors, and accessories. Choose fabrics that either match or contrast effectively with these elements.
- Test Samples: Always obtain fabric swatches to see how colors look in your space. Lighting can dramatically change how a color appears.
When selecting patterns, consider the function and style of the room:
- Geometric Patterns: Great for modern spaces, these patterns can add a sense of structure and order.
- Floral Patterns: Ideal for a more traditional or bohemian look, floral designs can introduce a touch of nature.
- Stripes: Vertical stripes can create the illusion of height, making them perfect for smaller rooms.
Mixing fabrics can add depth and interest to your decor. Here are some tips:
- Vary Scale: Combine large-scale patterns with smaller ones to create balance.
- Stick to a Color Palette: Limit your color palette to 2-3 main colors to maintain cohesion.
- Incorporate Textures: Mixing different textures, such as smooth cotton with rough linen, can enhance visual appeal.
The type of fabric you choose can also influence the overall look and functionality of your space:
- Cotton: Versatile and easy to clean, cotton is a great choice for casual spaces.
- Linen: While beautiful and breathable, linen wrinkles easily, making it better suited for low-traffic areas.
- Velvet: Luxurious and rich, velvet is perfect for adding a touch of elegance, especially in formal settings.
In conclusion, selecting the right patterns and colors for your fabrics is a crucial step in enhancing your room’s decor. By considering the psychology of color, understanding the impact of patterns, and choosing the right fabric types, you can create a space that feels both inviting and reflective of your personal style. Remember to take your time, experiment, and enjoy the process of transforming your living space.

What Tools Are Required for a No-Sew Project?
Creating a no-sew fabric room divider can be an exciting and rewarding project, especially for those who may not have sewing skills. To ensure your project is a success, it is essential to gather the right tools. This section outlines the key tools you will need to complete your no-sew room divider effectively.
A successful no-sew project requires specific tools that simplify the process and yield professional results. Here’s a list of the essential tools you’ll need:
- Adhesive Tape: This is the backbone of your no-sew project. Fabric tape or double-sided tape will work best for securing fabric edges without stitching.
- Scissors: A good pair of fabric scissors is crucial for cutting your materials cleanly. Avoid using regular scissors, as they can fray the edges of your fabric.
- Measuring Tape: Accurate measurements are vital for a well-fitted room divider. A measuring tape will help you determine the correct dimensions for your fabric pieces.
- Fabric Ruler: This tool assists in making straight cuts and ensuring your fabric is cut to the right width and length.
- Iron: While this is not a sewing tool, an iron can help in smoothing out wrinkles from your fabric before you start working with it.
- Fabric Adhesive: Different types of fabric adhesives serve various purposes. Choose one that is suitable for the fabric you are using, ensuring a strong bond.
Each of these tools plays a vital role in the creation of your room divider. For instance, using the right type of adhesive tape can significantly affect the durability and appearance of your finished project. Additionally, having sharp scissors ensures that you achieve clean edges, which is essential for a professional look.
When it comes to fabric adhesives, there are various options available. Fabric glue is ideal for lightweight fabrics, while fabric tape is perfect for quick fixes and securing hems. Always check the manufacturer’s instructions to ensure compatibility with your chosen fabric.
Using the right cutting tools is essential for achieving clean edges. While fabric scissors are a must, consider investing in a rotary cutter for larger pieces of fabric. Rotary cutters can make precise cuts and are especially useful for straight lines.
By gathering these essential tools, you will set yourself up for success in your no-sew fabric room divider project. Each of these items contributes to a smoother process and a more polished final product. With the right preparation and tools, you can create a stunning room divider that enhances your living space without the need for sewing.
Understanding Fabric Adhesives
is essential for anyone embarking on a DIY fabric project. With a variety of adhesives available, each serves a distinct purpose, making it crucial to choose the right one for your specific needs. This guide will help you navigate the different types of fabric adhesives and how to select the best option for your project.
Fabric adhesives come in several forms, each designed for particular uses. Here are the most common types:
- Fabric Glue: This is a versatile adhesive that works well for most fabric types. It dries clear and remains flexible, making it ideal for hems and patches.
- Fabric Tape: Perfect for quick fixes, fabric tape is easy to apply and doesn’t require drying time. It’s great for temporary solutions.
- Heat-Activated Adhesives: These adhesives bond when exposed to heat, making them suitable for projects requiring strong, permanent bonds.
- Spray Adhesives: These are ideal for large surfaces, providing even coverage. They are often used in crafting and upholstery projects.
Selecting the appropriate adhesive depends on several factors:
- Fabric Type: Consider the materials you are working with. Lightweight fabrics may need a different adhesive than heavier ones.
- Project Purpose: Are you creating a temporary project or something more permanent? This will influence your adhesive choice.
- Application Method: Think about how you will apply the adhesive. Some adhesives are better for precision applications, while others are suited for larger areas.
To achieve the best results with fabric adhesives, keep these tips in mind:
- Test First: Always test the adhesive on a scrap piece of fabric to ensure compatibility.
- Read Instructions: Follow the manufacturer’s guidelines for application and drying times.
- Work in a Well-Ventilated Area: Some adhesives may emit fumes, so ensure proper ventilation during application.
Even experienced crafters can make mistakes. Here are some common pitfalls to avoid:
- Overusing Adhesive: Applying too much can lead to stiff fabric and unsightly residue.
- Ignoring Drying Times: Not allowing adequate drying time can compromise the bond.
- Forgetting About Washability: Some adhesives are not washable. Be sure to choose one that suits your project’s needs.
By understanding the different types of fabric adhesives and how to choose the right one, you can ensure that your DIY projects are successful and durable. Whether you are crafting a no-sew room divider or making repairs on your favorite garments, the right adhesive will make all the difference in achieving a professional finish. Happy crafting!
Choosing the Right Cutting Tools
When embarking on your DIY fabric projects, is essential for achieving clean, professional-looking edges. This section delves into the various tools available, including scissors and rotary cutters, and discusses their specific uses to help you make informed decisions for your fabric creations.
The right cutting tools not only ensure clean edges but also enhance the overall quality of your project. Using dull or inappropriate tools can lead to frayed edges and uneven cuts, which can compromise the final look of your fabric divider. Below, we explore two primary cutting tools and their unique benefits.
Scissors are a staple in any crafter’s toolkit, especially for fabric projects. Here are some key points to consider:
- Types of Scissors: Fabric scissors are specifically designed for cutting fabric and are usually sharper than regular scissors. Ensure you use a pair that is dedicated solely to fabric to maintain their sharpness.
- Technique: When using scissors, make long, smooth cuts rather than short snips. This technique helps in achieving a cleaner edge.
- Size Matters: Consider the size of the scissors in relation to the fabric. Large scissors work well for big pieces, while smaller ones are ideal for intricate cuts.
Rotary cutters are another excellent option for cutting fabric, particularly for larger projects or when you need to make straight lines. Here’s what to know:
- How They Work: A rotary cutter features a circular blade that rolls over the fabric, allowing for quick and precise cuts. This is especially useful for cutting multiple layers of fabric at once.
- Cutting Mats: Always use a cutting mat when employing a rotary cutter to protect your surfaces and prolong the life of your blade.
- Safety First: Rotary cutters can be very sharp, so it’s crucial to handle them with care and store them safely when not in use.
The choice between scissors and rotary cutters often depends on the specific requirements of your project. For instance, if you’re working with intricate designs or small pieces, scissors may be more manageable. On the other hand, if you need to cut straight lines or multiple layers, a rotary cutter is likely the better choice.
To ensure longevity and optimal performance, proper maintenance of your cutting tools is vital:
- Sharpening: Regularly sharpen your scissors and rotary cutter blades to maintain their cutting efficiency.
- Cleaning: Keep your tools clean and free from fabric debris to prevent rusting and damage.
- Storage: Store your tools in a dry place, preferably in a protective case, to avoid accidents and prolong their lifespan.
In conclusion, selecting the right cutting tools, whether scissors or rotary cutters, is crucial for any fabric project. By understanding their unique features and maintenance needs, you can enhance the quality of your work and enjoy a smoother crafting experience.
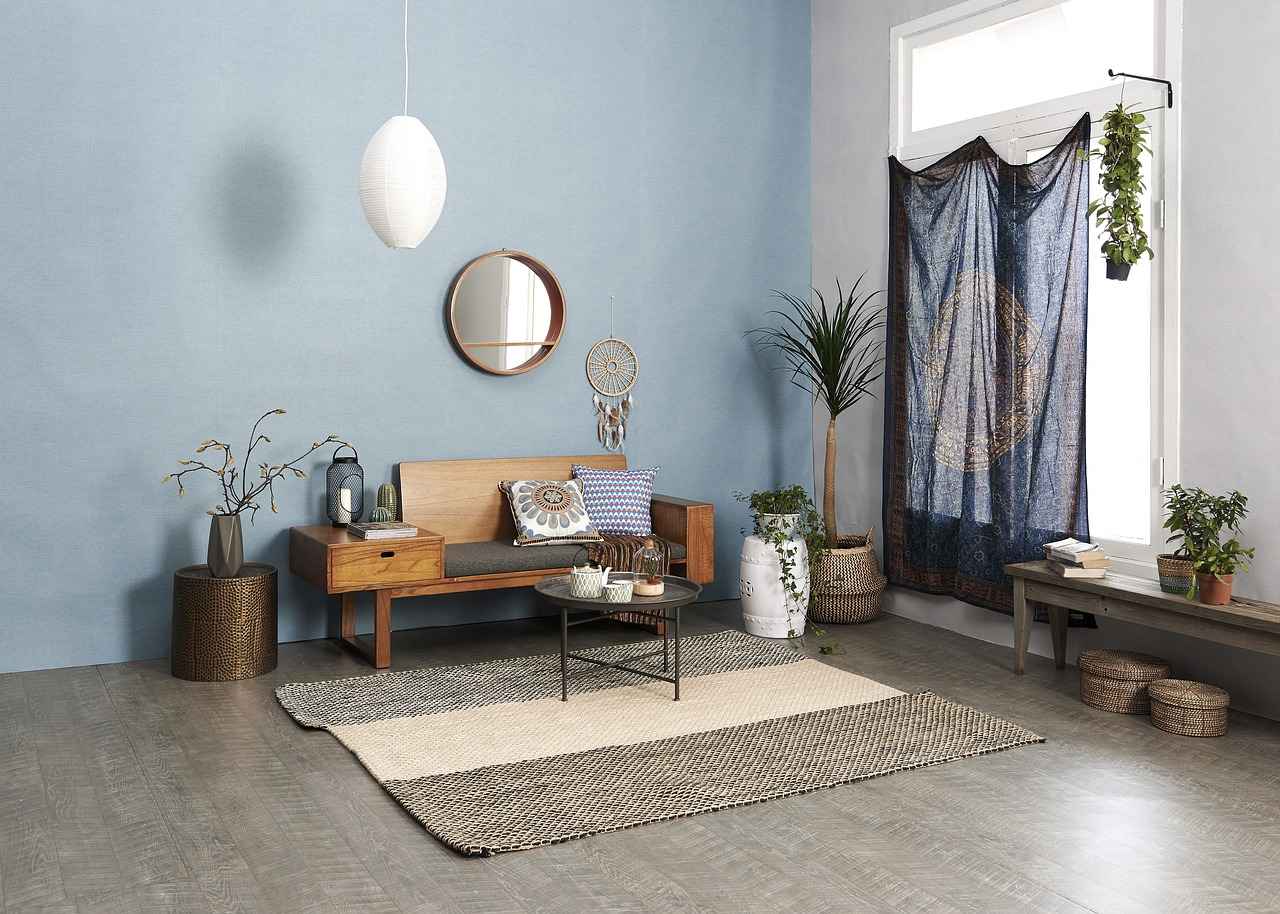
Step-by-Step Guide to Creating Your No-Sew Room Divider
Creating a no-sew fabric room divider is an exciting project that can transform your living space without the need for advanced sewing skills. This step-by-step guide is designed to be beginner-friendly and will walk you through the entire process, ensuring you can achieve a beautiful and functional divider with ease.
To begin your DIY journey, gather the necessary materials and tools. You will need:
- Fabric: Choose a fabric that suits your style and purpose.
- Curtain Rod: This will serve as the support for your divider.
- Fabric Adhesive: Essential for securing hems and edges without sewing.
- Measuring Tape: For accurate measurements.
- Scissors: To cut your fabric to the desired size.
Accurate measurements are crucial for a well-fitted room divider. Start by measuring the height and width of the area where you want to install the divider. This will help you determine how much fabric you need. Be sure to add a few extra inches to allow for hems and hanging methods.
Once you have your measurements, it’s time to cut your fabric. Lay it flat on a clean surface and use your measuring tape to mark the dimensions. Use sharp scissors for a clean cut, ensuring the edges are straight. If you want a more polished look, consider using fabric adhesive to secure the edges and prevent fraying.
Hanging your fabric divider correctly is essential for both stability and aesthetics. Here are some popular methods:
- Curtain Rods: Install the curtain rod at the top of your measured space. Use brackets for support and slide your fabric onto the rod.
- Adhesive Hooks: If you prefer a less permanent solution, adhesive hooks can be used to hang your fabric without drilling holes.
- Tension Rods: These are great for temporary dividers and can be adjusted to fit snugly between walls.
To ensure your room divider remains in great condition, regular maintenance is key. Here are some tips:
- Cleaning: Use a damp cloth to wipe down the fabric regularly. For deeper cleaning, check the fabric’s care instructions.
- Repairing Minor Damages: Small tears can be fixed with fabric adhesive. Simply apply the adhesive to the edges of the tear and press them together.
By following these steps, you can successfully create a no-sew fabric room divider that enhances your space while being easy to maintain. This project not only adds a touch of style but also offers practical benefits, such as creating privacy and defining areas within your home.
Measuring Your Space
When embarking on your DIY fabric room divider project, accurate measurements are crucial for achieving a well-fitted and aesthetically pleasing result. This section will guide you through the process of measuring your space effectively, ensuring that your fabric fits perfectly without any last-minute adjustments.
Getting precise measurements helps you avoid common pitfalls such as:
- Excess Fabric: Too much fabric can lead to unnecessary bulk and an unkempt appearance.
- Insufficient Fabric: Not having enough fabric can result in awkward gaps and an incomplete look.
- Improper Fitting: A poorly fitted divider can disrupt the flow of your space, making it feel cramped or cluttered.
Before you start measuring, gather the following tools:
- Measuring Tape: A flexible measuring tape is ideal for measuring both height and width.
- Pen and Paper: Keep track of your measurements to avoid confusion later on.
- Level: Ensures that your divider hangs straight, which is essential for aesthetic appeal.
Follow these simple steps to ensure accurate measurements:
- Identify the Area: Determine where you want to place your room divider. Consider factors like lighting, furniture placement, and traffic flow.
- Measure the Width: Use your measuring tape to measure the width of the space where the divider will hang. Make sure to measure at different points, especially if your wall is not perfectly straight.
- Measure the Height: Measure from the floor to the ceiling or the desired height for your divider. Again, measure at multiple points to ensure consistency.
- Account for Hardware: If you plan to use curtain rods or other hanging hardware, include their dimensions in your measurements. This will ensure that your fabric is cut to the proper size.
Once you have your initial measurements, it’s essential to double-check them. Mistakes can happen, and a quick verification can save you time and materials:
- Re-measure both width and height to confirm accuracy.
- Have someone else verify your measurements to catch any potential errors.
With your measurements in hand, you’re now ready to cut your fabric. Precision in this step will help you achieve a professional look:
- Use a Straight Edge: When cutting, utilize a straight edge or a rotary cutter for clean lines.
- Mark Your Fabric: Use fabric chalk to mark cutting lines based on your measurements. This prevents any miscalculations during the cutting process.
By following these guidelines, you can ensure that your fabric room divider will fit perfectly in your space, enhancing both functionality and style. Remember, taking the time to measure accurately will pay off in the long run!
Cutting and Preparing Your Fabric
Cutting and preparing your fabric is a crucial step in any DIY project, especially when creating a no-sew fabric room divider. Proper preparation not only ensures a professional-looking finish but also enhances the overall aesthetic of your space. In this section, we will delve into the best practices for cutting fabric, emphasizing techniques that even beginners can master.
When embarking on a fabric project, the way you cut and prepare your materials can significantly impact the final result. A clean, precise cut will help avoid frayed edges and uneven hems, which can detract from the overall appearance of your room divider. Moreover, taking the time to prepare your fabric properly can save you from potential frustrations during the assembly process.
- Fabric Scissors: Invest in a good pair of fabric scissors, as they are designed to cut through fabric cleanly and prevent fraying.
- Rotary Cutter: For straight lines and larger pieces, a rotary cutter can be a game-changer, providing smooth and efficient cuts.
- Cutting Mat: Using a cutting mat protects your surfaces and prolongs the life of your blades.
- Measuring Tape: Accurate measurements are vital; a measuring tape will help ensure your cuts are precise.
To achieve the best results, follow these best practices when cutting your fabric:
- Pre-Wash Your Fabric: Always pre-wash your fabric to remove any sizing or chemicals that may affect the cutting process. This also helps prevent shrinkage later.
- Iron Your Fabric: Smooth out any wrinkles before cutting, as this will ensure accurate measurements and neat edges.
- Use a Straight Edge: For straight cuts, use a ruler or a straight edge. Align your fabric carefully and cut along the edge to ensure a clean line.
- Cut with Intent: Make deliberate cuts rather than rushing. Take your time to ensure each cut is precise.
Accurate measurements are essential for a well-fitted room divider. Follow these steps to measure and mark your fabric:
- Measure Twice: Always double-check your measurements before cutting. This simple step can prevent costly mistakes.
- Mark with Tailor’s Chalk: Use tailor’s chalk or a fabric marker to mark your cutting lines. This will help guide your cuts and ensure accuracy.
- Cut in a Well-Lit Area: Ensure you are working in a well-lit space to clearly see your markings and cuts.
To ensure your fabric room divider looks polished, consider these finishing touches:
- Fray Check: Apply fray check to the edges of your fabric to prevent fraying over time.
- Use Bias Tape: If you prefer a clean edge, consider using bias tape to finish the edges of your fabric after cutting.
- Fold and Iron Edges: For a neat appearance, fold the edges of your fabric and iron them before hanging your divider.
By following these guidelines, you can cut and prepare your fabric with confidence, setting the stage for a stunning no-sew room divider. Remember, the key to a successful project lies in the details, so take your time and enjoy the process!

How to Hang Your Fabric Room Divider?
Hanging your fabric room divider correctly is essential for both stability and aesthetics. A well-hung divider not only enhances the look of your space but also ensures that it functions as intended, providing privacy and separation. In this section, we will explore several effective methods for securely hanging your fabric divider, ensuring it remains an attractive feature in your home.
Proper installation of your fabric room divider is crucial for several reasons:
- Stability: A securely hung divider minimizes the risk of it falling or becoming dislodged, which can be dangerous.
- Aesthetics: A well-hung divider looks polished and intentional, enhancing your room’s overall decor.
- Functionality: Ensures that the divider serves its purpose, whether it’s for privacy, sound absorption, or decorative appeal.
There are various methods to hang your fabric room divider, each with its own advantages. Below are some popular options:
Curtain rods provide a traditional and reliable way to hang your fabric divider. Here’s how to do it:
- Choose the Right Rod: Select a sturdy curtain rod that can support the weight of your fabric.
- Measure and Mark: Measure your space and mark where the brackets will go, ensuring they are level.
- Install Brackets: Securely install the brackets to the wall, making sure they can support the rod and fabric.
- Hang the Fabric: Slide your fabric onto the rod, then place the rod into the brackets.
If you prefer a more modern or flexible approach, consider these alternatives:
- Tension Rods: These are adjustable and can fit snugly between walls, making them perfect for temporary setups.
- Adhesive Hooks: Ideal for renters, adhesive hooks can hold lightweight fabric and are easy to install and remove.
- Clip Rings: Use clip rings on a rod for easy opening and closing of your divider, allowing for quick adjustments.
When deciding how to hang your fabric divider, keep the following factors in mind:
- Weight of the Fabric: Heavier fabrics will require sturdier support systems.
- Room Size: Consider the dimensions of your space and how the divider will fit within it.
- Accessibility: Ensure that the method you choose allows for easy access and movement of the divider.
To maintain the integrity of your hanging divider, consider the following tips:
- Regular Checks: Periodically check the stability of the hanging system and make adjustments as needed.
- Use Quality Materials: Invest in high-quality rods, hooks, and adhesives to prevent failures.
- Follow Manufacturer Instructions: Always adhere to the guidelines provided with your hanging materials for optimal results.
By following these methods and tips, you can successfully hang your fabric room divider in a way that is both functional and visually appealing. This not only enhances your living space but also adds a personal touch to your home decor.
Using Curtain Rods for Support
When embarking on your DIY fabric room divider project, one of the most crucial elements to consider is the support system for your fabric. Curtain rods not only serve as a functional component but also enhance the overall aesthetic of your divider. In this section, we will explore how to effectively install and utilize curtain rods to ensure your fabric is securely held in place, creating a stunning and practical room divider.
Curtain rods are an excellent choice for supporting your fabric because they offer stability and flexibility. They come in various styles, lengths, and materials, making it easy to find the perfect match for your decor. Additionally, curtain rods allow for easy sliding of the fabric, which is ideal for creating a functional divider that can be opened or closed as needed.
- Standard Curtain Rods: These are the most common type and are available in various materials such as wood, metal, and plastic. They are suitable for lightweight fabrics.
- Traverse Rods: Designed for curtains that need to open and close, these rods have a mechanism that allows the fabric to glide smoothly.
- Tension Rods: Perfect for smaller spaces, tension rods can be easily installed without hardware and are ideal for lightweight fabric dividers.
Installing curtain rods is a straightforward process. Follow these steps for a successful installation:
1. Measure Your Space: Determine the width and height where you want to install the rod.2. Mark the Placement: Use a pencil to mark where the brackets will go, ensuring they are level.3. Drill Holes: If using standard rods, drill holes for the brackets. For tension rods, simply adjust them to fit snugly in place.4. Attach the Brackets: Secure the brackets to the wall using screws and anchors if necessary.5. Hang the Rod: Slide your fabric onto the rod and place it onto the brackets. Adjust the fabric as needed for an even look.
Once your curtain rods are installed, it’s essential to use them effectively:
- Choose the Right Fabric: Ensure your fabric is compatible with the type of rod you choose. Lightweight fabrics work best with standard rods, while heavier fabrics may require sturdier options.
- Consider the Length: Allow enough fabric to gather when the divider is opened. This ensures a seamless look and functionality.
- Accessorize: Use decorative tiebacks or clips to enhance the visual appeal and functionality of your fabric divider.
To keep your curtain rods in top condition, regular maintenance is necessary. This includes:
- Cleaning: Dust the rods regularly and clean any stains using a mild detergent.
- Checking for Damage: Inspect the rods and brackets periodically for any signs of wear and tear, ensuring they remain secure.
By following these guidelines on using curtain rods for support, you can ensure that your DIY fabric room divider is not only visually appealing but also functional and durable. The right installation and maintenance practices will contribute to a successful project that enhances your living space.
Alternative Hanging Methods
When it comes to creating a fabric room divider, the hanging method you choose can significantly impact both the functionality and aesthetics of your space. While traditional curtain rods are a popular choice, there are several that offer unique benefits. This section explores these options, providing you with versatile installation ideas that cater to various needs and preferences.
Adhesive hooks are a fantastic solution for those who want to avoid drilling holes in walls. These hooks come with a strong adhesive backing that can hold lightweight fabrics securely. They are ideal for renters or anyone looking for a temporary solution. Here’s how to use them:
- Choose the right size of adhesive hooks based on the weight of your fabric.
- Clean the wall surface where you plan to attach the hooks to ensure a strong bond.
- Press the adhesive hook firmly against the wall and allow it to set for the recommended time before hanging your fabric.
Tension rods are another excellent option for hanging your fabric room divider. They are designed to fit snugly between two walls, providing a secure and stable support system without the need for hardware. Here are some advantages:
- Easy Installation: Simply adjust the rod to fit your space and twist to secure it in place.
- Adjustable: You can easily change the width of the divider or relocate it as needed.
- No Damage: Tension rods do not require nails or screws, making them perfect for temporary setups.
If you’re looking for a no-drill solution, consider using Command strips. These strips can hold lightweight fabrics and provide a clean, seamless look. Here’s how to utilize them:
- Attach the Command strips to the top of your fabric.
- Press the fabric against the wall where you want your divider to hang.
- Ensure the fabric is securely attached by following the instructions on the Command strip packaging.
Magnetic curtain rods are a lesser-known but innovative option for hanging fabric dividers. These rods use magnets to hold the fabric in place, making them easy to install and remove. Benefits include:
- Quick Setup: Simply place the magnetic rod against any metal surface for instant hanging.
- Versatility: They can be used in various locations, including metal door frames and cabinets.
- Minimal Damage: No need for screws or nails, preserving the integrity of your walls.
For a more creative approach, consider using ceiling clips. This method allows you to create a dramatic effect by suspending your fabric from the ceiling. Here’s how to do it:
- Install ceiling clips at regular intervals along the ceiling.
- Thread the fabric through the clips, adjusting the height as desired.
- This method works well for creating a flowing, elegant look that can enhance the ambiance of your room.
By exploring these , you can find the perfect solution that fits your needs and style. Whether you opt for adhesive hooks, tension rods, or ceiling clips, each method offers unique advantages that can transform your space without the need for extensive tools or skills. Embrace your creativity and enjoy the process of designing your fabric room divider!

Maintenance Tips for Your DIY Fabric Room Divider
Maintaining your DIY fabric room divider is essential for ensuring its longevity and aesthetic appeal. A well-cared-for divider not only enhances the beauty of your space but also serves its practical purpose effectively. Here are some practical maintenance tips to keep your fabric looking fresh and clean.
Regular cleaning is vital to prevent dust buildup and maintain the fabric’s vibrant colors. Depending on your environment, aim to clean your divider every 1-3 months. In high-traffic areas or homes with pets, more frequent cleaning may be necessary.
- Vacuuming: Use a handheld vacuum or an upholstery attachment to gently remove dust and debris.
- Spot Cleaning: For stains, use a damp cloth with mild soap. Blot the area instead of rubbing to avoid damaging the fabric.
- Machine Washing: If the fabric is machine washable, follow the care label instructions. Use a gentle cycle with cold water to prevent shrinkage.
Minor damages like small tears or frays can happen over time. Here’s how to address them:
- Fabric Glue: For small tears, apply fabric glue on the edges and press them together until dry.
- Iron-on Patches: Use iron-on patches for larger tears. They provide a sturdy repair without the need for sewing.
Fading can occur due to sunlight exposure. To combat this:
- Use UV-Blocking Curtains: Consider adding a layer of UV-blocking curtains behind your divider to protect it from sun damage.
- Rotate Your Fabric: If possible, rotate your fabric periodically to ensure even exposure to light.
If your fabric looks dull, consider the following:
- Fabric Sprays: Use fabric fresheners or sprays designed to revitalize colors and eliminate odors.
- Steam Ironing: Gently steam the fabric to remove wrinkles and restore its original texture.
If you need to take down your room divider, proper storage is crucial:
- Clean Before Storing: Ensure the fabric is clean and completely dry before folding and storing it to prevent mildew.
- Use a Garment Bag: Store the fabric in a breathable garment bag to protect it from dust and damage.
By following these maintenance tips, you can ensure that your DIY fabric room divider remains in excellent condition for years to come. Regular cleaning, prompt repairs, and proper storage will not only enhance its appearance but also prolong its lifespan, allowing you to enjoy its benefits fully.
Cleaning Your Fabric
Proper cleaning techniques are essential for maintaining the integrity and appearance of your fabric room divider. By following specific care guidelines, you can effectively prevent wear and tear, ensuring your DIY project remains beautiful and functional for years to come. Here, we will explore various cleaning methods and tips to help you care for your fabric without causing any damage.
Regular cleaning not only keeps your fabric looking fresh but also extends its lifespan. Dust, dirt, and stains can accumulate over time, leading to potential fading and deterioration. By prioritizing fabric care, you can:
- Enhance Aesthetic Appeal: Clean fabrics contribute to a tidy and inviting atmosphere.
- Prevent Allergens: Dust and allergens can trigger respiratory issues, making regular cleaning necessary.
- Maintain Structural Integrity: Proper care prevents fibers from weakening and fraying.
When it comes to cleaning your fabric room divider, several methods can be employed, depending on the type of fabric and the nature of the stains:
- Vacuuming: Use a vacuum with a brush attachment to gently remove dust and debris. This method is ideal for lightweight fabrics.
- Spot Cleaning: For stains, use a mild detergent mixed with water. Apply the solution with a soft cloth, dab gently, and avoid rubbing to prevent fabric damage.
- Machine Washing: If your fabric is machine washable, follow the care label instructions. Use a gentle cycle with cold water to minimize shrinkage and fading.
- Dry Cleaning: For delicate fabrics, consider professional dry cleaning to ensure safe and effective cleaning without damaging the material.
Stains are inevitable, but knowing how to deal with them can make all the difference. Here are some tips:
- Act Quickly: The sooner you address a stain, the easier it will be to remove it.
- Test First: Always test any cleaning solution on a small, inconspicuous area of the fabric to check for colorfastness.
- Use the Right Tools: Soft cloths, sponges, and brushes can help lift stains without damaging the fabric.
The frequency of cleaning your fabric room divider depends on several factors, including:
- Location: Fabrics in high-traffic areas may require more frequent cleaning.
- Usage: If your divider is often touched or exposed to spills, consider cleaning it every few weeks.
- Seasonal Changes: Regular cleaning during seasonal changes can help reduce allergens and dust buildup.
To keep your fabric looking its best, consider the following:
- Rotate Fabrics: If you have multiple dividers, rotate them occasionally to ensure even wear.
- Store Properly: When not in use, store your fabric in a cool, dry place to prevent mold and mildew.
- Avoid Direct Sunlight: Prolonged exposure can fade colors, so consider using window treatments to protect your fabrics.
By implementing these cleaning and care techniques, you can enjoy a beautiful and long-lasting fabric room divider that enhances your living space. Remember, the key to maintaining your fabric lies in understanding its specific needs and treating it with the care it deserves.
Repairing Minor Damages
When it comes to maintaining your DIY fabric room divider, minor damages can occur over time due to regular use, environmental factors, or accidental snags. Fortunately, you don’t need to be a sewing expert to fix these issues. This section will guide you through effective methods to repair small tears or frays without the need for a needle and thread.
Understanding the common types of minor damages can help you address them promptly:
- Tears: Small rips in the fabric that can happen from pulling or snagging.
- Frays: Edges that have begun to unravel, often seen on fabric that has been cut.
- Stains: Marks that can accumulate over time, affecting the overall appearance.
If you notice a small tear, here are some effective no-sew methods to repair it:
- Fabric Glue: Apply a thin layer of fabric glue along the edges of the tear. Press the fabric together and hold it for a few seconds to allow the adhesive to set. This method is quick and ensures a strong bond.
- Iron-on Hem Tape: Cut a piece of hem tape slightly longer than the tear. Place it inside the tear, cover it with a pressing cloth, and use an iron on a low setting to bond the fabric together. This creates a seamless repair.
- Patch Method: If the tear is larger, consider using a patch. Cut a piece of fabric that matches or complements your divider, apply fabric glue, and place it over the tear. This adds a decorative element while providing support.
Frayed edges can be unsightly but are easy to fix:
- Fray Check: This liquid solution is designed to stop fraying. Apply a small amount to the frayed area and let it dry. This will prevent further unraveling.
- Heat Sealing: For synthetic fabrics, carefully use a lighter or heat tool to seal the frayed edges. Be cautious not to burn the fabric.
- Decorative Tape: Use washi tape or fabric tape to cover the frayed edges. This not only hides the damage but also adds a creative touch to your divider.
Stains can detract from the beauty of your fabric divider. Here are some effective cleaning methods:
- Spot Cleaning: Use a damp cloth and mild detergent to gently dab at the stain. Avoid rubbing, as this can spread the stain.
- Fabric Cleaner: For tougher stains, consider using a fabric cleaner specifically designed for the type of fabric you are using. Always test on a small, inconspicuous area first.
By utilizing these no-sew repair techniques, you can maintain the aesthetic and functionality of your fabric room divider with ease. Regular maintenance will not only prolong the life of your divider but also keep it looking fresh and inviting.
Frequently Asked Questions
- What type of fabric is best for a no-sew room divider?
Choosing the right fabric depends on your needs. Lightweight fabrics like cotton are great for a breezy feel, while heavier fabrics like canvas offer better privacy and sound absorption. Think about the atmosphere you want to create!
- Do I need special tools for this project?
Not at all! You just need some basic tools like scissors, adhesive tape, and a measuring tape. It’s all about keeping it simple and fun—no fancy sewing machines required!
- How can I clean my fabric room divider?
Cleaning is a breeze! Most lightweight fabrics can be spot cleaned with a damp cloth. For heavier fabrics, check the care label for specific instructions. Keeping it fresh will ensure it lasts for years!
- Can I change the fabric later?
Absolutely! One of the best parts about a no-sew divider is flexibility. You can easily swap out the fabric whenever you want to refresh your space or update your decor style.
- What if I make a mistake while cutting?
Don’t sweat it! Mistakes happen. You can always trim a bit more if needed or use fabric tape to fix minor errors. Remember, the goal is to have fun and be creative!


